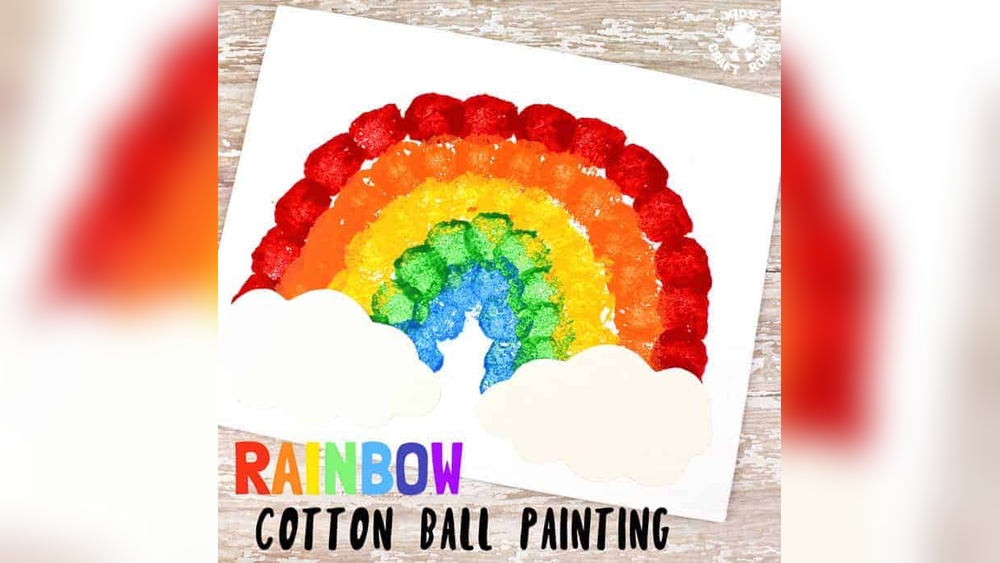
Quick answer: Cotton ball painting for kids uses cotton balls as soft stamps instead of brushes. Clip each cotton ball into a clothespin for a handle, dip it into a shallow puddle of washable tempera, and dab it onto paper to make fluffy dots, clouds, snow, sheep, flowers or full pictures. Use one cotton ball per color, thick paint, and heavier paper so the dabs stay round and bright.
A cotton ball makes a mark a brush cannot: a soft, slightly fuzzy dot with a textured center. Dab it once and you get a snowflake. Dab it twenty times and you get a cloud, a sheep’s wool coat or a whole tree of blossoms. It is also one of the cheapest painting tools available, and most homes already have a bag in the bathroom cabinet.
This guide shows how to do cotton ball painting for kids with a handle trick that keeps fingers clean, the right paint thickness, a set of project ideas organized by season, and tips for younger and older children. To see where this fits among other tool-based techniques, browse our hub on painting for kids.
Why Cotton Balls Make a Great Painting Tool
- Easy grip. Clipped into a clothespin, a cotton ball becomes a chunky handle that small hands can hold with a whole-fist grip.
- Instant texture. Each dab has a soft edge, which suits clouds, fur, snow, smoke and flowers.
- Disposable. No brush washing; used cotton balls go in the trash.
- Fine motor practice. Pinching clothespins strengthens the same muscles children use to hold a pencil.
- Controlled mess. Dabbing is less splashy than brushing, so this works well indoors.
Supplies
| Supply | Details |
|---|---|
| Cotton balls | Regular size for dots; jumbo size for big clouds and sheep |
| Clothespins | Spring-style wooden or plastic, one per color |
| Washable tempera | 3 to 5 colors, used at full thickness |
| Paint palette | Paper plates, an egg carton lid or a muffin tin |
| Paper | Cardstock or construction paper; blue paper for cloud and snow scenes |
| Extras | Pencil for outlines, markers for details, glue for collage versions |
| Cover-up | Smock and a washable table cover |
How to Do Cotton Ball Painting for Kids: Step by Step
- Make the handles. Squeeze a clothespin open and clip it onto a cotton ball so about two-thirds of the ball sticks out. Make one per color. For toddlers who cannot pinch yet, adults can prepare them.
- Set out the paint. Squeeze a puddle of each color, about the size of a quarter, onto a plate. Thick paint works best; thin paint soaks into the cotton and drips.
- Draw a guide (optional). For a specific picture, lightly sketch the outline with pencil or a marker. Very young children can paint freely.
- Dip lightly. Touch the cotton ball into the paint and dab off any excess on a clean part of the plate. Pressing it deep into the puddle overloads it.
- Dab, don’t drag. Press the cotton ball straight down onto the paper and lift straight up. Dragging pulls fibers loose and smears the paint.
- Layer colors. Use a fresh clothespin for each color. Lighter colors first, darker on top, gives the most depth.
- Add details. Once dry, add eyes, outlines or stems with markers or a small brush.
- Dry flat. Thick dabs of tempera usually dry in 30 to 60 minutes.
Light dabs vs. heavy dabs
Pressure changes the mark. A quick, light dab leaves a speckled, airy print, ideal for snow or distant clouds. A firm press leaves a solid dot with a fuzzy edge, better for flower centers or animal bodies. Twisting the cotton ball while pressing creates a swirl, useful for roses or snail shells. Let children experiment on scrap paper before starting their main picture.
How to Paint Clouds With Cotton Balls
Clouds are the classic cotton ball project because the texture matches so closely. Here is a simple sky scene.
- Prepare a blue background. Use blue construction paper, or have children paint white paper with a light blue wash and let it dry fully.
- Start with white. Dab white paint in a loose, lumpy cluster. Real cumulus clouds are flat-ish on the bottom and puffy on top, so encourage a straighter base and bumpy top edge.
- Add soft shadows. Mix a little blue or black into white to make pale gray. Dab it lightly along the bottom of each cloud while the white is still slightly wet so the colors blend at the edges.
- Add highlights. Once the gray is dry, dab a few touches of pure white on the top bumps where the sun would hit.
- Try a sunset version. Use an orange and pink background, gray-purple clouds, and a touch of yellow along the top edges.
Children enjoy adding a sun, birds, a hot air balloon or a kite once the clouds are done. For storm clouds, use more gray and dab a few zigzags of yellow for lightning.
Cotton Ball Painting Ideas by Season
Spring
- Cherry blossom tree: Paint a brown trunk and branches with a brush, then dab pink and white cotton ball blossoms along the branches.
- Lambs and sheep: Draw a simple sheep outline and fill the body with white dabs. Add a black face and legs with marker.
- Ladybugs: Dab red bodies and add black dots once dry. Our ladybug painting guide for kids walks through the shapes.
Summer
- Fireworks: Dab bright colors in rings on black paper.
- Sunflowers: Dab a brown center, then yellow petals in a circle around it.
- Ice cream cones: Draw a cone and stack dabbed “scoops” on top.
Fall
- Autumn tree: Dab red, orange and yellow leaves on a painted trunk, with a few falling to the ground.
- Pumpkin patch: Firm orange dabs for pumpkins, green marker stems.
- Owls: Brown dabs for feathers, large white dots for eyes.
Winter
- Snowman: Three stacked circles of white dabs on blue paper, plus a snowy ground.
- Snowfall scene: Light white dabs over a painted house or tree.
- Polar bear: White body filled with dabs on dark blue paper.
Project Walkthrough: A Fluffy Cotton Ball Sheep
The sheep is a favorite with preschoolers because the cotton texture looks so much like wool. It takes about 20 minutes plus drying time.
- Background. Use green construction paper for a field, or paint the bottom third of a blue sheet green and let it dry.
- Outline. Draw a large oval for the body, about the size of an adult palm, and a smaller oval at one end for the head.
- Wool. Fill the body oval with white dabs, overlapping them so no paper shows. Let a few dabs spill past the outline to make the edge look fluffy rather than drawn.
- Face and legs. Once the wool is dry, paint the head and four straight legs in black or dark gray with a small brush, or draw them with a thick marker.
- Details. Add a white dot eye with a cotton swab, a few dabbed yellow flowers in the grass and a cloud or two in the sky.
For a lamb, use lighter gray for the face and keep the body smaller. For a black sheep, swap the wool to dark gray and give it white legs for contrast.
Process Art vs. Product Art With Cotton Balls
Cotton balls suit both styles of art activity. In process art, the child explores freely with no target picture: dabbing, twisting, layering and seeing what happens. In product art, there is a planned result, such as a snowman or sheep. Young children, especially under four, often get more from process art because there is no “wrong” way to do it. Older children usually enjoy a mix: a planned scene with room for their own choices of color and detail. Offering a free-dab sheet alongside a guided project lets kids do both in one session.
Cotton Ball Painting by Age
| Age | Good projects | Tips |
|---|---|---|
| 18 months to 2 | Free dabbing, one or two colors | Adult makes handles; watch that cotton is not chewed |
| 3 to 4 | Clouds, snowman, sheep fill-in | Use bold outlines; limit to 3 colors |
| 5 to 6 | Seasonal trees, flowers, fireworks | Introduce light vs. firm dabs |
| 7 and up | Shaded clouds, sunsets, pointillism-style pictures | Mix tints and shades; add brush details |
Loose cotton can be a choking hazard for very young children if pulled apart and mouthed. Keep supervision close and remove fibers from little hands as you go.
A Link to Pointillism for Older Kids
Older children may enjoy learning that cotton ball dabbing is a simple version of pointillism, a technique developed by painters such as Georges Seurat in the 1880s. Seurat built pictures from small dots of pure color placed side by side, so the viewer’s eye blends them from a distance.
Try it: dab blue and yellow dots close together without mixing them, step back several feet, and see whether the area reads as green. Cotton ball dots are larger than Seurat’s brush dots, so the effect is softer, but the idea comes across. Cotton swabs give smaller dots if a child wants to go further.
Common Mistakes and Fixes
| Problem | Why it happens | Fix |
|---|---|---|
| Dabs look like blobs | Too much paint on the cotton | Dab off excess on the plate before printing |
| Fibers stick to the paper | Dragging or twisting too hard | Press straight down and lift; use a fresh cotton ball |
| Colors turn muddy | Same cotton ball used for every color | One clothespin per color |
| Paper wrinkles | Thin paper and heavy paint | Use cardstock or construction paper |
| Cotton falls out of the clothespin | Clipped too close to the edge | Clip deeper so the pin grips more cotton |
Cotton Ball Painting Without Clothespins
No clothespins? Other handles work:
- Binder clips: small ones grip cotton well.
- Chopsticks or craft sticks: wrap a rubber band around a cotton ball and the stick end.
- Tongs: kitchen tongs or toy tweezers for older kids who want a challenge.
- Bare hands: fine for older children who do not mind painty fingertips.
Cleanup
Cotton ball painting is easier to clean up than most paint activities. Throw away used cotton balls. Rinse clothespins under warm water if they got paint on them, or keep a set just for painting. Wipe plates or toss paper ones. Washable tempera comes off hands with soap and warm water and off most hard surfaces with a damp cloth.
Displaying Cotton Ball Art
The raised texture of dabbed paint looks good in natural light. Hang finished pieces by a window, group seasonal pictures together on a wall, or glue smaller pieces onto folded cardstock to make cards. Clouds and snow scenes look especially striking mounted on dark blue or black backing paper.
FAQs
What paint works best for cotton ball painting?
Thick washable tempera works best. It sits on the surface of the cotton and prints a clear, round dab. Thin or watery paint soaks into the cotton and drips.
How do you paint clouds with cotton balls?
Dab white paint in lumpy clusters on blue paper, keeping the bottom of each cloud flatter and the top puffy. Add a pale gray along the bottoms for shadow and a few touches of pure white on top for highlights.
What age is cotton ball painting for?
Children from about 18 months can dab freely with close supervision and adult-made handles. Children aged three to six get the most out of guided projects like clouds, sheep and trees.
Do I need clothespins for cotton ball painting?
No, but they help. Clothespins keep fingers clean and give an easy grip. Binder clips, craft sticks with rubber bands, or kitchen tongs also work.
How do I keep cotton fibers from sticking to the painting?
Press the cotton straight down and lift straight up without dragging. Replace the cotton ball when it starts shedding or gets soggy.
Can cotton ball painting be done on canvas?
Yes. A small canvas panel works well and makes a nice keepsake. Use thicker paint and let each layer dry before adding the next.
Final Thoughts
Cotton ball painting is low-cost, easy to prepare and satisfying for children at many ages. Start with fluffy clouds or a snowman, then move on to seasonal trees and dotted pictures as children learn how pressure and color layering change their marks. For more simple techniques that use household items, explore our guide to creative painting activities for children.