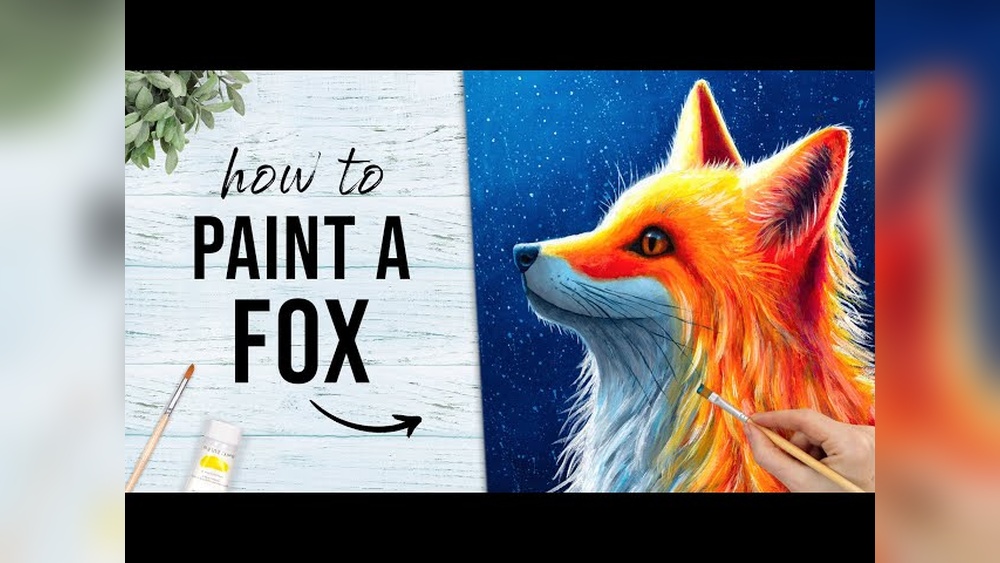
Quick answer: To paint a fox with acrylic paint, sketch a slim body, pointed muzzle, large triangular ears and a long bushy tail. Paint the background first, then block in the orange coat with burnt sienna and cadmium orange, the white muzzle, chest and tail tip, and the black legs and ear backs. Build fur with short strokes on the face and longer strokes on the tail and chest, then add amber eyes with a vertical pupil and a bright catchlight.
The red fox is one of the most painted animals in folk art, children’s books and wildlife illustration, and it is easy to see why. Its color pattern is bold and simple: rich orange, crisp white, and black “socks.” That strong pattern makes a fox recognizable even in a loose, quick painting.
This guide explains how to paint a fox with acrylic paint, including fox anatomy, color recipes for that signature orange, fur techniques for different parts of the body, and pose and background ideas. It focuses on the red fox, with notes on arctic and gray foxes at the end.
What Makes a Fox Look Like a Fox
Foxes are often mistaken for small dogs in amateur paintings. These features set them apart:
- Long, narrow muzzle that tapers to a small black nose.
- Large, pointed ears with black backs, set fairly high and wide on the head.
- Eyes set slightly forward and angled, often amber or golden with vertical, slit-like pupils in bright light.
- Slim body on thin legs, with dark lower legs.
- A very full tail that can be more than half the length of the body, usually with a white tip.
- White cheeks, throat and chest that contrast with the orange face.
Emphasizing these features, especially the ears and tail, keeps your fox from drifting toward a dog.
Supplies
- Surface: 11×14 inch canvas or panel. A square format works well for a curled sleeping fox.
- Paints: Titanium white, cadmium orange (or a hue), cadmium yellow medium, burnt sienna, burnt umber, raw sienna, ultramarine blue, cadmium red light, and a black or a mixed dark.
- Brushes: 1-inch flat for background, #8 and #4 filberts, #2 round, #0 liner, and a worn fan brush for tail fur.
- Other: Palette, water, spray bottle, pencil and reference images.
Mixing the Perfect Fox Orange
Tube orange on its own looks too bright and synthetic for fur. Real fox coats range from rusty red to golden ginger, with lots of variation.
| Area | Mix | Purpose |
|---|---|---|
| Main coat midtone | Burnt sienna + cadmium orange (about 1:1) | Warm, natural rusty orange |
| Coat shadow | Burnt sienna + burnt umber + touch of ultramarine | Deep red-brown that keeps warmth |
| Coat light | Cadmium orange + cadmium yellow + small amount of white | Sunlit fur on back and head |
| Brightest highlight | Cadmium yellow + white + touch of orange | Rim light and top highlights |
| White fur shadow | White + ultramarine + touch of burnt sienna | Soft cool gray |
| Legs and ear backs | Burnt umber + ultramarine | Rich near-black |
Oranges are one of the colors where pigment quality shows most. Genuine cadmiums and strong hues stay bright when mixed; weaker paints shift toward dull brown. If your fox looks muddy, compare options in our guide to the best acrylic paint for bright, clean color.
How to Paint a Fox With Acrylic Paint: Step-by-Step
Step 1: Draw the Fox
Start with the head as a slightly rounded triangle pointing toward the nose. Add a smaller oval for the muzzle. Place two large triangles for ears. For the body, draw an oval for the chest and a smaller one for the hips, connected by a gently curved back line. Add thin legs and a large, curved tail shape. Mark the boundaries of the white chest, muzzle and tail tip.
Step 2: Background
Paint the background before the fox. A fox looks striking against cool backgrounds because blue and green complement orange:
- Snowy winter scene with pale blue shadows
- Misty green forest with soft out-of-focus trees
- Blue-gray dusk sky with a tall grass meadow
Keep the background soft and less detailed so the fox stays the focal point.
Step 3: Block In Color Areas
Fill the fox in with flat color: orange midtone for the coat, light gray for white areas, and dark brown-black for legs and ear backs. Do not worry about fur yet. Getting the pattern placement right at this stage matters more than texture.
Step 4: Shadows and Form
Choose a light direction. Add the shadow mix under the belly, along the shadow side of the neck, under the jaw, inside the ears and where the tail overlaps the body. On white areas, add cool gray shadows. Soften shadow edges by dragging a little midtone into them.
Step 5: Fur Texture
Fur length varies across a fox, and matching it makes a big difference.
- Face: Short fur. Use tiny strokes with a #2 round, radiating out from the nose and around the eyes.
- Cheeks: Longer white fur that flares outward and slightly back, giving the face its distinctive heart shape.
- Chest: Medium to long fluffy white fur. Use a filbert or worn fan with soft, downward strokes.
- Back and sides: Medium-length orange fur. Layer strokes from dark to light following the body.
- Tail: Longest, fluffiest fur. Use a fan brush with sweeping strokes from the base toward the tip. Mix in darker hairs, as many red foxes have dark guard hairs on the tail.
- Legs: Short fur. Keep them dark, with a subtle lighter line along the front edge.
Step 6: Eyes
Fox eyes are almond-shaped and slanted. Outline the eye in dark brown-black. Fill the iris with amber (yellow ochre + cadmium orange + touch of yellow). Shade the top of the iris darker under the lid. Paint the pupil; in daylight it is a narrow vertical slit. Add a crisp white catchlight. A dark line running from the inner corner of the eye toward the muzzle is a characteristic fox marking and adds a lot of character.
Step 7: Nose, Mouth and Whiskers
Paint the nose dark with a small highlight on top. Add a dark mouth line that curves up slightly. Whiskers are dark on a fox and come from the muzzle. Use thinned dark paint and a liner, with one quick stroke per whisker.
Step 8: Final Highlights
Add bright highlights to the top of the head, the edges of the ears facing the light, the back, and the top of the tail. A thin rim of bright orange-yellow along the fox’s outline looks beautiful against a dark or cool background. Finish with a few stray hairs breaking over the background edge.
Pose Ideas
Sitting Fox
Upright, with the tail wrapped around the front feet. Good for showing the white chest. Watch the proportions of the hind legs, which fold under the body.
Sleeping Curled Fox
The fox curls into a circle with its tail over its nose. This pose is popular because it is cozy and avoids eye detail. The challenge is making the body read as a round, soft form with careful shading.
Pouncing Fox
A dynamic leap with front paws pointing down into snow. Use a strong diagonal and blur the snow spray to suggest motion.
Portrait
Head and shoulders, often three-quarter view. The ears, cheek fur and eyes become the focus.
Painting Snow Around Your Fox
A red fox in snow is one of the most striking combinations in wildlife art, and the snow deserves as much thought as the fox.
- Snow is not white everywhere. In sunlight, it is a warm off-white. In shadow, it turns cool blue or lavender. Paint the shadow areas first, then the lit areas.
- Cast shadows tell the story. A blue-violet shadow stretching from the fox across the snow anchors it to the ground and shows the light direction.
- Reflected color. Orange fur reflects onto snow just beneath and next to the fox. A faint peach glaze there ties the animal into the scene.
- Footprints and texture. A trail of small paw prints, painted as soft blue-gray ovals with a lighter edge on one side, suggests movement and a story.
- Falling snow. Spatter thinned white with a toothbrush at the very end, but keep it light so it does not cover the fox’s face.
How Light Changes Fox Colors
The same fox looks very different at different times of day. Morning and evening sun makes the coat glow deep red-orange with long shadows, so push warm highlights and use cool violet shadows. Midday light flattens the coat and makes it look more yellow-orange; keep shadows short and directly under the body. Overcast light shows true coat color with soft, gentle shadows, which is a good choice for a first realistic fox. Dusk light can turn the white fur pink or lavender and the orange coat almost red, a beautiful option for a moody piece. Decide on the light before mixing so your colors stay consistent across the painting.
Stylized and Folk Art Foxes
Not every fox painting needs realistic fur. Many popular designs use flat orange, white and black shapes with decorative elements like flowers, leaves or geometric patterns. To paint a stylized fox:
- Simplify the head into a triangle with two smaller triangle ears.
- Paint the face in flat orange with a white lower half shaped like a “W” or heart.
- Use a single curved shape for the tail with a white tip.
- Add decorative patterns with paint markers or a liner brush.
This style works well on wood, stones and greeting cards, and it is a great warm-up before tackling a realistic fox.
Common Mistakes
- Ears too small: Fox ears are big. Small ears make the fox look like a dog or cat.
- Too uniform orange: Real coats vary from red to gold. Mix several oranges.
- Thin tail: The tail should be very full and almost as wide as the body.
- Pure white without shadows: White fur needs gray shadows to show form.
- Muddy orange: Avoid adding black to orange for shadows. Use burnt umber and a touch of blue instead.
Painting Other Foxes
- Arctic fox: White winter coat; paint mostly with cool and warm grays and white. Ears are smaller and rounder. A pale blue-gray background makes the white fur glow.
- Gray fox: Salt-and-pepper gray back with rusty orange sides and neck, and a black stripe along the tail top.
- Fennec fox: Pale cream coat and enormous ears. A desert background with warm sand tones suits it.
For loose, glowing washes in snowy or misty backgrounds, fluid acrylics can glaze more smoothly than heavy body paint; our fluid acrylic paint review covers how they behave in washes.
FAQs
What colors do I need to paint a fox?
Burnt sienna, cadmium orange, cadmium yellow, burnt umber, ultramarine blue and titanium white cover nearly everything. Add raw sienna for golden tones and a black or mixed dark for legs and ears.
How do you paint fox fur in acrylic?
Block in the colors first, then layer short strokes on the face and legs and longer, sweeping strokes on the tail, chest and cheeks, always working from dark to light in the direction of growth.
How do I paint an easy fox for beginners?
Try a stylized fox with simple triangle shapes and flat orange, white and black areas, or a curled sleeping fox, which hides the eyes and focuses on shape.
What background color goes best with a fox?
Cool colors such as blue, blue-gray and green contrast with the orange coat and make the fox stand out. Snowy scenes are especially striking.
How do I keep my orange from looking muddy?
Avoid mixing black into orange. Darken with burnt sienna and burnt umber, and use a touch of blue only in the deepest shadows. Keep your brush clean between mixes.
How long does a fox painting take?
A stylized fox can take under an hour. A realistic fox on an 11×14 canvas typically takes three to six hours across a couple of sessions.
Final Thoughts
A great fox painting depends on bold color, big ears, a full tail and fur strokes that follow the body. Start with a stylized fox to learn the shapes, then move to a realistic portrait. When you want brighter oranges that do not dull as you mix, our guide to artist acrylic brands with strong pigment compares the options in detail.