
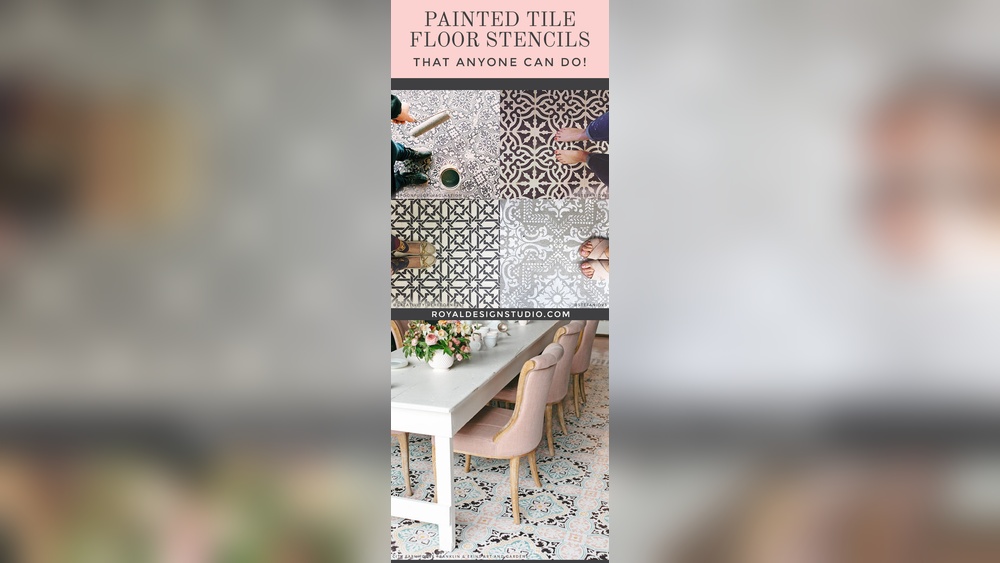
Quick answer: To paint DIY patterns on ceramic tiles, clean and degloss the tile (light sanding plus a rubbing-alcohol wipe), apply a bonding primer if you are using non-specialty paint, then lay out the pattern with tape or a stencil and paint thin coats with a small foam roller or stencil brush. Use enamel, ceramic or multi-surface paint for craft tiles, and a tile-rated paint system for installed tiles. Finish with a compatible clear topcoat and let it cure fully before use.
Painted tile patterns can turn a plain white tile into something that looks like Moroccan cement tile, Portuguese azulejo or modern geometric art. Some people paint loose tiles for coasters, trivets and wall art; others refresh an entire backsplash or bathroom floor with stencils. The techniques overlap, but durability needs are very different, so this guide separates the two.
Below you will find what paint to use on ceramic tile for each situation, eight pattern ideas, a stenciling method, freehand techniques, alcohol ink effects and the mistakes that cause peeling. Paint choice is the most important decision, so for a direct comparison of products, see our guide to the best paint for ceramic tiles.
Craft Tiles vs Installed Tiles
| Factor | Loose craft tiles | Installed tiles (backsplash, wall, floor) |
|---|---|---|
| Typical use | Coasters, trivets, wall art, mosaics | Kitchen and bathroom surfaces |
| Wear | Light to moderate | Moisture, cleaning, foot traffic on floors |
| Paint options | Enamel, ceramic or porcelain paint, multi-surface acrylic, alcohol ink | Tile-specific paint kits, bonding primer plus enamel or epoxy, porch and floor paint for some floors |
| Can be oven-cured? | Often, if the paint allows | No |
| Topcoat | Clear acrylic or polyurethane | Clear coat rated for the paint system and location |
What Paint to Use on Ceramic Tile
Glazed ceramic is non-porous and smooth, so regular wall paint will peel. The paint needs either a specialty formula or a bonding primer underneath.
- Enamel or ceramic paints (water-based): designed for glazed surfaces. Many can be oven-cured on loose tiles for extra hardness.
- Multi-surface acrylic craft paint: good for decorative tiles, especially over a primer. Needs a clear topcoat for durability.
- Tile paint kits and epoxy systems: made for installed surfaces such as backsplashes and bathroom walls. Usually two-part or multi-step; follow instructions exactly.
- Bonding primer plus enamel: a common approach for walls and backsplashes; the primer grips the glaze and the enamel provides a hard finish.
- Alcohol inks: for vivid, flowing abstract designs on loose tiles. Not durable without a specialty sealer.
Areas that stay wet, like shower floors and the inside of a shower stall, are generally poor candidates for painted patterns because constant water and scrubbing wear paint quickly. Check the paint label for recommended locations.
Supplies
- White or light-colored glazed tiles (4×4, 6×6 or 8×8 inch are common)
- Degreasing cleaner, rubbing alcohol, lint-free cloths
- Fine sandpaper (220 to 320 grit) or a deglossing liquid
- Bonding primer if your paint requires it
- Paint (see above) in two to four colors
- Painter’s tape in narrow and wide widths
- Stencils, or adhesive vinyl you can cut into shapes
- Small foam roller, stencil brushes, fine detail brushes
- Ruler, pencil, compass for layout
- Clear topcoat compatible with your paint
- Felt pads for coasters or trivets
Step 1: Prepare the Tile Surface
- Clean thoroughly. Wash with a degreasing cleaner to remove soap scum or kitchen grease, rinse and dry.
- Scuff the glaze. Lightly sand with fine-grit sandpaper until the shine dulls slightly, or use a deglossing product. This gives the paint something to grip.
- Remove dust. Wipe with a damp cloth, then with rubbing alcohol.
- Repair installed tile. For backsplashes, fix cracked tiles and clean grout lines. Mildew must be removed fully before painting.
- Prime if needed. Apply a thin, even coat of bonding primer with a foam roller. Let it dry as directed.
Step 2: Choose and Lay Out Your Pattern
Before painting, decide whether each tile is a complete design or whether the pattern spans several tiles. Many traditional patterns, such as quatrefoils and star motifs, form a larger design when four tiles meet.
Eight pattern ideas
| Pattern | Method | Difficulty |
|---|---|---|
| Diagonal half-tile (two-tone triangles) | Tape corner to corner, paint one half | Easy |
| Checkerboard | Paint alternate whole tiles or tape quarter squares | Easy |
| Simple stripes | Tape bands of varied widths | Easy |
| Quarter circles (rainbow arcs) | Draw arcs from one corner with a compass; paint bands | Moderate |
| Moroccan / quatrefoil | Stencil | Moderate |
| Azulejo-style blue and white | Stencil base plus hand-painted details in one blue | Moderate to advanced |
| Botanical sprigs | Freehand with fine brushes | Moderate |
| Alcohol ink abstracts | Drip and move ink with air or alcohol | Easy to start, hard to control |
The quarter-circle pattern is especially effective: when four tiles are rotated so their corners meet, the arcs form full circles or flowing waves.
Color schemes that suit tile patterns
| Style | Colors | Pairs well with |
|---|---|---|
| Portuguese azulejo | Cobalt, mid blue, pale blue on white | Floral stencils, scrolling borders |
| Moroccan | Teal, terracotta, saffron, cream | Quatrefoil and star stencils |
| Modern monochrome | Charcoal, black, white | Triangles, checkerboards, arcs |
| Mid-century | Mustard, olive, burnt orange, cream | Quarter circles and stripes |
| Coastal | Navy, seafoam, sand | Waves, scallops, fish-scale patterns |
Planning a backsplash or wall layout
- Count the tiles in each row and column, and photograph the wall.
- Print the photo or sketch a grid on paper, then color in your planned pattern to check how it repeats.
- Decide where the pattern starts. Starting from the center of the most visible area, such as behind the stove, usually looks best, with cut or partial patterns falling at the edges.
- Plan a border if you want one: a row of solid-color tiles or a simple stripe frames a busy pattern.
- Number the tiles lightly on painter’s tape if the pattern requires rotating motifs, so you do not lose track.
Step 3: Paint Taped Geometric Patterns
- Mark the pattern lightly in pencil.
- Apply painter’s tape along the lines. Press the edges down firmly with a fingernail or a credit card.
- Optional trick for crisp edges: brush a thin coat of the base or clear medium along the tape edge first. It seals the edge so the color does not bleed underneath.
- Paint the exposed areas with two thin coats using a small foam roller or brush.
- Remove the tape while the final coat is still slightly soft, pulling at a low angle away from the painted area.
- Touch up any bleeds with a fine brush.
Step 4: Stencil Repeating Patterns
Stenciling is the go-to method for Moroccan, Spanish and cement-tile looks.
- Position the stencil. Center it on the tile and tape the edges. Many tile stencils are cut to common tile sizes and include registration marks.
- Load very little paint. Dip the stencil brush or foam roller, then offload most of it onto a paper towel until it seems almost dry. This is the key to sharp stenciling; too much paint seeps under the edges.
- Apply with a pouncing or light rolling motion, building color in several light passes.
- Lift carefully. Peel the stencil straight up, wipe the back clean if needed, and move to the next tile.
- Use a second color once the first is dry, if your stencil has multi-layer pieces.
- Touch up small gaps and smudges with a detail brush.
For backsplashes, paint the base color across the whole wall first, let it dry, then stencil the pattern tile by tile. Edge tiles near cabinets may need a stencil cut down or a flexible stencil that can bend.
Step 5: Freehand Patterns and Details
- Practice on paper the same size as the tile first.
- Use a small round brush for leaves and petals and a liner for stems and outlines.
- Turn the tile rather than twisting your wrist.
- Keep one color family for traditional styles; azulejo designs, for example, often use shades of a single blue on white.
How to Use Alcohol Inks on Ceramic Tiles
Alcohol inks produce flowing, marbled designs because they spread and blend on non-porous surfaces like glazed tile.
- Work in a well-ventilated area and wear gloves; inks stain skin.
- Clean the tile with rubbing alcohol.
- Drop two or three ink colors onto the tile.
- Move the ink by tilting the tile, blowing through a straw, or using a hair dryer on the lowest setting held at a distance.
- Add drops of isopropyl alcohol or a blending solution to push color and create lighter “cells.”
- Let it dry fully. Alcohol inks dry quickly but remain reactivatable with alcohol.
- Seal with a sealer made for alcohol inks first, then a clear topcoat if you want extra protection. Some sealers can reactivate ink, so test on a spare tile.
Alcohol ink tiles make great coasters and decor pieces. They are not suitable for installed surfaces that get wet or scrubbed.
Step 6: Seal and Cure
- Let the paint dry fully, usually at least 24 hours.
- For loose tiles with oven-curable paint, follow the label: place in a cold oven, heat to the stated temperature, bake for the stated time, and let cool inside the oven.
- Apply two or three thin coats of a compatible clear topcoat. Water-based polyurethane is common; choose a matte, satin or gloss sheen.
- Allow the full cure time listed on the products before washing, placing hot items on trivets or exposing backsplashes to splashes. Full cure can take days or longer.
- Add felt or cork pads under coasters and trivets.
Caring for Painted Tiles
Clean painted tile with a soft cloth or sponge and mild dish soap diluted in warm water. Avoid scouring pads, bleach-based sprays and strong solvents, which can dull or soften the topcoat. On backsplashes, wipe up tomato sauce, oil and coffee splashes quickly, since some pigments stain painted surfaces more easily than glaze. If a small area chips, lightly sand the edges, touch up with the original color and reseal just that spot.
Common Mistakes
- Skipping scuffing or primer. Paint may look fine at first but peel within weeks.
- Overloading stencil brushes. The number one cause of blurry patterns.
- Painting in humid conditions. Slows drying and can affect adhesion; follow the temperature and humidity ranges on the label.
- Using the tile too soon. Surface-dry is not the same as cured.
- Painting grout on installed tile with tile paint. Decide whether you want the grout painted, and if not, tape or carefully cut in along grout lines.
- Abrasive cleaners. Clean painted tile gently with a soft cloth and mild soap.
Tips by Skill Level
Beginners
Start with loose 4×4 tiles and taped two-tone designs. Make a set of four coasters before tackling a wall.
Intermediate
Try stenciled Moroccan patterns and quarter-circle arcs, and experiment with rotating tiles to make larger patterns.
Advanced
Hand-paint azulejo-style designs with layered blues, or plan a full backsplash with a border row and a contrasting field pattern.
FAQs
What paint do you use on ceramic tile?
For loose craft tiles, use enamel or ceramic paint, or multi-surface acrylic over a bonding primer, finished with a clear topcoat. For installed tiles, use a tile paint system or a bonding primer plus enamel designed for that location.
Do painted tile patterns last?
On walls and backsplashes with proper preparation and topcoat, painted patterns can last for years. High-wear areas like floors and constantly wet showers wear faster.
Can you paint ceramic tile without sanding?
Some bonding primers claim to grip glossy surfaces without sanding, but light scuffing generally improves adhesion. Always follow the primer label.
How do you use alcohol inks on ceramic tiles?
Clean the tile with alcohol, drop ink on it, move the color with air or tilting, add alcohol to create lighter areas, and seal with a sealer made for alcohol inks.
What is the easiest tile pattern to paint?
Diagonal two-tone triangles and stripes using painter’s tape are the easiest. Both need only a ruler, tape and one or two colors.
Can I bake painted ceramic tiles?
Only if the paint label recommends oven curing. Start the tile in a cold oven, bring it up to the stated temperature, bake for the stated time and let it cool slowly inside.
Final Thoughts
Painted tile patterns come down to three things: a properly prepared surface, a pattern laid out carefully with tape or stencils, and paint matched to how the tile will be used. Start with coasters, then scale up to a backsplash once your technique is reliable. To find a paint that suits your surface and wear level, see our comparison of tile paints for a durable, flawless finish.



4 Comments