Quick answer: The best cute animal painting ideas for beginners are built from simple round shapes: a sleeping cat curled into a circle, a chubby bird on a branch, a peeking fox, a pastel bunny, or a smiling whale. Paint the body as one soft shape, keep the eyes large and low on the face, add a tiny highlight dot in each eye, and finish with blush cheeks. Acrylics on a small 8×10 inch canvas or watercolor on 140 lb paper both work well for a first try.
Cuteness in art follows a surprisingly strict formula. Big heads, short limbs, round silhouettes, and eyes placed lower than you would expect make almost any creature look adorable. Once you understand that formula, cute animal painting ideas for beginners stop feeling like a talent test and become a set of repeatable shapes you can paint in an afternoon.
This guide breaks down why certain shapes read as cute, gives you a dozen specific animal projects ranked by difficulty, and walks through one complete step-by-step painting so you can see the process from blank canvas to final highlight. If you are still gathering basic materials and want an overview of brushes, paints, and surfaces before you start, our guide to getting started with painting as a beginner covers the essentials.
Why Some Animal Paintings Look Cute (and Others Don’t)
Illustrators and animators lean on a set of proportions sometimes called “baby schema,” the features that make young animals and babies appealing. You can use the same cues on purpose:
- Oversized head: Make the head roughly half the size of the body, or even equal to it. Realistic animals have much smaller heads.
- Low-set eyes: Place the eyes on or slightly below the horizontal midline of the face. This leaves a big forehead, which reads as young and soft.
- Large, dark eyes with a highlight: A solid dark oval or circle with one small white dot instantly adds life. Two dots (one large, one tiny) look even sweeter.
- Rounded everything: Replace sharp corners with curves. Ears become rounded triangles, paws become ovals, tails become soft commas.
- Short limbs and tiny features: Keep the nose and mouth small and close together, sitting just below the eyes.
- Soft color: Pastels, warm neutrals, and a pink blush on the cheeks push the mood toward cute rather than dramatic.
If a painting looks “off,” the cause is usually one of these: eyes placed too high, a head that is too small, or outlines that are too sharp and dark. Check those three before changing anything else.
Easy Animal Painting Ideas for Beginners, Ranked by Difficulty
The table below sorts twelve projects by how many separate shapes and color transitions they involve. Start in the first tier and move up when your shapes start looking confident.
| Animal | Core shapes | Difficulty | Best medium | Approx. time |
|---|---|---|---|---|
| Sleeping cat curled up | One circle, two triangles, a curved tail | Very easy | Acrylic or watercolor | 30–45 min |
| Round bird on a branch | Oval body, small wing, line branch | Very easy | Watercolor | 30 min |
| Smiling whale | Teardrop body, curved tail, water line | Very easy | Acrylic | 30–40 min |
| Pastel bunny | Pear-shaped body, long ovals for ears | Easy | Acrylic | 45 min |
| Peeking penguin | Egg shape, white belly patch, tiny feet | Easy | Acrylic | 45 min |
| Hedgehog | Half-circle body, short stroke spines | Easy | Acrylic | 45–60 min |
| Baby chick in an eggshell | Circle, zigzag shell | Easy | Watercolor or acrylic | 30 min |
| Sitting fox | Teardrop body, triangle face, bushy tail | Medium | Acrylic | 60 min |
| Panda eating bamboo | Two circles, black patches, green sticks | Medium | Acrylic | 60 min |
| Sloth hanging from a branch | Oval body, long arms, face mask | Medium | Acrylic | 60–75 min |
| Puppy with floppy ears | Bean body, long ear shapes, snout oval | Medium | Acrylic or gouache | 60–75 min |
| Koala on a eucalyptus branch | Big round head, fluffy ears, large nose | Medium | Acrylic | 75 min |
12 Cute Easy Painting Ideas for Beginners
Each idea below includes the key move that makes it work. You do not need to follow them in order, but the earlier ones teach skills you will reuse later.
1. Sleeping Cat Curled Into a Circle
Draw a circle, then add two rounded triangle ears near the top and a tail that wraps around the front. Closed eyes are just two small downward arcs, which means you skip the hardest part of any animal face. Paint the body in a soft gray or orange, then add slightly darker stripes with a small round brush while the base is dry.
2. Chubby Bird on a Branch
Think of the body as a lemon lying on its side. Paint a pale belly and a darker back, let it dry, then add a single wing shape. A short dark line for the branch and two tiny leaves complete it. This one is excellent in watercolor because the soft edges suit feathers.
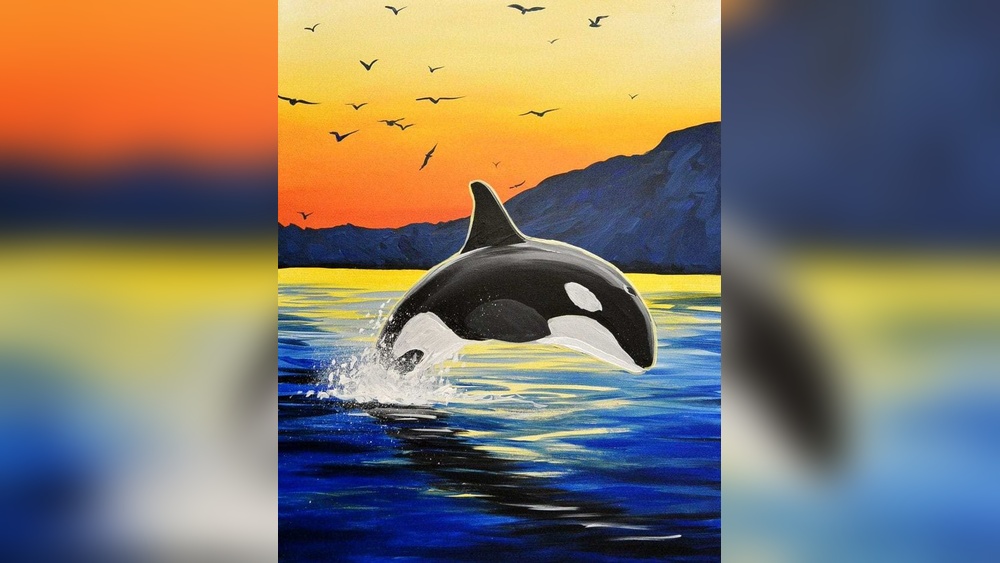
3. Smiling Whale
A blue teardrop with a curved tail, a pale belly stripe, one dot eye, and a tiny curved smile. Add a little water spout with white paint. Kids and adults both enjoy this one because it is nearly impossible to get wrong.
4. Pastel Bunny
Paint a pear shape for the body and a circle for the head overlapping the top. Ears are long ovals with pink inner stripes. Keep the nose as a tiny pink triangle and add a white fluffy tail with dabbing strokes.
5. Peeking Penguin
An egg-shaped black or navy body with a white heart-shaped face patch. The heart shape is the trick: it frames the eyes and makes the penguin look friendly. Add an orange triangle beak and two small feet.
6. Round Hedgehog
Paint a half-circle of warm brown, then use short flicking strokes with a flat brush to suggest spines along the top edge. Leave the face pale and pointed slightly to one side. A small mushroom or apple next to it adds charm.
7. Baby Chick in an Eggshell
A yellow circle sitting in a white shape with a zigzag top edge. Shade the inside of the shell with a light gray so it reads as hollow. Add a tiny orange beak and two dot eyes.
8. Sitting Fox
The fox introduces a two-tone face: orange on top, white on the cheeks and chin. Paint the whole head orange, then add the white cheek shapes once dry. The bushy tail curls around the feet with a white tip.
9. Panda Eating Bamboo
Paint the white areas first on a light background, then add black ears, arms, and eye patches. Tilt the eye patches slightly downward on the outer edges; that tilt makes pandas look gentle rather than grumpy. Bamboo is just green stripes with small joint lines.
10. Hanging Sloth
A soft brown oval body, long arms reaching up to a branch, and a pale face mask with dark stripes running from the eyes. The relaxed, droopy expression comes from slightly curved eye stripes and a small smile.
11. Floppy-Eared Puppy
Use a bean-shaped body sitting upright, a round head, and long ears that hang past the cheeks. A pale snout oval with a dark nose on top is what makes it look like a dog rather than a bear.
12. Koala on a Branch
The koala relies on a very large, dark nose and fluffy ears. Paint the ears with white dabs over gray to suggest fluff. The big round head and tiny eyes give it a sleepy, cuddly look.
How to Paint Cute Animals: A Full Step-by-Step Walkthrough
This walkthrough uses the sitting fox because it combines several beginner skills: a background, a two-tone face, overlapping shapes, and fine details. The same sequence applies to any animal on the list.
What You Need
- An 8×10 inch or 9×12 inch canvas panel or stretched canvas
- Acrylic paint in white, black, burnt sienna or orange, yellow, a blue, and a pink
- Brushes: a 3/4 inch flat, a size 6 round, a size 2 round, and a 0 or 00 liner
- A pencil or chalk pencil for sketching
- A palette, water jar, and paper towels
- Paint the background first (10 minutes). Mix a soft teal or pale sky blue and cover the whole canvas with the flat brush. A plain background keeps attention on the animal. Let it dry fully; acrylic is usually touch-dry in 10 to 20 minutes for thin layers.
- Sketch the big shapes (5 minutes). Draw a teardrop for the body, a rounded triangle for the head overlapping its top, two ear triangles, and a curved tail. Keep the head large, about two-thirds the width of the body.
- Block in the orange (10 minutes). Fill the head, body, and tail with orange using the size 6 round. Do not worry about the white areas yet. Two thin coats look smoother than one thick coat.
- Add the white areas (10 minutes). Once the orange is dry, paint the cheek shapes, chest bib, and tail tip in white. White over orange may need two or three coats to become opaque.
- Add shading (5–10 minutes). Mix a little burnt sienna or a touch of blue into the orange and paint a thin darker band where the head overlaps the body and under the tail. This simple shadow makes the shapes separate.
- Paint the ears and feet dark. Use a dark brown or black for the ear tips and little paws. Rounded edges, not sharp points.
- Place the eyes low. With the size 2 round, paint two dark ovals on the lower half of the face, spaced apart. This is the step that decides whether the fox looks cute.
- Add the nose and mouth. A small dark oval nose at the tip of the face triangle and a tiny “w” mouth just below it.
- Highlights and blush. With the liner brush, place a white dot in the upper corner of each eye, both eyes on the same side. Mix pink with a lot of white and dab soft cheeks just below and outside each eye.
- Optional outline. If the shapes look a little flat, add a thin outline in a dark brown rather than pure black. Brown outlines look softer and more storybook-like.
Acrylic Painting Ideas for Beginners: Animals on Canvas
Acrylic is the most forgiving medium for cute animal art because you can paint light over dark once a layer dries. That means a misplaced eye can be painted over in a minute. A few acrylic-specific tips help:
- Keep paint creamy, not watery. Add water a few drops at a time. Too much water makes acrylic streaky and weakens adhesion.
- Use a retarder or work in small areas if you want soft blends, such as a gradient from pink to white in a bunny’s ear.
- Let each layer dry before details. Painting eye highlights onto wet paint makes them gray and fuzzy.
- Small canvases are friendlier. An 8×10 inch or 6×6 inch canvas lets you finish a cute animal in one session, which keeps motivation high.
Watercolor for Beginners Ideas With Animals
Watercolor suits fluffy, soft creatures because pigment naturally spreads and creates gentle edges. Birds, bunnies, chicks, and sleeping cats are perfect subjects. A few rules make watercolor animals easier:
- Work light to dark. You cannot paint white over a dark wash, so leave the white of the paper for eye highlights and pale bellies. A dot of masking fluid on each eye highlight before painting is a reliable shortcut.
- Use 140 lb (300 gsm) paper. Thinner paper buckles when wet and makes control harder.
- Paint wet-in-wet for fur. Wet the body shape with clean water, then touch in color and let it spread. Add darker color while still damp for soft shading.
- Add details once the paper is bone dry. Eyes, noses, and whiskers need crisp edges, which only happen on dry paper.
For more watercolor-first projects that build the same skills, see these easy watercolor ideas for beginners.
Color Palettes That Make Animals Look Cute
Color choice shifts mood more than most beginners expect. Here are four palettes that reliably read as sweet:
| Palette | Colors | Works best for |
|---|---|---|
| Pastel nursery | Blush pink, mint, butter yellow, powder blue | Bunnies, chicks, whales |
| Warm woodland | Rust orange, cream, olive green, chocolate brown | Foxes, hedgehogs, owls |
| Cool arctic | Navy, ice blue, white, soft gray | Penguins, polar bears, seals |
| Muted earth | Sage, taupe, terracotta, oatmeal | Sloths, koalas, cats |
Pick three or four colors plus white and stick with them. Limiting the palette keeps the painting cohesive and makes mixing easier.
Common Mistakes When Painting Cute Animals
- Eyes too high and too small. This is the most common reason an animal looks realistic or slightly creepy instead of cute. Move them down and make them bigger.
- Pure black outlines everywhere. Heavy black lines flatten the image. Use dark brown, navy, or a darker version of the body color.
- Too many details. Individual fur strands, toe pads, and complex backgrounds work against the cute style. Simplify.
- Muddy colors. Over-mixing on the canvas turns pastels gray. Mix on the palette, apply, and leave it alone.
- Highlights on different sides. If the left eye has a highlight on the upper right, the right eye needs one on the upper right too. Mismatched highlights make the animal look cross-eyed.
- Skipping the dry time. Details painted onto damp layers smear. Use a hair dryer on a cool or low setting if you are impatient, held at a distance.
Tips by Skill Level
First Painting Ever
Choose the whale, sleeping cat, or chick. Stick to a plain background and three colors. Focus only on getting a smooth body shape and well-placed eyes.
A Few Paintings In
Try the fox or penguin to practice two-tone faces and painting white over a color. Add one simple background element, such as a moon, a branch, or a few flowers. Our guide to simple flower painting ideas for beginners pairs nicely with animal scenes.
Ready for a Challenge
Paint the koala or puppy and experiment with texture: dry-brushing fur, stippling with an old brush, or blending soft gradients. You can also try a series of four small canvases featuring the same animal in different seasons.
FAQs
What is the easiest animal to paint for beginners?
A sleeping cat or a whale is usually easiest because each is built from one main shape and needs no open eyes, or only simple dot eyes. Birds and chicks are close behind.
How do you make an animal painting look cute instead of realistic?
Enlarge the head, place big dark eyes low on the face, keep the nose and mouth tiny, round off all corners, and add a white highlight in each eye plus pink blush on the cheeks.
Is acrylic or watercolor better for cute animal painting ideas for beginners?
Acrylic is more forgiving because you can cover mistakes once a layer dries. Watercolor gives softer, fluffier edges but requires planning, since you need to save the white of the paper for highlights.
What size canvas should a beginner use for animal paintings?
An 8×10 inch or 9×12 inch canvas is a good balance. It is large enough for brush control but small enough to finish in one sitting. A 6×6 inch canvas works well for single, simple animals.
Can I paint cute animals with kids?
Yes. The whale, chick, and sleeping cat are ideal for children because the shapes are simple. Use washable, non-toxic paint for young kids and supervise closely.
How do I paint fur without it looking messy?
For a cute style, suggest fur rather than painting every strand. Use a few short strokes along the edges of the body, or dab lighter color over a dry base with a slightly worn brush.
Next Step
Pick one animal from the very easy tier, paint it today, and then paint it again tomorrow with the eyes a little lower and bigger. Repeating a single subject is one of the quickest ways to build confidence with shape and placement. When you are ready to strengthen the fundamentals behind these projects, including brush handling, color mixing, and choosing the right beginner supplies, head to our complete beginner painting guide with essential tips.