
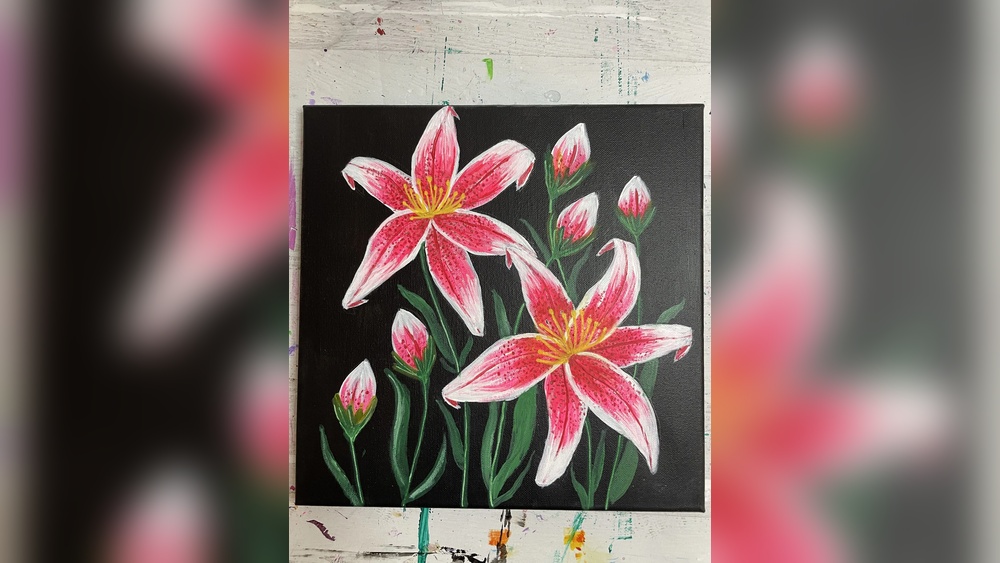
Quick answer: Easy painting ideas for beginners using flowers include one-stroke tulips, five-petal daisies, loose watercolor roses, lavender sprigs, poppies on a white background, sunflower close-ups, cherry blossom branches and a simple vase bouquet. Begin with flowers built from basic shapes (ovals, teardrops, circles), paint the petals in a middle color first, then add one darker shade and one lighter highlight. That three-value approach makes even a quick flower look dimensional.
Flowers are probably the most popular first subject for new painters, and for good reason. They are forgiving, nobody expects every petal to match, and they reward simple techniques like a single pressed brushstroke or a drop of color into wet paint. The trick is choosing flowers that match your current skills and learning a few repeatable strokes.
Below you will find painting ideas for beginners with flowers arranged from easiest to more involved, the brushstrokes behind them, step-by-step instructions for five favorites in acrylic and watercolor, and fixes for the problems most beginners run into. If you are just setting up, our beginner’s guide to painting explains which supplies are worth buying first.
Why Flowers Are Ideal for Beginners
- Simple shapes: most blooms break down into circles, ovals, cups and teardrops.
- Forgiving: natural petals vary, so imperfect strokes look organic.
- Quick: a single flower can be painted in 20–40 minutes.
- Skill-rich: flowers teach brush control, color mixing, layering and light.
- Endless references: gardens, grocery store bouquets and your own photos.
Five Brushstrokes Behind Most Flowers
Practice these on scrap paper for ten minutes before painting a flower. They cover most petal and leaf shapes.
| Stroke | How to make it | Used for |
|---|---|---|
| Press-and-lift | Touch the tip of a round brush down, press to spread the bristles, lift as you pull away | Daisy petals, lavender buds, leaves |
| Comma stroke | Press, then pull and curve while lifting into a thin tail | Rose petals, tulip edges, ferns |
| C-stroke | Paint a curved “C” with a flat or round brush, thick in the middle | Rose spirals, cup-shaped blooms |
| Dab / stipple | Tap the brush tip repeatedly | Lilacs, hydrangeas, flower centers |
| Flat pull | Pull a loaded flat brush in one direction | Tulip petals, long leaves |
Supplies for Beginner Flower Painting
- Acrylic option: white, lemon yellow, a warm red, a magenta or crimson, ultramarine blue, and burnt umber. Canvas panels 8×10 or smaller.
- Watercolor option: a basic pan set, 140 lb (300 gsm) watercolor paper, masking tape.
- Brushes: a medium round (size 8), a small round (size 2–4), a 1/2-inch flat, and a liner.
- Extras: two water jars, paper towels, pencil, palette.
Easiest Flower Painting Ideas for Beginners
1. One-Stroke Tulips
Each tulip is three flat pulls: one center petal and two side petals that curve inward. Add a long stem and blade-shaped leaves. Paint a row of tulips in different colors for a cheerful garden.
2. Five-Petal Daisies
Dot a yellow center, then press-and-lift petals around it in white. On a colored background, the white petals pop.
3. Lavender Sprigs
Paint thin green stems, then stack tiny press-and-lift strokes in purple and lilac along the top third, getting smaller toward the tip.
4. Polka-Dot Flower Field
Paint a sky and green field, then dab dots of pink, white and yellow across the field, larger in front and tiny near the horizon.
5. Cherry Blossom Branch
Paint a dark brown branch diagonally, then dab clusters of pink and white blossoms with a cotton swab bundle or the round brush.
Next-Step Flower Ideas
6. Poppies
Loose red cup shapes with dark centers and soft, crinkled edges. Poppies look best painted quickly; overworking ruins their freshness.
7. Sunflower Close-Up
A large brown center with dabbed texture and two rows of yellow petals. Paint the back row darker for depth.
8. Loose Watercolor Roses
Begin with a small C-stroke in the center, then add larger C-shaped petals around it, leaving thin white gaps between them.
9. Hydrangea Ball
Stipple a round cluster in blue and purple, then add tiny four-petal shapes on top for definition.
10. Simple Vase Bouquet
Combine tulips, daisies and leaves in a basic vase shape. Paint the vase first, then stems, then blooms.
11. Wildflower Border
A line of mixed small flowers along the bottom edge of a card or paper, ideal for greeting cards.
12. Single Rose on Black
A dramatic project for acrylics: paint a black background, then a red rose with strong highlights.
13. Magnolia Bloom
Large, soft cupped petals in white and blush with gray-violet shadows teach painting white objects.
14. Peony
Many layered ruffled petals; a good challenge once you are comfortable with roses.
15. Botanical Study
A single stem with leaves and a bloom painted carefully from life, with a handwritten label.
How to Paint Flowers for Beginners: The Three-Value Method
Every flower in this guide looks better with three values: a base color, a shadow color and a highlight.
- Paint the whole flower shape in its base color.
- Add the shadow color where petals overlap, near the center and on the side away from the light.
- Add highlights on petal edges facing the light.
| Flower color | Shadow mix | Highlight mix |
|---|---|---|
| Red | Red + a touch of crimson or blue | Red + white + a hint of yellow |
| Pink | Magenta + a little blue | Pink + more white |
| Yellow | Yellow + a tiny bit of purple or burnt sienna | Yellow + white |
| White | White + a little blue and red (soft gray-violet) | Pure white |
| Purple | Purple + ultramarine | Purple + white |
| Green leaves | Green + blue or burnt umber | Green + yellow + white |
Avoid using black for shadows on flowers; it dulls colors quickly.
Step-by-Step: How to Paint a Flower for Beginners (Acrylic Tulip)
- Background. Paint a soft sky blue or cream background on an 8×10 canvas panel. Let dry.
- Sketch. Lightly draw an egg shape for the bloom and a long, slightly curved line for the stem.
- Base color. Fill the egg with a mid red or pink.
- Petal divisions. With a darker mix, paint two curved lines to suggest the front petal overlapping the side petals.
- Shadows. Darken the bottom and one side of the bloom.
- Highlights. Add lighter strokes along the top edges of the petals.
- Stem and leaves. Paint the stem with a liner brush, then two long leaves using flat pulls, one folding over itself.
- Finish. Add a light highlight along one edge of each leaf.
Step-by-Step: Loose Watercolor Rose
- Tape watercolor paper to a board.
- Mix a puddle of pink or red, plus a darker version of the same color.
- Paint a small dark spiral or C-shape in the center.
- Paint slightly larger C-shapes around it in the lighter mix, leaving thin white lines between petals.
- Continue outward, making petals larger and lighter.
- While the outer petals are damp, drop a touch of the darker mix near the base for depth.
- Once dry, add leaves in green with a press-and-lift stroke and a liner-brush stem.
Watercolor Painting Ideas for Beginners: Flowers
- Wet-on-wet blooms: wet a circle of paper and drop in color; it spreads into a soft flower shape. Add a darker center once dry.
- Negative-space leaves: paint around leaf shapes with a darker background color.
- Salt-texture florals: sprinkle salt on a wet background for a starry texture behind flowers.
- Ink-and-wash: draw flowers in waterproof ink, then add loose watercolor that does not need to stay inside the lines.
For more beginner-friendly watercolor projects beyond flowers, explore these easy watercolor ideas for beginners.
Step-by-Step: Sunflower Close-Up (Acrylic)
- Background. Paint a turquoise or soft blue background on an 8×10 or 9×12 canvas. Blue makes yellow petals glow because the colors contrast strongly.
- Center. Paint a circle about one-third the width of the canvas in burnt umber, placed slightly off-center.
- Back petals. Using a darker yellow-orange (yellow plus a touch of red and a hint of umber), paint pointed petals radiating from the center with press-and-lift strokes.
- Front petals. In brighter yellow, paint a second ring of petals overlapping the first, slightly offset so the darker petals peek between them.
- Petal highlights. Add yellow mixed with white along the middle of a few front petals.
- Center texture. Dab a darker brown ring around the outer center, then tiny yellow-ochre dots across the top for seeds catching light.
- Stem and leaves. Add a thick green stem and one or two large heart-shaped leaves with a darker vein line.
Step-by-Step: Lavender Sprigs (Watercolor)
- Paint three or four thin, slightly curved stems in a muted green using a liner brush.
- Mix a purple puddle and a lighter lilac puddle.
- Starting a third of the way down each stem, add small press-and-lift marks on alternating sides, angled upward.
- Make the marks smaller and closer together toward the tip.
- While some marks are damp, touch a darker purple into the bases for depth.
- Tie the stems together with a painted ribbon or leave them loose as a sprig.
Composition Tips for Flower Paintings
- Use odd numbers. Groups of three or five flowers look more natural.
- Vary sizes and angles. Include a bud, a side view and a full bloom.
- Overlap elements. Overlapping flowers and leaves creates depth.
- Leave breathing space. Do not fill every inch of the canvas.
- Choose a focal flower. Make one bloom larger, brighter or more detailed.
- Crop boldly. Letting a flower extend off the edge looks modern and dynamic.
Common Beginner Problems and Fixes
| Problem | Cause | Fix |
|---|---|---|
| Flat-looking flowers | Only one color used | Add a shadow and highlight value |
| Stiff petals | Outlining then filling | Paint each petal in one confident stroke |
| Muddy watercolor | Overworking wet paint | Let layers dry; touch each area fewer times |
| Stems look like sticks | Uniform width and straight lines | Taper stems and give them gentle curves |
| Leaves all the same green | Single tube color | Mix warm and cool greens, add a little red to calm |
| Busy bouquet | Too many flower types and colors | Limit to two or three flower types and a tight palette |
Painting From Real Flowers
A few stems from the grocery store make excellent models. Place one flower in a glass near a window so light falls from one side, which makes shadows and highlights easy to see. Turn it until you find an angle you like, and paint it at actual size. Real flowers teach color variation that photos often flatten, such as the faint green at the base of a white petal or the purple in a red rose’s shadows.
A Two-Week Flower Practice Plan
| Day | Practice |
|---|---|
| 1–2 | Brushstroke drills, then tulips |
| 3–4 | Daisies and lavender |
| 5–6 | Cherry blossoms and flower field |
| 7–8 | Poppies and sunflowers |
| 9–10 | Loose roses (watercolor or acrylic) |
| 11–12 | Hydrangea and magnolia |
| 13–14 | Vase bouquet combining favorites |
Once you can paint a few flowers confidently, combine them with simple landscapes or still lifes; our list of step-by-step painting ideas for adult beginners is a natural next step.
FAQs
What is the easiest flower to paint for beginners?
Tulips and daisies are the easiest because they use a few simple strokes. Lavender and cherry blossoms are also beginner-friendly because they are built from small repeated marks.
How do I paint flowers step by step as a beginner?
Paint the background first, sketch simple shapes, fill each flower with a base color, add a darker shadow color where petals overlap, then finish with highlights and stems.
Should beginners paint flowers in acrylic or watercolor?
Acrylic is more forgiving because you can paint over mistakes. Watercolor gives beautiful soft petals but needs more planning. Both are good choices; many beginners try both.
What brushes do I need to paint flowers?
A medium round brush handles most petals, a small round adds details, a flat brush is useful for tulips and leaves, and a liner is ideal for stems.
How do I make painted flowers look realistic?
Use at least three values, vary petal shapes, observe real flowers for color variation, and keep edges softer in shadowed areas and crisper in highlights.
How long does it take to paint a flower?
A simple flower takes 20 to 40 minutes. Bouquets and detailed blooms such as peonies can take one to two hours.
Final Thoughts
Start with tulips and daisies, practice the five core strokes, and use three values in every flower. Within a couple of weeks of short sessions, most beginners can paint a convincing bouquet.
To strengthen the fundamentals behind every flower, from brush handling to color mixing, see our essential tips for new painters.





2 Comments