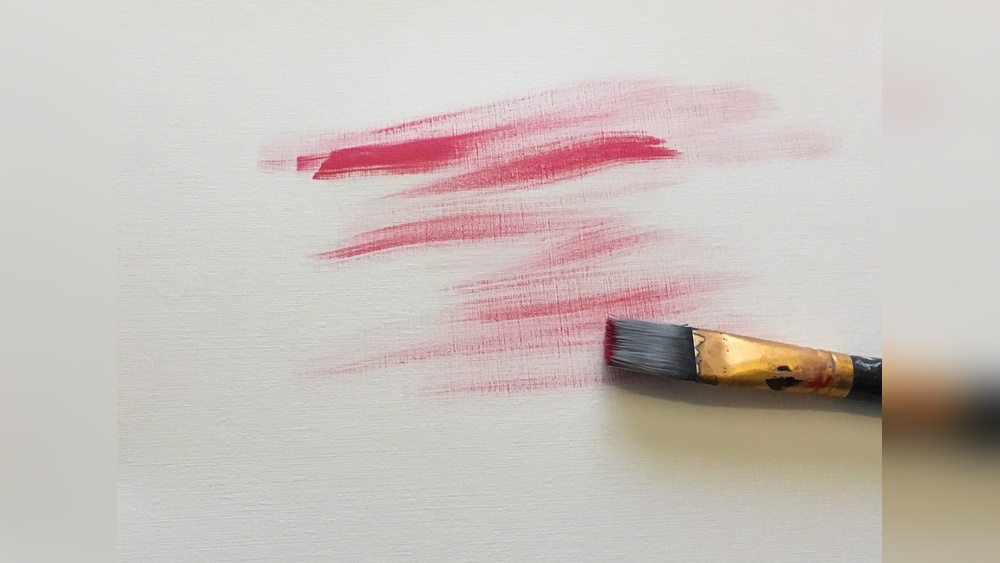
If you’ve ever wanted to add texture and depth to your acrylic paintings without complicated techniques, the dry brush technique acrylics method is exactly what you need. This simple yet powerful approach lets you create soft, scratchy strokes that bring your artwork to life.
You’ll discover how to master the dry brush technique with acrylics step by step. Whether you’re a beginner or looking to refine your skills, you’ll learn how to control your brush, choose the right paint amount, and achieve stunning effects that make your art stand out.
Ready to transform your acrylic paintings? Let’s dive in and unlock the secrets of dry brushing together!

Credit: www.youtube.com
Materials Needed
Gathering the right materials makes dry brushing with acrylics easier and more enjoyable.
Choosing quality supplies helps achieve the best texture and detail in your painting.
Choosing The Right Brush
Select a brush with stiff, natural bristles for dry brushing.
Flat or fan-shaped brushes work well to create textured strokes.
Use a small to medium size brush to control paint application better.
Selecting Acrylic Paints
Pick acrylic paints with a thick consistency for dry brushing.
Matte or satin finishes help create subtle highlights and texture.
Choose colors that contrast well with your base coat for best results.
Additional Tools
Use a palette or plate to remove excess paint from the brush.
Keep paper towels or a cloth handy to blot your brush frequently.
A primed canvas or surface works best for dry brushing techniques.
Credit: santafepaintingworkshops.com
Preparing Your Workspace
Preparing your workspace is key to a smooth dry brush painting experience. A clean, organized area helps you focus on creating delicate textures with acrylics. Setting up everything before you start saves time and keeps frustration away. It also protects your tools and canvas from accidental spills or damage.
Keep your workspace bright and well-ventilated. This improves visibility and comfort during painting. A flat, stable surface is best to hold your canvas and supplies steady. Arrange your materials so that each item is easy to reach without clutter.
Setting Up Your Canvas
Choose a canvas size that suits your project. Place it securely on an easel or flat table. Ensure the canvas surface is clean and dry. If needed, prime it with gesso for better paint adhesion. Position the canvas at eye level to reduce neck strain. Proper placement helps you control brush strokes precisely.
Organizing Paints And Brushes
Select acrylic paints in the colors you plan to use. Squeeze small amounts onto a palette for easy mixing. Keep your brushes within arm’s reach to maintain workflow. Use a variety of brush sizes, especially stiff bristle brushes for dry brushing. Arrange brushes by size or type to find them quickly. Have a jar of water and paper towels nearby for cleaning and drying brushes.
Brush Preparation
Preparing your brush is the first step in the dry brush technique with acrylics. Proper brush preparation ensures the paint applies in thin, textured layers. This step controls how much paint transfers and how the brush strokes appear on the surface.
Take time to get your brush ready. The right preparation helps achieve the classic dry brush look with minimal effort and great results.
Loading The Brush Correctly
Start by dipping only the tip of your brush into the acrylic paint. Avoid soaking the brush fully. The goal is to