
Painting a lighthouse in oil is more than just an art project—it’s a journey into light, shadow, and the spirit of the sea. Many people are drawn to the bold shape of a lighthouse and the dramatic landscapes that surround it.
With oil paints, you can capture the glowing beacon, rough stones, and swirling skies in a way that feels alive. Even if you’re new to oil painting, you can create a stunning lighthouse scene by following a clear process, using the right materials, and learning how to handle common challenges.
In this guide, you’ll find step-by-step advice, practical tips, and insights that even many experienced artists overlook.
What You Need Before You Start
Before you begin painting, it’s important to gather the right materials and prepare your workspace. Here’s what you’ll need:
- Oil paints – Choose a basic set with good primary colors, plus white and a few earth tones like burnt sienna and yellow ochre.
- Brushes – A mix of flat, round, and detail brushes. For lighthouses, small detail brushes will help with windows and edges.
- Canvas or canvas board – 12×16 inches is a good starting size.
- Palette – For mixing your colors.
- Palette knife – For mixing paint and creating texture.
- Mediums – Linseed oil or another oil painting medium to thin paint and improve flow.
- Rags or paper towels – For cleaning brushes.
- Easel – Helps you work at a comfortable angle.
- Reference photo – A clear picture of a lighthouse you want to paint.
- Solvent – Like odorless mineral spirits for cleaning brushes.
Pro tip: If you’re just starting, don’t invest in expensive paints yet. Student-grade oils are fine for practice.
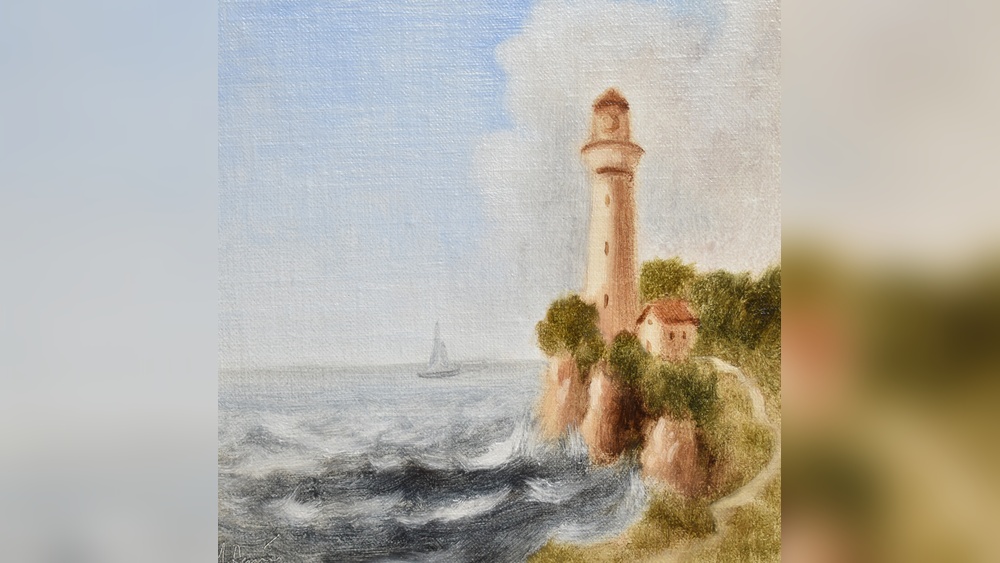
Choosing The Right Lighthouse Scene
A great painting starts with a strong subject. When picking a reference image, consider these points:
- Lighting: Lighthouses look dramatic at sunrise, sunset, or during storms. Strong light and shadow make your painting more interesting.
- Composition: The lighthouse should be a clear focal point. Look for images where the lighthouse stands out but is balanced with rocks, sea, or sky.
- Details: Close-up views help beginners focus on the building. Wider views add mood with crashing waves or dramatic clouds.
Non-obvious tip: Avoid photos with too many small details. Simple backgrounds and clear shapes are easier to paint well.
Planning Your Composition
Before you start painting, sketch your lighthouse lightly on the canvas. Use a pencil or thinned paint. Focus on:
- Proportions: Lighthouses are tall and narrow. Make sure it doesn’t look too short or wide.
- Horizon line: Decide where the sea meets the sky. This helps anchor your scene.
- Main elements: Place rocks, waves, and the building in a way that leads the viewer’s eye to the lighthouse.
A common mistake is to put the lighthouse right in the center. Try placing it off-center for a more natural feel.
Mixing Your Paints
Color mixing is a key skill in oil painting. For a lighthouse scene, you’ll need:
- Sky blues: Mix ultramarine blue with a little white.
- Sea greens/blues: Add hints of green or grey to your blue for ocean water.
- Lighthouse whites: Pure white is rarely used. Add a tiny bit of blue, yellow, or grey to give it depth.
- Stone and earth tones: Mix burnt sienna, ochre, and a touch of blue for shadows.
Here’s a quick look at common color mixes for a lighthouse painting:
| Element | Main Color | Mix Suggestions |
|---|---|---|
| Sky | Blue | Ultramarine + Titanium White |
| Sea | Blue-Green | Phthalo Blue + Viridian + White |
| Lighthouse | White/Grey | Titanium White + Touch of Blue or Ochre |
| Rocks | Brown/Grey | Burnt Sienna + Black + White |
Practical insight: Always mix a little more paint than you think you need. Matching colors later can be tricky.
Step-by-step: How To Paint A Lighthouse In Oil
Painting in oil works best if you build your picture in layers. Here’s a step-by-step guide:
1. Block In The Big Shapes
Start by using a large brush and thinned paint to block in the sky, sea, and main land shapes. Don’t worry about details yet. Focus on getting the right color and value for each area.
- Sky: Paint from top to bottom. Skies are usually darker at the top and lighter near the horizon.
- Sea: Use horizontal brush strokes for calm water, diagonal for rough waves.
- Land and rocks: Use earth tones for the ground and rocks.
Let this layer dry for at least a day if you use thick paint.
2. Add The Lighthouse Structure
With a smaller brush, paint the basic shape of the lighthouse. Check your proportions and edges. Don’t use pure white—add a touch of color to give it form.
- Shadows: Decide where the light comes from. Paint one side darker.
- Highlights: Add lighter areas where the sun hits the building.
3. Work On Details
Once the main shapes are dry, add details like windows, doors, railings, and the light at the top. Use a fine brush and steady hand.
- Windows: Mix a dark color, but not pure black. Add a hint of blue or brown.
- Metal railings: Use a thin brush and quick strokes.
4. Paint The Sea And Sky
Now build up the sky and water. Add clouds, waves, and reflections.
- Clouds: Use a soft brush, blending edges for a natural look.
- Waves: Add highlights where the light hits the water. Use short, broken lines for foam.
A common beginner mistake is to make the sea too flat. Add variety in color and movement.
5. Add Final Touches
Step back and look at your painting as a whole.
- Deepen shadows or brighten highlights to increase contrast.
- Add texture with a palette knife for rocks or waves.
- Sign your name in a corner.
Let your painting dry completely before framing—this can take several weeks.
Tips For Realistic Effects
To make your lighthouse painting stand out, try these techniques:
- Atmospheric perspective: Objects farther away look lighter and bluer. Use this trick for distant hills or sea.
- Implied texture: Use a dry brush for rough stone, or a palette knife for choppy waves.
- Reflected light: Add hints of color reflected from the sea onto the base of the lighthouse.
Non-obvious insight: The beacon light is rarely a pure yellow or white. Mix in a tiny bit of orange for a warm, glowing effect.
Common Mistakes And How To Fix Them
Even experienced artists run into trouble. Here are some frequent issues and solutions:
- Overworking details: Too much focus on tiny features makes the painting stiff. Stand back often to see the big picture.
- Flat colors: If your sky or sea looks dull, add subtle changes in color and value.
- Hard edges everywhere: Soften some edges, especially in the background, to create depth.
If you make a mistake with oil paint, you can gently wipe it off with a rag and a bit of solvent. Don’t be afraid to scrape off and repaint an area.
Drying And Varnishing
Oil paints take time to dry. Depending on paint thickness and humidity, it can take from a few days to weeks. Here’s how to handle the process:
- Touch dry: The painting should not feel sticky.
- Curing: Wait at least 6 months before adding a final varnish. This protects the painting and makes colors pop.
Quick tip: Use a temporary “retouch” varnish if you want to display your work before full drying.
Comparison: Oils Vs. Other Painting Mediums
It helps to know why oil paint is a great choice for lighthouses compared to other mediums.
| Medium | Drying Time | Blending Ability | Vivid Colors |
|---|---|---|---|
| Oil | Slow (days to weeks) | Excellent | Very high |
| Acrylic | Fast (minutes to hours) | Moderate | High |
| Watercolor | Very fast (minutes) | Limited | Medium |
Oil’s slow drying time is perfect for blending smooth skies and soft light, which are key in a good lighthouse painting.
Practical Examples And Variations
You don’t need to stick to traditional views. Try these ideas:
- Stormy lighthouse: Use bold brushwork and darker colors to show crashing waves and rain.
- Sunset scene: Paint warm oranges and purples in the sky, and show the lighthouse silhouette.
- Night view: Focus on the bright beacon and deep blue-black sky.
Many famous artists, like Edward Hopper, painted lighthouses to study light and solitude. Look at their works for inspiration.

Credit: www.youtube.com
Taking Your Painting Further
Once you finish your first lighthouse, experiment with:
- Different weather: Fog, rain, or starry nights.
- Adding people or boats: To tell a story.
- Changing the viewpoint: Paint from above, below, or at an angle.
Each new painting will teach you more about color, composition, and mood.
Safety And Cleanup
Oil painting needs a bit of care:
- Always work in a well-ventilated space.
- Store solvents in closed containers.
- Clean brushes right after use with solvent, then soap and water.
Dispose of rags safely—oil-soaked cloth can catch fire if left in a pile.

Credit: www.youtube.com
Recommended Resources
To learn more, explore tutorials and gallery images on museum websites or trusted art education sites. The National Gallery offers a helpful overview of oil painting basics.
Frequently Asked Questions
What’s The Best Canvas Size For A Beginner Painting A Lighthouse?
For beginners, a 12×16 inch canvas is ideal. It’s big enough to show details but small enough to finish in a few sessions.
Can I Use Acrylics Instead Of Oil Paint?
Yes, but oil paint blends more smoothly and stays wet longer, giving you more time to work. Acrylics dry fast and are less forgiving for beginners.
How Long Does An Oil Lighthouse Painting Take To Dry?
Thin layers may feel dry in 2-7 days. Thick paint or humid conditions can make drying take weeks. Always check before varnishing or framing.
What If I Make A Mistake?
With oil paints, you can wipe off or scrape away mistakes before the paint dries. For dried paint, paint over the area with new layers.
Do I Need To Varnish My Finished Painting?
Varnishing is recommended. It protects your painting from dust and makes colors look richer. Wait at least 6 months before applying final varnish.
Painting a lighthouse in oil is both rewarding and challenging. With patience and practice, you’ll learn how to use color, light, and texture to capture the beauty and drama of these coastal guardians. Each painting will bring new skills and deeper enjoyment of the art.
So gather your brushes, find a scene that inspires you, and let your creativity shine.
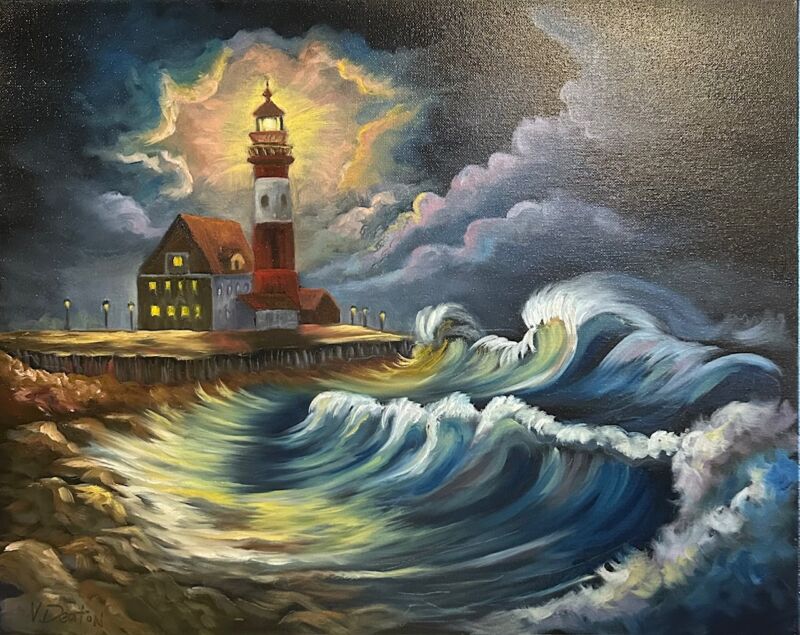
Credit: www.ginideaton.com


