
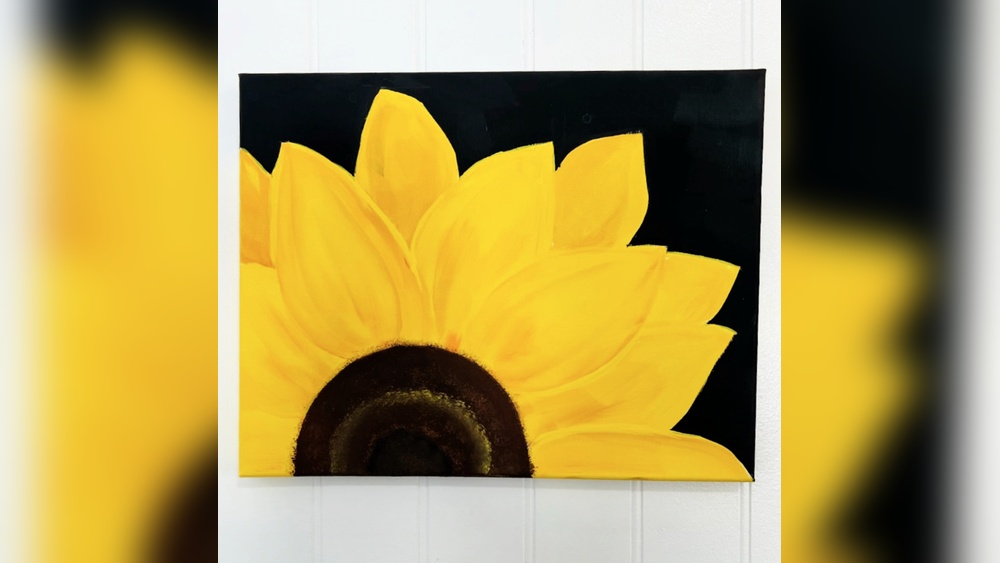
Painting a sunflower for wall art is a creative way to bring warmth and vibrancy into your home. Sunflowers are known for their bold yellow petals and large, cheerful faces, making them a favorite subject for both beginner and experienced artists.
Unlike many other flowers, sunflowers have a simple yet striking shape, which means you don’t need advanced skills to create a beautiful piece. Whether you want to make a statement in your living room or add a touch of nature to your bedroom, learning how to paint a sunflower can be both fun and rewarding.
Many people feel intimidated when starting a painting project, especially when it’s meant for display. But painting a sunflower is much easier than you might think. With the right materials, clear steps, and a little patience, you’ll be surprised by what you can achieve—even if you’ve never painted before.
In this guide, you’ll learn how to paint a sunflower for wall art, from choosing your supplies to adding the final details that make your art come alive. Along the way, you’ll also pick up tips that most beginners miss, helping your sunflower stand out as a true centerpiece.
Choosing The Right Materials
Selecting the right materials is the first and most important step. The quality of your supplies will affect both the painting experience and the final result.
Paint Types
The three most popular types for wall art are:
- Acrylic Paint: Dries fast, easy to clean, and very forgiving for beginners.
- Oil Paint: Has rich colors and blends smoothly, but dries slowly and requires special cleaning.
- Watercolor: Soft and transparent, best for paper rather than canvas.
For sunflower wall art, acrylic paint is the top choice. It’s vibrant, dries quickly, and works well on canvas.
Canvas Or Surface
Canvas is the classic choice for wall art, but there are other options:
- Stretched canvas: Ready to hang, sturdy, and comes in many sizes.
- Canvas board: Thinner but still good for wall display.
- Wood panel: Gives a different texture and can look very modern.
A 16×20 inch stretched canvas is a good starting size—large enough for detail, but not overwhelming.
Brushes And Tools
For a sunflower painting, you’ll need:
- Flat brush (for backgrounds and large petals)
- Round brush (for details and outlines)
- Detail brush (for the center and fine lines)
- Palette (for mixing colors)
- Cup of water (for cleaning brushes)
- Paper towels (for drying brushes or correcting mistakes)
Paint Colors
You don’t need a huge set. The basics:
- Titanium White
- Cadmium Yellow
- Yellow Ochre
- Burnt Sienna
- Raw Umber
- Cadmium Red
- Ultramarine Blue
- Sap Green
- Mars Black
With these, you can mix all the shades you need for a classic sunflower look.
Other Helpful Items
- Pencil (for sketching)
- Eraser
- Apron or old shirt
- Reference photo (optional but helpful)
Most beginners forget to protect their workspace. Lay down newspaper or a plastic sheet before you start.
Planning Your Sunflower Composition
Before you pick up a brush, think about how you want your sunflower to look on the wall.
Sunflower Placement
Decide if you want a single large sunflower, a group, or even just a close-up of the flower’s center. A single large flower is easier for beginners.
Position And Size
Sketch lightly with a pencil to plan the sunflower’s size and position. Centering the flower creates a bold look. Placing it off to one side gives a more modern, artistic effect.
Background Choices
Don’t ignore the background. Simple backgrounds make the sunflower pop; complex ones can add interest but may distract from the flower.
Popular options:
- Soft blue sky
- Light cream or white
- Gentle green wash
Beginners often choose a white background, but a pale blue or soft green gives more depth and makes the yellow petals stand out.
Step-by-step Sunflower Painting Process
Now, let’s break down the painting process into clear steps. Each step is important, so don’t rush.
1. Sketching The Sunflower
Start with a light sketch on the canvas. Draw a circle for the center. Then sketch petals around it—these don’t have to be perfect. Sunflower petals are often uneven in nature.
- Use a soft pencil so you can erase lines easily.
- Don’t press too hard; you want faint lines.
2. Painting The Background
It’s best to paint the background first, before the sunflower, so you don’t have to paint around delicate petals later.
- Mix your background color with a little water (for acrylics).
- Use a flat brush for even coverage.
- Let it dry before moving to the next step.
3. Blocking In The Center
Use a medium round brush to paint the sunflower’s center. Mix burnt sienna and raw umber for a rich brown base.
- Paint the circle, covering your pencil lines.
- Let it dry. Acrylics dry quickly, but oils will take longer.
4. Layering The Petals
Sunflower petals are bright and layered. Start with the base color:
- Mix cadmium yellow with a bit of white.
- Use a flat brush to paint each petal, following the direction from center out.
- Let the first layer dry.
Add a second layer for depth. Mix yellow ochre with your base yellow for some petals, and pure cadmium yellow for others. This creates natural variation.
5. Adding Petal Details
With a detail brush, add lines and shadows:
- Mix a small amount of cadmium red or burnt sienna with yellow for darker lines near the base of each petal.
- Highlight the petal edges with pure titanium white.
This step is often skipped by beginners, but it makes your petals look real and three-dimensional.
6. Painting The Center Details
The sunflower center isn’t just brown—it’s full of tiny seeds and dots.
- Use a detail brush to add small dots of raw umber, burnt sienna, and even a touch of yellow ochre.
- For extra realism, add a few tiny white dots for highlights.
Gently blend some of these dots outward, so the center doesn’t look flat.
7. Painting The Stem And Leaves
Mix sap green with a bit of ultramarine blue for a deep green. Paint the stem with a round brush. For leaves:
- Sketch the basic shape first.
- Paint with your green mix.
- Add shadows using more blue, and highlights with a touch of yellow and white.
Sunflower leaves are large and jagged—don’t make them too neat.
8. Adding Final Details
Step back and look at your painting from a distance. See where you can add more highlights or shadows.
- Add a few more bright white lines to petals.
- Deepen some brown tones in the center.
- Adjust the background if needed.
Don’t overwork—knowing when to stop is a skill most beginners lack.
Comparing Paint Types For Sunflower Wall Art
Choosing the right paint can change your experience. Here’s a comparison to help you decide:
| Paint Type | Drying Time | Ease of Use | Vibrancy | Best For |
|---|---|---|---|---|
| Acrylic | Fast (10-30 min) | Beginner-friendly | High | Wall Art |
| Oil | Very slow (days) | Intermediate | Very High | Professional Art |
| Watercolor | Fast (5-10 min) | Beginner | Medium | Paper Art |
Common Mistakes And How To Avoid Them
Many beginners face similar problems. Here are the top mistakes and how to fix them.
1. Overblending Colors
Trying to make every color transition smooth can result in muddy petals. Sunflowers have strong color contrasts. Let some brushstrokes show.
2. Flat Petals
Painting every petal the same color makes the flower look flat. Use different yellows and add shadows.
3. Ignoring The Background
Leaving the background white makes the sunflower less lively. Even a light wash adds depth.
4. Not Letting Layers Dry
If you paint new layers before the first is dry (with acrylics), colors can mix in ways you don’t want.
5. Overworking Details
Adding too many dots or lines can make the sunflower look messy. Sometimes less is more.
How To Hang And Display Your Sunflower Wall Art
Finishing your painting is just the beginning. Displaying it well is key to enjoying your work.
Framing
You can hang stretched canvas without a frame for a modern look. For a classic style, use a simple wooden frame that matches your room’s decor.
Placement
Hang your painting at eye level. If you’re hanging above furniture, leave 6-8 inches between the top of the furniture and the bottom of the canvas.
Lighting
Good lighting makes colors pop. Use soft white bulbs or place your painting near natural light, but avoid direct sunlight to prevent fading.

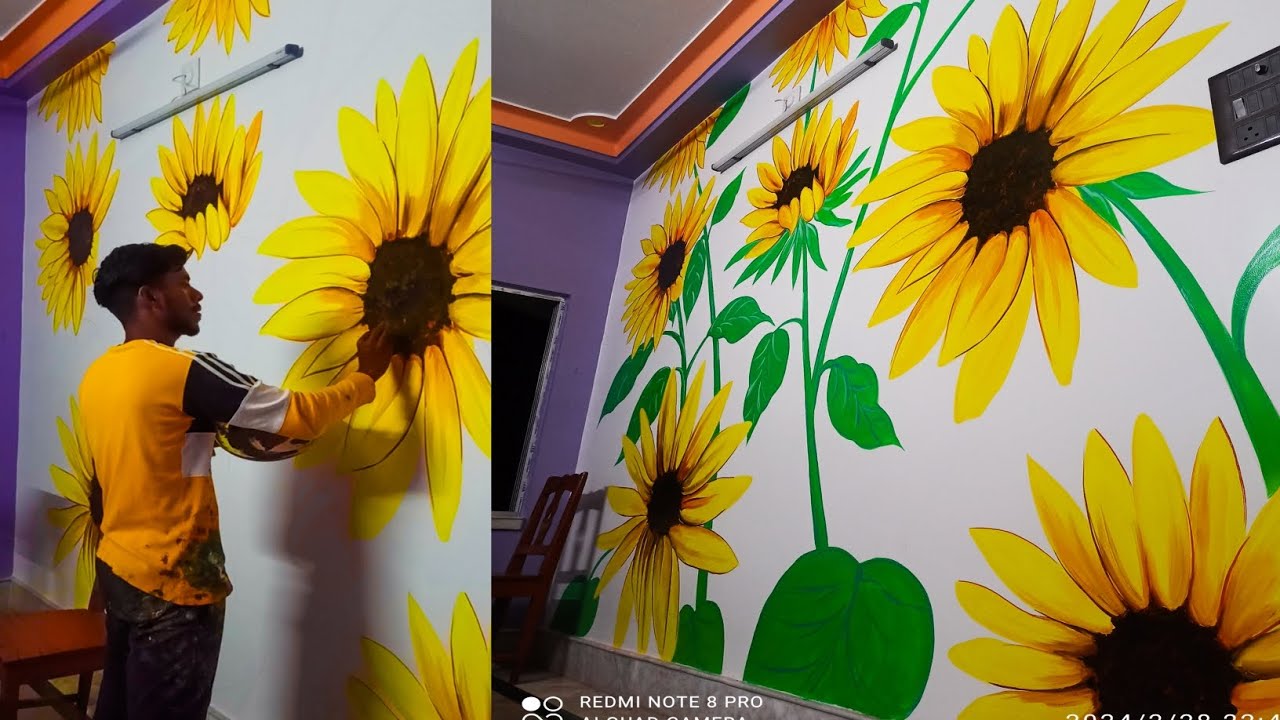
Credit: www.youtube.com
Caring For Your Painted Sunflower
A finished painting can last for years with the right care.
- Dust regularly with a soft, dry cloth.
- Avoid direct sunlight to keep colors bright.
- For acrylics, you can use a clear varnish for protection.
- If your painting is on paper, frame it behind glass.
If you ever want to clean your painting, never use water or cleaning products. Dust only!
Inspiration: Famous Sunflower Paintings
You’re not alone in loving sunflowers. Some of the world’s most famous artists painted them, most notably Vincent van Gogh. His sunflower series is known for its bold colors and expressive brushwork.
Many beginners compare their work to these masters and feel discouraged. Remember: even Van Gogh painted dozens of sunflowers before he was satisfied!
Example Color Mixes For Realistic Sunflowers
Getting the colors right is often the trickiest part. Here are some popular mixes:
| Area | Base Color | Mix For Shadows | Mix For Highlights |
|---|---|---|---|
| Petals | Cadmium Yellow + White | Yellow Ochre + Cadmium Red | Cadmium Yellow + White |
| Center | Burnt Sienna + Raw Umber | Raw Umber + Black | Yellow Ochre + White |
| Leaves/Stem | Sap Green + Ultramarine Blue | Sap Green + Black | Sap Green + Yellow |
Essential Tips For Beginners
- Use a reference photo. Don’t rely on memory. Photos help you get shapes and colors right.
- Practice on paper first. If you’re nervous, try painting small sunflowers on paper before moving to canvas.
- Don’t panic over mistakes. Most mistakes can be fixed with a new layer of paint.
- Step back often. Looking at your work from a distance helps you see the big picture.
- Sign your art! Use a detail brush to sign your name in the corner.
Credit: www.youtube.com
Comparing Sunflower Art Styles
There’s no single way to paint a sunflower. Here are some popular approaches:
| Style | Features | Difficulty | Good For |
|---|---|---|---|
| Realistic | Accurate colors, fine details | High | Advanced artists |
| Impressionist | Visible brushstrokes, bold color | Medium | All levels |
| Abstract | Bright, stylized shapes | Low/Medium | Beginners/Modern spaces |
If you’re just starting, an impressionist or abstract style is more forgiving and fun.
Frequently Asked Questions
How Long Does It Take To Paint A Sunflower For Wall Art?
For a beginner, expect to spend 2 to 3 hours on your first sunflower painting. This includes drying time between layers. More complex backgrounds or details may add time.
Can I Use Student-grade Paints For Sunflower Wall Art?
Yes, student-grade acrylics are fine for beginners. They cost less and are easy to use. For more vibrant colors and a longer-lasting painting, artist-grade paints are better, but not necessary for your first project.
What If I Make A Mistake?
With acrylics, you can paint over mistakes once the paint is dry. For oils, wait for the area to dry, then paint over. Watercolors are less forgiving, so mistakes are harder to fix.
Should I Varnish My Sunflower Painting?
For acrylic paintings, applying a clear varnish can protect your art from dust and fading. Wait until the painting is completely dry (about a week) before varnishing. Use a brush-on or spray varnish made for acrylics.
Where Can I Find Good Sunflower Reference Photos?
You can find free sunflower reference photos on sites like Pixabay or Unsplash, or study famous paintings. For more information on sunflower art, visit Wikipedia: Sunflowers (Van Gogh series).
Bringing a sunflower to life on your wall is a journey that mixes creativity and technique. With the right approach, even a simple painting can fill your space with color and joy. Remember, the most important thing is to enjoy the process—your unique style is what makes your art special.
Happy painting!
Credit: www.pamelagroppe.com


