
Painting cats in oil is a rewarding journey for any artist. Cats have expressive eyes, elegant fur, and unique personalities. Each brushstroke can capture a bit of their charm. Yet, many artists find painting cats challenging—especially when aiming for lifelike results.
This guide will help you paint cats with confidence, from sketch to final detail. Whether you’re new to oil painting or want to improve your pet portraits, you’ll find practical tips, expert advice, and real-world examples here.
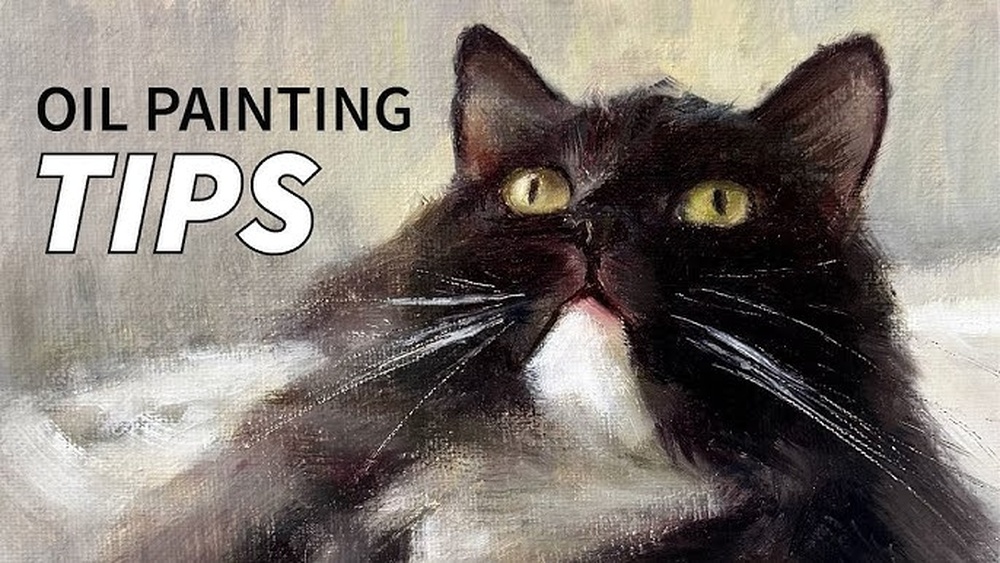
Understanding Cat Anatomy For Painting
Before you dip your brush in oil, spend time observing real cats. Notice how their bodies move and rest. Study the way their fur lies, how their ears rotate, and how their tails curl. Cats have flexible spines and their muscle structure is different from dogs or humans.
Learning these basics helps you avoid stiff or awkward results.
Focus on these key features:
- Head shape: Cats have a rounded face with a flat nose bridge.
- Eyes: Large, almond-shaped, and set wide apart.
- Ears: Triangular and mobile, often tilted or turned.
- Body: Muscular but sleek, with a gentle curve along the back.
- Tail: Long and expressive, often used to show mood.
If possible, take your own reference photos or sketch your cat from life. This personal touch makes your painting more authentic.
Choosing Reference Images Wisely
Not all references are equal. Select clear, high-quality photos that show the details you want to paint. Avoid blurry or overexposed images. If you want to paint a specific breed, study several photos to understand the unique features.
Here’s a quick comparison of reference photo quality:
| Photo Type | Pros | Cons |
|---|---|---|
| High-Resolution Close-Up | Details of fur, eyes, textures visible | May lack full body pose |
| Natural Light Portrait | Good color accuracy, soft shadows | Can show distracting backgrounds |
| Studio Lighting | Even lighting, clear forms | Can look artificial or too sharp |
If you’re painting a commission or a beloved pet, ask for several photos from different angles.
Essential Oil Painting Materials
Having the right tools makes painting smoother and more enjoyable. Here’s what you need for painting cats in oil:
- Oil paints: Choose high-quality artist’s paints. Basic colors include titanium white, ivory black, burnt sienna, yellow ochre, ultramarine blue, cadmium red, and a green.
- Brushes: Use a mix of round, flat, and liner brushes. Synthetic and natural hair both work—try a few to see which you prefer.
- Canvas or panel: Stretched canvas or gessoed panel, size depends on your subject.
- Mediums: Linseed oil for blending, odorless mineral spirits for cleaning.
- Palette and palette knife: For mixing colors.
- Rags or paper towels: For wiping brushes.
- Easel: Keeps your painting at a comfortable height and angle.
Many beginners miss the importance of a good brush. Using an old or low-quality brush can make it almost impossible to paint fine whiskers or delicate fur.
Planning Your Composition
A strong composition keeps the viewer’s attention. Think about where you want the cat’s face, body, and eyes. Decide if you want to paint the whole cat, just the face, or even a playful pose.
Here are some popular approaches:
- Close-up portrait: Focus on the face and eyes for emotional impact.
- Full body: Show the cat’s pose and personality.
- Action scene: Capture a leap, stretch, or playful moment.
Use the rule of thirds. Place the cat’s eyes or face off-center for a more dynamic look. Consider the background too—simple backgrounds keep the focus on the cat.

Credit: www.reddit.com
Sketching The Cat
Start with a light sketch using a pencil or thin paint. Mark the main shapes: head, body, ears, tail. Don’t worry about details yet—get the proportions right first.
Many artists make the mistake of jumping into details too soon. If the basic shapes are off, the final painting will not look right, no matter how well you paint the fur. Step back often to check your lines.
Blocking In Colors
Begin with large areas of color, using thinned paint. This step is called “blocking in. ” It helps you see the overall color and value relationships early.
- Paint the background first, so you can paint fur edges on top later.
- Lay in the main shapes of fur—light, mid, and dark tones.
- Keep brushstrokes loose at this stage; don’t focus on details.
Blocking in lets you adjust big shapes and colors before committing to fine work.
Building Up Layers
Oil painting is all about layers. Let the blocked-in layer dry a little, then add more paint on top. Work from general shapes to specific details.
- Work dark to light: Start with shadows, then add mid-tones, and finish with highlights.
- Let some layers dry before adding details—this prevents colors from getting muddy.
- Use thin paint for early layers, thicker paint for later ones (“fat over lean” principle).
Many beginners rush to highlights and end up with flat or chalky fur. Take your time building up depth.
Painting Realistic Cat Fur
Fur is one of the hardest parts to get right, but also the most rewarding. Break it down into steps:
- Observe fur direction: Fur changes direction around the eyes, cheeks, and joints. Paint in the direction the fur grows.
- Start with large brushes: Suggest the main clumps and shapes.
- Switch to smaller brushes: Add finer strands, especially around the face, ears, and whiskers.
- Vary your colors: Real fur isn’t just one color. Mix in blues, browns, and creams for depth.
Here’s a table comparing different brush types for fur effects:
| Brush Type | Best For | Tips |
|---|---|---|
| Round Brush | General fur, small details | Use tip for fine lines |
| Fan Brush | Layering soft fur | Drag lightly for texture |
| Liner Brush | Whiskers, fine hairs | Use with thinned paint |
Don’t try to paint every hair—suggest texture in key places, and let the viewer’s eye fill in the rest.
Capturing Expressive Cat Eyes
The eyes are the soul of any cat painting. They show emotion and draw viewers in. To paint lifelike eyes:
- Draw the shape accurately—cat eyes are more almond than round.
- Paint the iris color first, then add the pupil.
- Add a sharp highlight (catchlight) to bring life. Place it consistently on both eyes.
- Blend colors in the iris for depth—don’t use just one flat color.
- Soften the edges where the eyelid meets the eye for realism.
Many artists use a tiny brush or even a toothpick for the smallest highlights. Don’t skip this step—it makes a huge difference.
Painting Whiskers And Fine Details
Whiskers are tricky but important. Use a liner brush and thinned paint. Practice on scrap paper first. Pull the brush quickly in one stroke for each whisker.
Other fine details include:
- Ear fur: Use short, sharp strokes for the soft hairs inside the ears.
- Nose and mouth: Add subtle shading and highlights for form.
- Claws or collar: These small touches add personality.
Don’t overdo the details—too many can make the painting look busy.
Color Mixing Tips For Lifelike Fur
Cats come in many colors: tabby, tortoiseshell, black, white, and more. Mixing natural fur colors takes practice.
- Use warm and cool tones: Real fur often has cool shadows (blues, purples) and warm highlights (yellows, reds).
- Mix colors on the palette and canvas: Try laying two colors next to each other, then blend slightly with your brush.
- Test colors in small areas before committing.
A common mistake is using straight black for shadows. Instead, mix ultramarine blue and burnt sienna for rich, deep fur shadows.
Avoiding Common Mistakes
Even experienced artists make mistakes. Here are some to watch out for:
- Flat fur: Caused by using only one color or value. Always add highlights and shadows.
- Out-of-place whiskers: Draw lightly first; wrong placement can ruin the face.
- Stiff pose: Avoid copying a photo too closely—add life by adjusting the tail or ears.
- Overblending: Too much blending makes fur look blurry. Leave some crisp edges.
Always compare your work to your reference and step back for a fresh view.
Drying, Varnishing, And Finishing Touches
Oil paint dries slowly—sometimes weeks. When the painting is touch dry, you can add a thin varnish to protect it and bring out the colors.
- Let the painting dry for at least two weeks before varnishing.
- Use a removable varnish so you can clean the painting in the future.
- Frame under glass only if fully dry (months) to avoid trapping moisture.
Sign your painting in a corner with a small brush.
Real-world Example: From Sketch To Finished Cat Portrait
Imagine you want to paint a Siamese cat with blue eyes:
- Study several photos to capture the unique face shape and color points.
- Sketch the main shapes on canvas.
- Block in the cream body color and darker points (ears, face, tail).
- Build up layers of fur, using a mix of ultramarine and burnt sienna for shadows.
- Paint the eyes with a mix of cerulean blue and white, adding a sharp highlight.
- Finish with whiskers and fine details—don’t forget the pink nose!
- Let the painting dry, then varnish for a glossy finish.
This process works for any breed or color—just adjust your color mixing and fur patterns.

Credit: www.reddit.com
Two Non-obvious Insights For Painting Cats
- Use lost-and-found edges: Not every edge needs to be sharp. Soften the edges where the fur meets the background, especially around the body. This creates depth and makes the head stand out.
- Suggest personality through pose: A slightly tilted head, raised paw, or curled tail can show playfulness, curiosity, or calm. Don’t be afraid to tweak the pose from your photo for more character.
Final Thoughts
Painting cats in oil is a blend of observation, technique, and patience. Focus on anatomy, plan your composition, and build up layers of color. Take time with fur and eyes—they make your painting come alive. Remember, every artist’s style is unique; find joy in the process and don’t fear mistakes.
Over time, your confidence and skill will grow, and your cat portraits will truly shine.
For further reading on cat anatomy and breeds, check out this Wikipedia cat article.

Credit: www.youtube.com
Frequently Asked Questions
How Do I Paint White Or Black Cats Without Making Them Look Flat?
Use a variety of colors in your shadows and highlights. For white cats, mix in blues, purples, and warm creams in the shadows. For black cats, use deep blues, browns, and purples—never just straight black.
What’s The Best Way To Paint Realistic Cat Eyes?
Paint the iris with a blend of several colors, add a sharp black pupil, and finish with a bright white catchlight. Layer translucent glazes if needed for extra depth.
How Do I Avoid Overworking The Fur?
Work in layers, and stop to let paint dry between stages. Avoid blending too much—leave some crisp brush marks. Focus detailed fur only in key areas, like the face.
Can I Paint Cats From Imagination, Or Do I Always Need A Reference?
References help with accuracy, especially for anatomy and lighting. Once you’re comfortable, you can paint from imagination, but most artists still use references for best results.
How Long Does An Oil Cat Portrait Take To Dry?
Touch-dry time is usually 1–2 weeks, depending on paint thickness and climate. Wait at least 2 weeks before varnishing, and several months before framing under glass.


