Have you ever looked at plain pebbles and wondered how to turn them into colorful little works of art? Painting pebbles with acrylic paint is easier than you think, and it’s a fun way to bring a splash of creativity into your day.
Whether you want to brighten up your garden, make personalized gifts, or simply relax with a simple craft, this guide will show you exactly how to do it step-by-step. Keep reading, and you’ll discover the tips and tricks that make your painted pebbles stand out and last longer.
Ready to transform those ordinary stones into something extraordinary? Let’s dive in!
Materials Needed
Gathering the right materials is key to painting pebbles with acrylic paint. Using quality supplies helps your artwork last longer. You also get better colors and smoother finishes. Prepare all items before you start. This saves time and avoids frustration.
Choosing The Right Pebbles
Pick smooth, flat pebbles for easy painting. Clean stones work best. Avoid rough or crumbly rocks. Small to medium sizes fit well in your hand. Light-colored pebbles make colors pop.
Selecting Acrylic Paints
Use acrylic paints made for craft projects. Choose bright, vibrant colors. These paints dry fast and stick well. Avoid watercolor or oil paints. They don’t hold up on stones.
Essential Brushes And Tools
Have a set of small paintbrushes ready. Thin brushes help with details. Flat brushes cover larger areas. A palette or plate holds paint. Use toothpicks or fine liners for tiny designs.
Additional Supplies
Keep water and paper towels nearby for cleanup. Use a pencil to sketch designs first. Seal your work with a clear acrylic sealer. It protects paint from fading and chipping. A workspace cover prevents messes.

Credit: artistro.com
Preparing Pebbles
Preparing pebbles is the first step to create beautiful painted stones. Clean and smooth surfaces help paint stick better. This makes your artwork last longer and look brighter. Take your time to prepare each pebble well.
Cleaning And Drying
Start by washing the pebbles with warm water. Use a soft brush to remove dirt and dust. Avoid harsh soaps that might leave residue. Rinse the stones thoroughly to remove all dirt. Let the pebbles dry completely before painting. Dry stones help paint stick and avoid smudges.
Sanding For Smooth Surface
Use fine sandpaper to smooth rough spots on the pebbles. Sanding creates a better surface for paint to hold on. Rub gently to avoid breaking or chipping the stone. Wipe off dust with a dry cloth after sanding. Smooth pebbles give your artwork a clean, polished look.
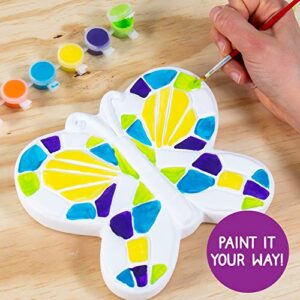
Design Ideas
Designing painted pebbles is a fun way to express creativity. Simple ideas can turn plain stones into art pieces. Choose designs that suit your style and skill level. Experiment with colors and shapes. Each pebble becomes unique and special.
Below are some easy and popular design ideas. These ideas help beginners and experienced painters create beautiful pebbles.
Simple Patterns
Simple patterns make pebble painting easy and enjoyable. Use dots, stripes, or small hearts. These patterns look great on small stones. They are quick to paint and require little detail. Simple patterns bring color and charm without stress.
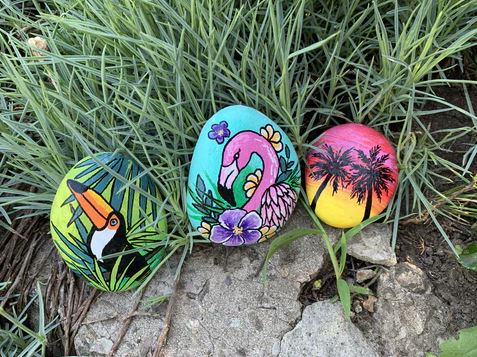
Nature-inspired Designs
Nature offers endless design ideas for pebbles. Paint flowers, leaves, or trees to bring nature indoors. Animals like ladybugs, bees, or birds add life to your stones. Use soft greens, browns, and bright floral colors. These designs connect your art with the outdoors.
Abstract And Geometric Shapes
Abstract shapes and geometric patterns add a modern touch. Triangles, circles, and squares create interesting visuals. Mix and match shapes for a bold look. Use bright or pastel colors to highlight the design. These shapes let you play with form and color freely.
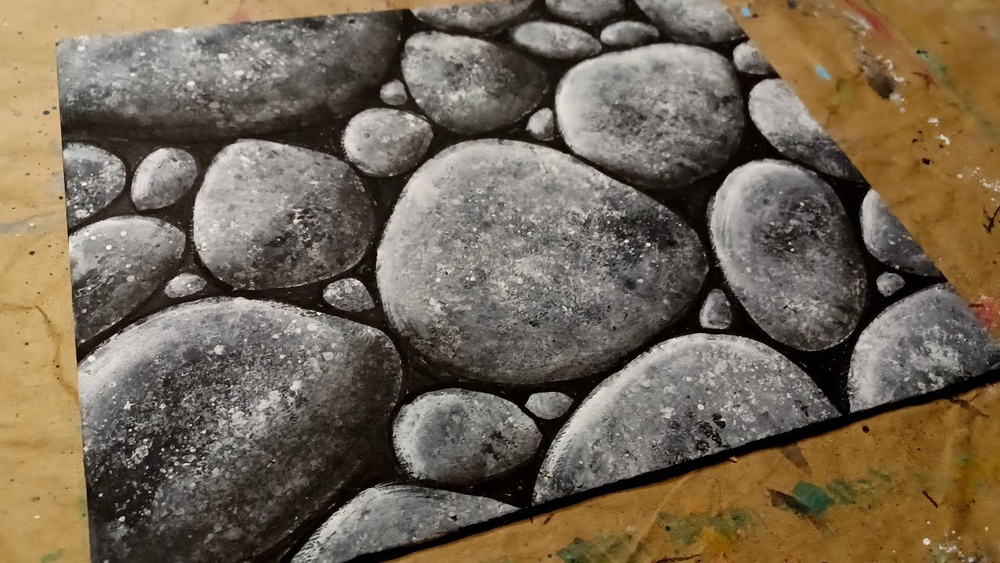
Painting Techniques
Painting pebbles with acrylic paint is fun and easy. Using the right techniques helps your designs look bright and clear. Simple steps like applying a base coat, layering colors, and adding fine details make a big difference. These steps create strong colors that last on the stone surface.
Good painting techniques also help the paint stick well. They stop colors from mixing too much and keep lines sharp. Let’s explore these important steps for painting pebbles.
Base Coat Application
Start with a clean, dry pebble. Apply a thin base coat of white or light color. Use a flat brush for smooth coverage. Let the base coat dry completely before adding more paint. This layer helps colors stand out and stick better on the pebble.
Layering Colors
Build colors slowly by applying thin layers. Each layer should dry before the next one goes on. Thin layers avoid clumps and cracks. This process makes colors look bright and even. Use a small brush to fill in areas carefully.
Detailing And Fine Lines
Use a fine-tipped brush or a toothpick for small details. Steady hands help create clean lines and shapes. Paint small dots, lines, or patterns to add interest. Take your time to avoid smudging. These details bring your pebble art to life.
Drying And Sealing
Drying and sealing are important steps in painting pebbles with acrylic paint. Proper drying ensures the paint sets well. Sealing protects your artwork from damage and keeps colors bright for longer. Skipping these steps can cause the paint to chip or fade quickly.
Proper Drying Times
Let the painted pebbles dry on a flat surface. Drying time depends on paint thickness and room temperature. Thin layers usually dry in 20 to 30 minutes. Thicker layers or multiple coats need 1 to 2 hours. Avoid touching the paint until it feels completely dry.
Drying overnight is best before sealing. This prevents smudges and helps the paint stick better to the pebble.
Choosing The Right Sealant
Use a clear acrylic sealer to protect your painted pebbles. Sealants come in spray or brush-on forms. Spray sealants are easy to use and provide even coverage. Brush-on sealants allow more control but can leave brush marks.
Pick a sealant that is waterproof and UV resistant. This helps your pebbles last outside. Matte or glossy finishes are both good. Choose the finish that suits your style.

Credit: www.youtube.com
Creative Uses For Painted Pebbles
Painted pebbles bring color and charm to many parts of life. They add a personal touch to spaces and gifts. Using acrylic paint on pebbles lets you create unique designs. These small art pieces brighten homes, gardens, and special moments.
Explore ways to use painted pebbles creatively. Each idea helps you enjoy your artwork beyond the paint.
Home Decor Ideas
Place painted pebbles on shelves or tables as small art displays. Use them as paperweights with colorful patterns. Arrange pebbles in bowls for a simple centerpiece. Decorate candle holders by gluing pebbles around the base. Use them as fridge magnets by adding magnet strips. Create coasters by sealing flat painted pebbles. These add personality to any room.
Gifts And Keepsakes
Paint pebbles with names or special dates for personalized keepsakes. Make sets of painted pebbles as thoughtful gifts. Use pebbles to write short messages or quotes. Gift them as bookmarks or small tokens of love. They show care and effort in a simple way. Pebbles make memorable gifts for birthdays and holidays.
Garden And Outdoor Uses
Place painted pebbles along garden paths for color and fun. Use them to mark plants by painting plant names. Decorate flower pots with bright painted stones. Arrange pebbles around birdbaths or fountains for a lively look. Use pebbles to create garden signs or small art pieces. They bring joy and creativity to outdoor spaces.
Troubleshooting Tips
Painting pebbles with acrylic paint can be fun, but sometimes problems happen. These troubleshooting tips help fix common issues. They also guide you to keep your painted pebbles looking great for longer.
Fixing Paint Mistakes
Paint mistakes on pebbles happen to everyone. If the paint smudges, wait for it to dry. Then, gently scrape it off with a toothpick or a small brush. Use a damp cloth to wipe away loose paint.
For uneven colors, paint a white base layer first. This helps colors look bright and smooth. If colors mix by accident, let the paint dry. Then, paint over the area with the correct color.
Preventing Paint Chipping
Chipping paint can spoil your pebble art. To stop this, clean pebbles well before painting. Use soap and water to remove dirt and dust.
Apply thin paint layers. Thick paint chips more easily. Let each layer dry fully before adding the next one. After painting, seal the pebbles with clear acrylic spray. This protects the paint from scratches and weather.
Credit: artistro.com
Frequently Asked Questions
What Materials Do I Need To Paint Pebbles With Acrylic Paint?
You need clean pebbles, acrylic paints, paintbrushes, a palette, water, and sealant. These basic materials ensure vibrant, lasting designs.
How Do I Prepare Pebbles Before Painting?
Wash pebbles thoroughly to remove dirt. Let them dry completely. A smooth, clean surface helps paint adhere better.
Can I Use Any Type Of Acrylic Paint On Pebbles?
Yes, but use high-quality, outdoor acrylic paints for durability. They resist fading and withstand weather conditions well.
How Long Does Acrylic Paint Take To Dry On Pebbles?
Acrylic paint usually dries in 20-30 minutes. For thicker layers, drying can take up to an hour.
Conclusion
Painting pebbles with acrylic paint is a fun and simple craft. You only need a few materials and some creativity. Take your time and enjoy the process. Each painted pebble can become a special decoration or gift. Keep practicing to improve your skills.
Try different colors and designs for variety. This hobby brings joy and brightens up any space. Give it a try and see what you can create!