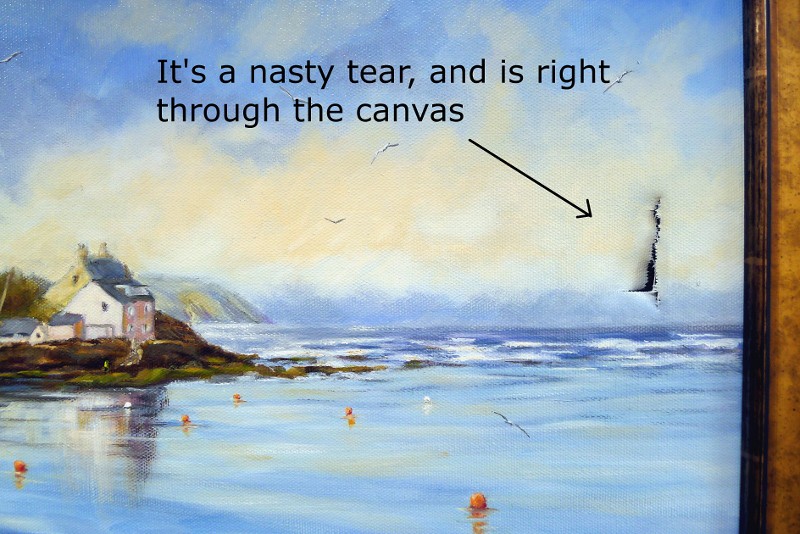
Your cherished canvas painting“>canvas painting“>canvas painting has a tear — it’s frustrating, right? But don’t worry, you don’t have to give up on it or rush to a costly restorer just yet. You can repair a torn canvas painting yourself, preserving your artwork’s beauty and value.
In this guide, you’ll discover simple, step-by-step methods using materials you can easily find. Whether the tear is small or more significant, you’ll gain the confidence to fix it carefully and effectively.
Ready to bring your painting back to life? Keep reading, because the solution is closer than you think.
Credit: www.chrischalkart.com
Tools And Materials
Repairing a torn canvas painting requires specific tools and materials to ensure a smooth and lasting fix. Using the right supplies helps maintain the artwork’s original look and prevents further damage. Prepare carefully by gathering everything needed before starting the repair.
Each material plays a key role in securing the tear and blending the patch with the original canvas. Choose items that are safe for art and easy to work with. This section explains the main tools and materials needed for a successful canvas repair.
Adhesives For Canvas Repair
Select adhesives that dry clear and stay flexible. Acrylic gel medium is a popular choice because it does not crack or yellow over time. PVA glue also works well for canvas and provides a strong bond.
Apply the adhesive on both the canvas tear and the patch. Press them together firmly for a tight seal. Remove extra glue quickly with a damp cloth before it dries.
Choosing The Right Patch Material
Use a patch made from canvas or linen similar to the original painting surface. The patch should be slightly larger than the tear to cover it fully. Avoid thin or synthetic fabrics that may not hold well.
Cut the patch carefully to fit the tear shape. A good patch blends with the canvas texture and thickness, making the repair less visible.
Additional Supplies Needed
Gather tools like a pair of scissors, tweezers, and a small brush. Scissors help trim the patch and remove loose threads. Tweezers allow you to realign canvas fibers gently.
A soft cloth or sponge is useful for wiping excess glue. A needle and thread can reinforce the repair with gentle stitching if needed. Have a clean workspace to avoid dust or dirt on the painting.
Preparing The Canvas
Preparing the canvas is the first step in fixing a torn painting. This stage ensures the repair will hold strong and look natural. Handle the canvas carefully to avoid further damage. Work in a clean, well-lit space to see all details clearly. Follow these steps to prepare the canvas properly.
Cleaning The Torn Area
Start by removing any dust or dirt around the tear. Use a soft brush or a dry cloth to clean gently. Avoid using water or harsh chemicals as they can harm the paint. Cleaning prevents dirt from getting trapped under the repair patch. This step helps glue or adhesive stick better to the canvas.
Aligning Broken Threads
Look closely at the torn edges. Use tweezers or a needle to move threads back into place. Aligning threads keeps the canvas structure intact and smooths out the tear. Take your time to match each thread as closely as possible. Correct thread alignment reduces the visibility of the repair later.
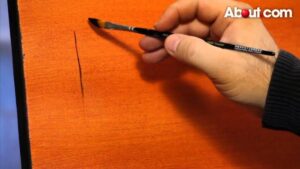
Removing Canvas From Stretcher Bars
If the tear is large or in a difficult spot, remove the canvas from its stretcher bars. Use a staple remover or flat tool to lift staples carefully. Removing the canvas makes it easier to work on the back side of the tear. Lay the canvas flat on a clean surface before starting the repair. Handle the canvas with care to avoid new tears.
Applying The Patch
Applying the patch is a key step in repairing a torn canvas painting. This process strengthens the damaged area and prevents the tear from growing. Using the right techniques ensures a seamless repair.
Finishing Touches
Blending the Patch
Once the patch is applied, use paint or a matching medium to blend the patch with the original canvas. This step is crucial for making the repair less noticeable.
Reattaching to Stretcher Bars
After the repair is complete, reattach the canvas to the stretcher bars carefully. Ensure the canvas is taut and evenly stretched to maintain its original appearance.