If you love oil painting, you know how important it is to get your paint just right. But have you ever struggled with thick, stubborn oil paint that just won’t flow?
Or maybe you’re worried about thinning it too much and ruining your masterpiece. Learning how to thin oil paint correctly can change everything about your painting experience. It helps your colors blend smoothly, dries your layers evenly, and keeps your artwork lasting for years.
In this guide, you’ll discover the simple steps and secrets artists use to thin oil paint perfectly every time—no more guessing, no more frustration. Ready to make your oil paints work for you like never before? Let’s dive in.

Credit: www.reddit.com
Choosing Thinners And Mediums
Choosing the right thinners and mediums is essential for thinning oil paint correctly. These substances control the paint’s consistency, drying time, and finish. The choice depends on your painting stage and desired effects. Understanding each option helps you work with oil paints more confidently and achieve better results.
Turpentine And Mineral Spirits
Turpentine and mineral spirits are classic thinners for oil paint. They reduce the paint’s thickness and help it flow smoothly. Turpentine evaporates quickly, making it ideal for early layers. It speeds up drying and keeps the paint lean. Mineral spirits dry slower and have less odor. Both clean brushes and thin paint without changing color or gloss.
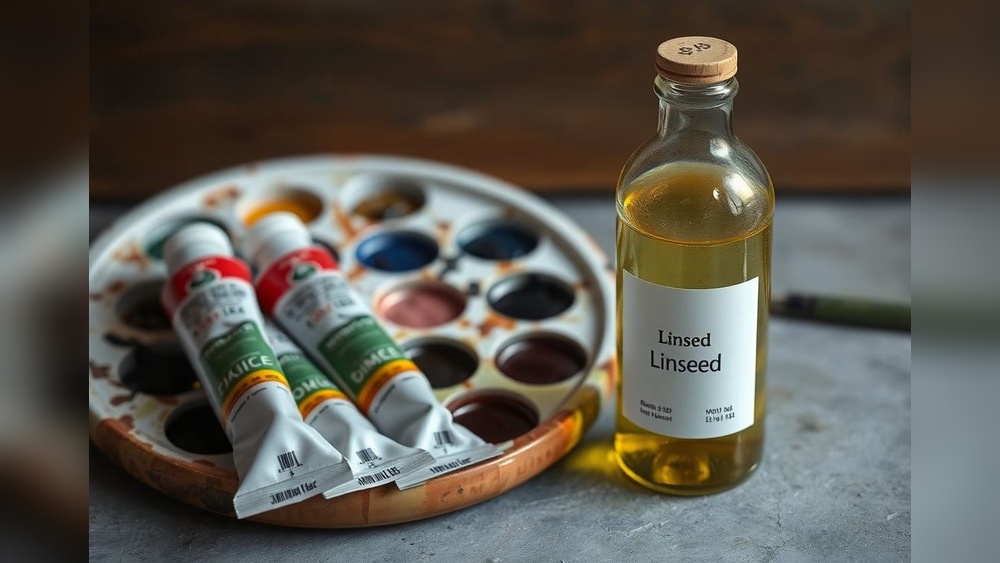
Linseed And Other Oils
Linseed oil and other oils add fat to oil paint, making it richer. They slow drying and increase gloss and flexibility. Use oils for later layers to follow the “fat over lean” rule. This prevents cracking by ensuring each layer has more oil than the one below. Other oils include walnut and poppy seed oil, each with unique drying times and finishes. Oils improve blending and create smooth textures.
Commercial Mediums
Commercial mediums combine thinners and oils with additives. They offer controlled drying times and finishes. Some mediums increase transparency or gloss, while others speed drying or reduce brush marks. These ready-made formulas simplify thinning and modifying oil paint. Use them to save time and enhance paint handling. Always check labels to match the medium with your painting needs.
Applying Fat Over Lean
Applying fat over lean is a key technique in oil painting. It helps your artwork last longer and look better. This method involves layering paint so that each new layer has more oil than the one below it. Understanding this rule can prevent common problems like cracking and peeling. Let’s explore what fat over lean means and how to adjust oil content in your paint layers.
What Fat Over Lean Means
Fat over lean means using paint with more oil on top of paint with less oil. The “lean” layer has less oil and more solvent, making it dry faster. The “fat” layer contains more oil, so it dries slower and stays flexible. This balance stops the paint from cracking as it dries and ages.
Adjusting Oil Content
Start with thin paint by mixing oil paint with a solvent like turpentine. This creates the lean layer. For the fat layer, add a small amount of linseed oil or an oil-based medium to the paint. Avoid adding too much oil, or the paint will stay sticky and take a long time to dry.
Avoiding Cracks
Cracks happen when a lean layer is on top of a fat layer. The bottom dries slowly, while the top dries fast and tight. This causes the top layer to crack as the paint moves. Following the fat over lean rule keeps layers flexible and stable. Paint in thin, lean layers first, then add oil-rich, fat layers on top.
Layering Techniques
Layering techniques in oil painting are essential for creating depth and texture. Correct thinning helps each layer dry well and prevents cracking. Applying paint layers thoughtfully improves the overall look and durability of your artwork.
Understanding how to build layers from thin to thick ensures a smooth painting process. Each step requires attention to the paint’s consistency and drying time. Let’s explore key layering methods for thinning oil paint effectively.
Starting Thin
Begin your painting with thin paint layers. Mix oil paint with a solvent like turpentine or mineral spirits to reduce thickness. Thin layers dry faster and form a strong base. These lean layers hold the paint and create a stable surface for later work.
Apply thin layers evenly and avoid heavy brush strokes at this stage. This approach follows the “fat over lean” rule, keeping your painting flexible and crack-free. Starting thin helps you shape the composition before adding details.
Building Thickness Gradually
After the base dries, add thicker layers with less solvent. Increase the amount of oil medium like linseed oil in your mix. This step builds up color and texture without harming earlier layers. Gradually thickening the paint creates rich depth and vibrancy.
Work patiently, letting each layer dry before applying the next. This prevents lifting or mixing of colors and ensures strong adhesion. Thickening slowly protects the painting’s structure and enhances its visual appeal.
Using Impasto Correctly
Impasto is the technique of applying thick, textured paint. Use it sparingly for highlights or focal points. Mix paint with minimal medium to keep it dense and hold brush or palette knife marks. Thick impasto adds dimension and energy to your work.
Apply impasto only over dry, thicker layers. This practice avoids cracking and supports the paint’s weight. Controlled use of impasto enriches your painting with bold texture and lively effects.
Drying Time Management
Managing drying time is key to thinning oil paint correctly. The drying speed affects your painting process and final result. Controlling it helps avoid issues like cracking or muddy colors. Understanding how solvents and pigments influence drying time improves your workflow.
Fast Evaporating Solvents
Solvents like turpentine and mineral spirits dry quickly. They reduce paint thickness and speed up drying. Use them in early layers for faster drying and better adhesion. Fast solvents help you work in thin layers that dry fast. Avoid using too much solvent, or paint may become too thin and weak.
Choosing Slow-drying Pigments
Some pigments dry slower than others. Slow-drying colors like alizarin crimson or cadmium red stay wet longer. Use slow pigments in top layers for blending and smooth transitions. They give more time to work on details. Mixing fast and slow pigments can help control drying time.
Balancing Drying Speeds
Balance fast solvents with slow-drying pigments for better control. Start with fast-drying thin layers and add thicker, slower layers on top. This method follows the “fat over lean” rule to prevent cracking. Adjust your mix based on your painting style and drying environment. Proper balance helps layers dry evenly and last longer.
Mixing And Consistency Tips
Mixing and adjusting the consistency of oil paint is vital for smooth application and desired effects. Proper thinning ensures the paint flows well without losing its strength. Understanding how to balance paint and thinner improves control during painting.
Achieving Desired Flow
Start by mixing small amounts of thinner into the paint. Stir gently to blend without overworking the paint. Test the flow by brushing on a palette or canvas. The paint should spread evenly without dripping or pooling. Adjust thinner quantity slowly to reach a smooth, fluid consistency that suits your brushwork.
Avoiding Over-thinning
Too much thinner weakens the paint film and reduces adhesion. Thin only enough to improve flow and workability. Avoid adding large amounts of solvent at once. Apply in small steps and check the paint’s texture frequently. Over-thinned paint appears watery and may cause cracking after drying.
Maintaining Paint Vibrancy
Preserve color strength by limiting thinner use. Excess solvent can mute pigment intensity and dull the finish. Use mediums like linseed oil sparingly to enhance gloss and richness. Keep the paint thick enough to retain its original vibrancy while still allowing smooth application.

Credit: www.reddit.com
Common Mistakes To Avoid
Thinning oil paint is an essential skill for smooth and vibrant artwork. Many painters make common mistakes that affect the paint’s texture and drying time. Avoiding these errors helps create durable and beautiful paintings.
Understanding these mistakes can improve your painting process and results. Here are some key errors to watch out for.
Too Much Solvent Early On
Using too much solvent at the start thins the paint excessively. This weakens the paint layer and reduces adhesion. Thin paint dries too fast and becomes brittle. It may also cause cracking later. Use solvents sparingly in the first layers. Keep initial coats lean but not watery.
Ignoring Drying Order
Oil paint layers dry at different speeds. Applying thick paint over still-wet thin layers traps moisture. This causes uneven drying and cracking. Always let each layer dry before adding the next. Follow the natural drying order to avoid damage. Patience ensures strong and lasting paint layers.
Skipping Fat Over Lean
The fat over lean rule is crucial in oil painting. Each new layer must have more oil than the one below it. Skipping this rule leads to cracking and poor paint adhesion. Lean layers dry faster and are less flexible. Fat layers stay soft longer and move with the paint. Follow this principle to keep your painting stable.
Tools For Thinning Oil Paint
Thinning oil paint requires the right tools to mix and apply your paint effectively. Using proper tools helps you control paint consistency. It also ensures smooth blending and clean application. Knowing which tools to use can improve your painting process and final results.
Brushes And Palettes
Brushes help spread thinned oil paint smoothly on your canvas. Choose brushes made for oil painting. They hold paint well and allow easy blending. Palettes give you space to mix paint and thinner. Wooden or glass palettes work best. Keep them clean for accurate color mixing.
Palette Knives
Palette knives are perfect for mixing paint and thinner. They help you blend colors without wasting paint. You can control the amount of thinner added. Use a clean knife each time to avoid contamination. Palette knives also allow scraping off excess paint.
Mixing Containers
Mixing containers hold paint and thinner safely during preparation. Small glass jars or metal tins work well. They prevent spills and keep your thinner fresh. Using containers helps measure the right thinner amount. Clean containers after each use to keep your paint pure.
Safety And Ventilation
Working with oil paint requires attention to safety and proper ventilation. Thinning oil paint involves solvents that can release harmful fumes. These fumes affect your health and may cause dizziness or headaches. Good airflow reduces these risks and keeps your workspace safe. Always prepare your area before starting to thin oil paint.
Handling Solvents Safely
Use solvents like turpentine and mineral spirits carefully. Wear gloves to protect your skin from irritation. Avoid direct contact and do not inhale fumes deeply. Store solvents in tightly closed containers. Keep them away from flames or heat sources. Use only small amounts to reduce exposure.
Proper Workspace Setup
Set up your workspace near an open window or door. Use a fan to increase air circulation. Work in a well-lit area to avoid accidents. Keep your painting materials organized and within reach. Avoid eating or drinking in the painting area. This prevents accidental ingestion of harmful substances.
Disposal Of Materials
Dispose of solvent-soaked rags safely to prevent fires. Place them in a metal container with a lid. Do not throw them in the trash immediately. Allow solvents to evaporate in a safe, ventilated spot first. Follow local regulations for disposing of hazardous waste. Proper disposal protects the environment and your health.
Credit: www.reddit.com
Frequently Asked Questions
What Can I Use To Thin My Oil Paint?
Use turpentine or mineral spirits to thin oil paint for initial layers. Linseed oil or other oil mediums thin paint for later, richer layers. This follows the “fat over lean” rule, ensuring proper drying and preventing cracking.
What Is The Golden Rule Of Oil Painting?
The golden rule of oil painting is “Fat Over Lean. ” Apply each new layer with more oil than the previous one. This prevents cracking and ensures proper drying. Start with thin, fast-drying layers, then add thicker, oil-rich layers for durability and flexibility.
What Is The Thin Technique In Oil Painting?
The thin technique in oil painting uses paint mixed with solvents to create transparent, fast-drying layers. It builds smooth underpaintings and prevents cracking.
Is It Necessary To Mix Thinner With Oil Paint?
Mixing thinner with oil paint is necessary for early layers to improve flow and drying speed. Thin initial layers with solvents like turpentine. Avoid thinning later layers too much to maintain paint fatness and prevent cracking. Proper thinning ensures smooth application and long-lasting artwork.
Conclusion
Thinning oil paint correctly helps your artwork last longer. Use the right thinner to keep paint smooth and workable. Remember the “fat over lean” rule for strong layers. Start with thinner paint and add more oil in later layers. This prevents cracking and ensures good drying.
Practice patience and test your mix before painting. With time, thinning paint becomes easier and more natural. Keep these tips in mind to enjoy better oil painting results.