
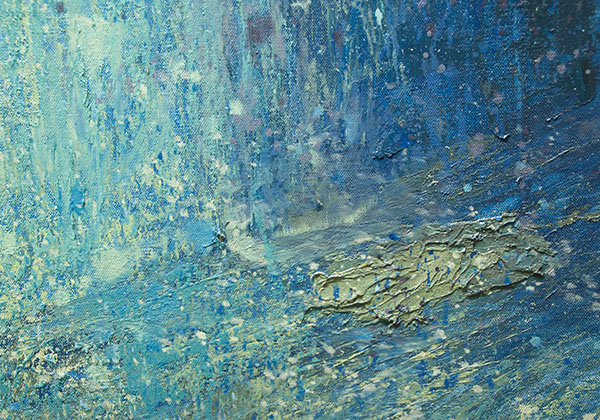
Quick answer: Layering techniques in oil painting build depth and texture by stacking paint in a planned order: a thin, lean underpainting for value, opaque block-in layers for form and color, then glazes (thin transparent layers) to deepen color, scumbles (thin semi-opaque layers) to soften and add atmosphere, and impasto (thick paint) for texture in the lights. Each layer must follow fat over lean and be dry enough before the next goes on.
A single layer of oil paint can be beautiful, but layering is what gives many oil paintings their glow, their sense of air and their tactile surfaces. Light passes through transparent layers and bounces off opaque ones underneath, creating color effects that are hard to mix directly on a palette. Thick paint catches real light and casts tiny shadows of its own.
This guide explains the main layering techniques in oil painting for depth and texture, the order they usually go in, how long to wait between them, and how to apply them in landscapes, portraits and still life.
How Layering Creates Depth
Layering works because oil paint can be opaque, semi-opaque or transparent depending on the pigment and how much medium is added.
- Opaque layers hide what is beneath them and reflect light from their surface. They create solid forms and strong lights.
- Transparent layers (glazes) let light pass through, reflect off lower layers and travel back out, picking up color twice. This creates depth and richness.
- Semi-opaque layers (scumbles) partially veil what is beneath them, softening contrast and adding a hazy, atmospheric quality.
- Thick layers (impasto) add physical texture that responds to real-world lighting.
Combining these lets you push some areas back, bring others forward, and make colors glow in ways a single layer rarely achieves. For a wider look at oil styles and the supplies behind them, see our oil painting guide with styles, expert tips and buying advice.
The Core Rules of Layering
Fat over lean
Each layer should be slightly more oil-rich (fatter) than the one below it. Early layers are thinned with solvent; later layers use more oil medium. This keeps upper layers flexible as lower layers continue to cure, reducing the risk of cracking.
Thick over thin
Thin layers generally go first, thick layers later. Heavy impasto underneath thin glazes can create uneven drying and makes later layers harder to control.
Slow-drying over fast-drying
Pigments dry at different rates. Earth colors such as burnt umber dry relatively quickly, while some whites, cadmiums and alizarin crimson tend to dry slowly. Placing fast-drying layers under slower ones is safer than the reverse.
Dry enough between layers
Most layering techniques, especially glazing and scumbling, require the layer beneath to be touch dry. Painting over a skinned-but-wet layer can trap soft paint underneath and lead to wrinkling or cracking.
List of Oil Painting Techniques for Layering
| Technique | What it is | Creates | Typical stage |
|---|---|---|---|
| Toned ground (imprimatura) | Thin transparent wash over the whole canvas | Unified color temperature; easier value judgment | First |
| Underpainting | Monochrome or limited-color value study | Structure, value pattern | Early |
| Dead coloring / block-in | Opaque color layer establishing local color | Form and color foundation | Middle |
| Glazing | Thin transparent layer over dry paint | Depth, richness, color shifts | Middle to final |
| Scumbling | Thin semi-opaque light layer over dry paint | Softness, atmosphere, haze | Middle to final |
| Velatura | Semi-transparent light-tinted layer | Subtle lightening and unifying | Middle to final |
| Impasto | Thick paint with visible brush or knife marks | Physical texture, emphasis on lights | Final |
| Dry brush / broken color | Lightly loaded brush dragged over texture | Sparkle, rough surfaces | Final |
| Sgraffito | Scratching into wet paint to reveal layer below | Fine lines, texture | Any wet stage |
A Classic Layering Sequence, Step by Step
This is a general indirect painting sequence. Not every painting needs every stage, but understanding the full sequence helps you choose.
- Tone the ground. Brush a thin wash of a transparent earth, such as burnt sienna or raw umber thinned with solvent, over a primed surface. Wipe back to an even mid-tone. Let it dry, often within a day.
- Draw the composition. Sketch in pencil, charcoal (fixed lightly) or thinned paint.
- Create the underpainting. Using a fast-drying earth color mixed with white or used transparently, paint the full value structure: shadows, mid-tones and lights. Keep it lean. Classical approaches include a brown underpainting (brunaille), a gray one (grisaille), or a green-gray one (verdaccio) for portraits.
- Block in color. Once the underpainting is dry, apply local colors in opaque or semi-opaque layers, following the established values. Keep this layer moderately thin and slightly fatter than the underpainting.
- Refine forms. In one or more layers, refine edges, transitions and details. Each layer slightly fatter than the last.
- Glaze for depth. Over dry paint, apply transparent glazes to deepen shadows, intensify colors or shift temperature. Use transparent pigments and a glazing medium.
- Scumble for atmosphere. Over dry paint, drag thin, semi-opaque light layers to soften distant areas or add haze.
- Add impasto and highlights. Finish with thicker paint in the brightest lights and focal areas.
Glazing Techniques in Oil Painting
Glazing is the technique most associated with layered oil painting depth.
Choosing glazing pigments
Transparent pigments glaze best. Examples include alizarin crimson (or permanent alternatives), ultramarine blue, phthalo blue and green, quinacridones, transparent oxide red and transparent yellow oxide, and many organic yellows. Opaque pigments such as cadmiums and titanium white do not glaze well on their own.
Glazing medium
Glazes need enough binder to stay strong when thinly spread. A glazing medium usually contains oil (often stand oil or linseed) and sometimes resin or alkyd. Solvent alone is not ideal for glazes, as it can leave the paint underbound.
How to apply a glaze
- Make sure the layer underneath is fully touch dry.
- Mix a small amount of transparent pigment into the medium until you get a thin, colored liquid.
- Brush it evenly over the area with a soft brush.
- Optionally, wipe back with a lint-free rag to lighten the glaze or reveal highlights.
- Let it dry before adding another glaze.
What glazing does well
- Deepens and enriches shadows without making them muddy.
- Unifies areas, for example warming all the skin in a portrait.
- Creates jewel-like color, such as red glazed over a light underpainting.
- Adjusts color temperature without repainting.
Scumbling and Velatura
Scumbling is the opposite effect to glazing. Instead of a transparent dark layer, it is a thin, semi-opaque light layer scrubbed or dragged over dry paint.
- Use it to: soften harsh contrast, push distant areas back, create mist and haze, or add a pearly quality to skin.
- How: load a stiff brush lightly with a light color plus a little medium, then scrub or drag it over the surface so the underlayer partly shows through.
- Watch for: chalkiness if the scumble contains too much pure white. Tint it with color.
Scumbling is especially useful for atmospheric subjects. Our guide on painting fog in oil shows how layered scumbles build convincing haze.
Velatura is closely related: a semi-transparent layer with a little white, used to lighten and unify an area without hiding it completely.
Oil Paint Texture: Impasto and Broken Color
Impasto
Impasto means applying paint thickly enough that brush or knife marks stand up from the surface. It draws attention and catches real light.
- Reserve impasto for lights and focal areas; thick shadows tend to look heavy.
- Use paint straight from the tube or with an impasto medium designed to add body.
- Apply in the final stages, since thick paint dries slowly and should sit on top.
- Palette knives create crisp, sculpted textures; stiff bristle brushes create ridged strokes.
Dry brush and broken color
Drag a brush lightly loaded with fairly stiff paint over a dry, textured surface. Paint catches on the high points, leaving broken strokes that sparkle. This is excellent for water glints, rough bark, stone and fabric.
Sgraffito
Scratch into wet paint with a brush handle or palette knife edge to reveal the layer below. Use it for grasses, hair, wood grain or signatures.
Oil Painting Techniques for Landscape Layering
- Underpainting: warm burnt sienna underpainting establishes the value pattern and adds warmth under cool greens and blues.
- Atmospheric depth: scumble cool, light veils over distant hills to push them back.
- Sky glow: glaze thin warm color near the horizon for sunsets.
- Foreground texture: impasto and dry brush for grass, rocks and highlights on water. Our guide to painting sand and beach scenes in oil shows how texture in the foreground and smoothness in the distance work together.
Oil Painting Techniques for Portraits
- Verdaccio or grisaille underpainting establishes form in neutral tones; cool underlayers can show through warm skin glazes for natural-looking flesh.
- Opaque modeling in the lights; thinner, more transparent paint in the shadows.
- Thin warm glazes over cheeks, lips and ears add life.
- Light scumbles soften skin texture and transitions.
- Small impasto highlights on the nose, forehead and eyes bring the face forward.
Layering in Still Life
Still life is an ideal place to practice layering because the subject stays put while each layer dries.
- Glass and ceramics: paint the object opaquely, let it dry, then glaze transparent color over shadow areas for depth. Add crisp, thick highlights last so they sit on top of everything.
- Fruit: a light, opaque underlayer glazed with transparent red or yellow can produce a glowing skin that is hard to mix directly.
- Metal: build reflections opaquely, then use thin dark glazes to deepen the darkest reflections and make the brightest highlights pop.
- Backgrounds: a thin glaze over a dry background can push it back and unify it, so objects stand forward more clearly.
Working on a small set of objects across three or four sessions is one of the most effective ways to learn how each layer changes the one beneath it.
Direct vs. Indirect Painting
| Direct (alla prima) | Indirect (layered) | |
|---|---|---|
| Sessions | One, wet-into-wet | Several, with drying between |
| Strengths | Fresh, spontaneous, fast | Depth, glow, precise control |
| Texture | Brushwork and impasto in one go | Built gradually; glazes and scumbles |
| Best for | Plein air, studies, expressive work | Detailed studio paintings, portraits, luminous effects |
Many painters combine the two: a direct block-in followed by selective glazing or scumbling once it dries.
Drying Times Between Layers
Times vary with pigment, thickness, medium, temperature and humidity. As a rough guide:
- Toned grounds and thin underpaintings: often touch dry within one to two days.
- Block-in layers: several days.
- Glazes: one to several days, depending on medium (alkyd mediums dry faster).
- Impasto: weeks to dry on the surface, longer to cure through.
Always test with a light touch in an inconspicuous area before adding the next layer.
Common Layering Mistakes
Glazing over wet paint
The glaze mixes with the layer below, creating mud instead of transparency.
Solvent-only glazes
Glazes thinned only with solvent can be weak and underbound. Use a glazing medium.
Too many glazes
Stacking many glazes can darken and muddy a painting. Plan each glaze’s purpose.
Impasto too early
Thick paint in early layers dries slowly and makes later layers risky.
Chalky scumbles
Too much white or too thick a layer makes scumbles look chalky. Tint them and keep them thin.
FAQs
What are the main layering techniques in oil painting?
The main techniques are toned grounds, underpainting, opaque block-in, glazing, scumbling, velatura and impasto. Together they build structure, depth and texture in a planned sequence.
How many layers should an oil painting have?
There is no fixed number. Some paintings are done in a single layer, while layered studio paintings may have an underpainting plus three to six additional layers, depending on the effects wanted.
What is the difference between glazing and scumbling?
Glazing is a thin transparent layer, usually darker, that deepens and enriches color. Scumbling is a thin semi-opaque layer, usually lighter, that softens and adds atmosphere.
How long should I wait between oil layers?
Wait until the layer is touch dry, which can range from one day for thin, fast-drying layers to a week or more for thicker ones. Test before painting over.
How do you add texture to an oil painting?
Use impasto with a palette knife or stiff brush, dry brush over textured surfaces, or sgraffito into wet paint. Add texture in the final layers, mostly in light areas.
Can beginners use layering techniques?
Yes. A simple toned ground, an underpainting and one glaze or scumble are a great introduction. Following fat over lean keeps layered work stable.
Final Thoughts
Layering is a toolbox, not a formula. Use underpainting for structure, opaque layers for form, glazes for depth, scumbles for atmosphere and impasto for texture, always following fat over lean and letting layers dry. Choose the tools a painting actually needs, and depth and texture will follow.
To find paints, mediums and surfaces suited to glazing, scumbling and impasto, browse our complete resource on oil painting techniques and recommended supplies.




