
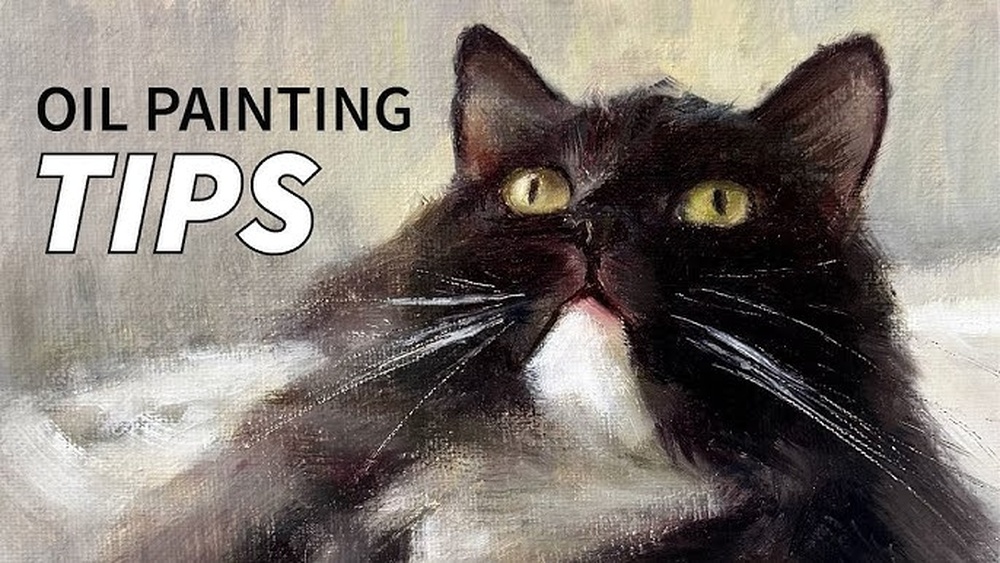
Quick answer: To paint cats in oil painting, draw the cat’s gesture and proportions first, paying close attention to eye placement, ear angle and the shape of the muzzle. Block in a thin underpainting of the main light and shadow masses, then paint the fur as large color areas that follow the direction of hair growth, softening the outer edges so the silhouette looks furry rather than cut out. Save sharp detail for the eyes, nose and a few whiskers, and finish with a bright catchlight in each eye.
Cats are popular subjects for good reason: expressive faces, elegant poses and endless variety in coat color and pattern. They are also easy to get subtly wrong. A cat painted with every hair carefully drawn can look stiff and flat, while one with misplaced eyes stops looking like the specific animal, or even like a cat at all. The best cat paintings balance accurate structure with soft, suggestive fur.
This guide shares practical tips for how to paint cats in oil painting, covering anatomy, references, a step-by-step process, fur and pattern, eyes and whiskers, and the mistakes that most often spoil pet portraits. For more on oil methods and styles overall, the guide to oil painting techniques and styles is a helpful companion.
Cat Anatomy That Affects Your Painting
Fur hides most of the skeleton, but certain structural facts show through and decide whether a painted cat looks believable.
- The head is broad and roughly circular from the front. The eyes sit about halfway down the head, with roughly one eye-width between them.
- The muzzle is a distinct form. It projects forward from the face like a small rounded box, with the nose at the front and the whisker pads on either side.
- Ears are triangles set on the sides of the top of the head, angled slightly outward. Their angle shows the cat’s mood: upright and forward when alert, flattened sideways when annoyed.
- The body is long and flexible. A sitting cat forms a pear or teardrop shape; a lying cat may curl into a near-circle.
- Legs are slim, with the hind legs bending sharply. Paws are rounded and compact.
- The tail is a flexible extension of the spine and often curls around the body or paws in a sitting pose.
Breeds vary considerably. Persians have flat faces and long fur; Siamese have wedge-shaped heads and large ears; Maine Coons have heavy, shaggy coats and ear tufts. Always check your specific reference.
Photograph to Oil Painting Tips for Cat Portraits
Since cats rarely pose on request, most cat paintings come from photos. Better references make a noticeably better painting.
- Shoot at the cat’s eye level. Photos taken from human height looking down distort the head and shrink the body.
- Use natural side light. Window light from one side reveals the form and fur texture. Avoid on-camera flash, which flattens the face and creates unnatural eye reflections.
- Take many shots. Expressions change in seconds. Choose a reference where the eyes are sharp and the pose is characteristic.
- Correct the photo’s flaws. Lift shadows that have gone black, add color to white fur that has blown out, and correct any lens distortion around the face.
- Know the cat if possible. For a pet portrait, ask the owner about coat color in daylight, since photos often shift colors.
Materials for Painting Cats in Oil
| Item | Suggestion |
|---|---|
| Surface | Smooth primed panel or fine canvas, 8 x 10 to 12 x 16 inches |
| Brushes | Size 6 to 10 filberts, size 2 to 4 filberts, size 0 and 1 rounds, a rigger, a soft fan or blender |
| Palette | Titanium white, yellow ochre, cadmium yellow light, cadmium red light, alizarin crimson, burnt sienna, burnt umber, raw umber, ultramarine blue, plus a green for some eye colors |
| Medium | Mineral spirits for the block-in; a little medium for fine fur and whiskers |
A worn or slightly splayed filbert is useful for fur. Its uneven bristles create natural, broken strokes.
How to Paint Cats in Oil Painting: Step-by-Step
Step 1: Draw the gesture and structure
Start with the overall shape of the body and the tilt of the head. Then construct the head: a circle, a horizontal line halfway down for the eyes, a vertical center line, and the muzzle as a smaller form at the bottom. Add the ears as triangles. Check eye spacing and the distance from the eyes to the nose carefully; these relationships define the individual cat.
Step 2: Underpaint the values
Using thin burnt umber or a mix of ultramarine and burnt sienna, paint the shadow side of the cat, the darkest markings, the eyes, nostrils and the cast shadow. Wipe out light areas with a rag. Following solid oil underpainting tips here, keep this layer lean and thin so it dries quickly and supports later layers.
Step 3: Paint the background
Block in a simple background in thin paint. Contrast helps: a dark background for a light cat, a lighter or complementary background for a dark cat. Bring the background slightly into the fur edges so you can soften them later.
Step 4: Block in the fur color masses
Paint the main areas of fur as large shapes with a light and shadow version of each color. Use brush strokes that follow the direction of hair growth: radiating from the nose across the face, flowing back over the head, and down the body and legs.
Step 5: Paint the eyes
Paint the iris color first, darker around its outer edge and under the upper lid where the lid casts a shadow. Paint the pupil, a vertical slit in bright light or a large round shape in dim light, using ultramarine and burnt umber. Add a thin dark rim around the eye. Leave the catchlight for the end.
Step 6: Paint the nose and mouth
The nose leather is often pink, gray or black, with a slightly glossy surface. Paint its top plane lighter and its sides darker, with dark nostrils. The mouth is a subtle line under the nose; avoid overdefining it.
Step 7: Add fur texture
With a smaller filbert or rigger, add strokes of lighter and darker fur within each mass, following the growth direction. Concentrate texture where light hits the fur and near the face. In shadow, keep fur smoother and less detailed.
Step 8: Soften the silhouette
Fur edges are soft. Drag short strokes outward from the cat into the background, and from the background into the cat, so the edge looks furry. Keep edges firmer only where the cat meets a sharp shadow or in very short-haired areas.
Step 9: Whiskers and ear hair
With a rigger and thinned light paint, pull whiskers out from the whisker pads in a single confident stroke each, tapering as you lift. Paint only a few, and break them where they cross similar-colored backgrounds. Add a few fine hairs inside the ears.
Step 10: Catchlights and final accents
Place a small, sharp catchlight in each eye, consistent with the light source. Add a few bright highlights on the nose and on the fur where light is strongest. Step back and check the expression.
Painting Different Coat Colors and Patterns
| Coat | Approach |
|---|---|
| Black | Use ultramarine and burnt umber; show form with cool blue-gray sheen where light reflects, never flat black |
| White | Paint mostly with light grays, warm creams and cool blues; reserve pure white for the brightest highlights |
| Orange tabby | Yellow ochre and burnt sienna base, cadmium red light for warm stripes, burnt umber in shadows |
| Gray (blue) | White, ultramarine and raw umber, warmed slightly in the light |
| Calico and tortoiseshell | Paint each color patch as its own mass, with soft, irregular boundaries between patches |
| Tabby stripes | Paint stripes after the base, curving around the form and softening at their edges |
Patterns must wrap around the cat’s three-dimensional form. A tabby’s stripes curve around the legs and body, compressing where the form turns away from you.
Oil Painting Tips and Tricks for Beginners Painting Cats
- Start with short-haired cats. Their structure is easier to read than long-haired breeds.
- Paint the head alone first. A head study teaches eye placement and fur direction without the complexity of the full body.
- Squint often. Squinting shows the big value masses and stops you from getting lost in fur detail.
- Do not paint every hair. Suggest fur with grouped strokes and soft edges.
- Use a mahlstick. Fine work on eyes and whiskers is easier when your hand is supported.
Oil Artist Painting Tips for Soft Fur Edges
The silhouette of a cat is where fur reads most clearly. A hard outline makes the cat look cut out; an entirely blurred edge makes it look out of focus. Vary the edges: soft and broken along the fluffy chest and back, slightly firmer where the cat’s form turns sharply or overlaps something. The same principle of lost and found edges is central to atmospheric painting, as shown in the guide on painting soft fog in oil.
Composing a Cat Portrait
A technically strong cat can still sit in a dull composition. A few decisions before you start make the painting more engaging.
- Choose the crop. A head-and-shoulders crop puts all the attention on the face and eyes. A full-body view shows posture and personality, such as a cat curled on a cushion or stretched on a windowsill.
- Place the eyes off-center. In a head study, positioning the eyes slightly above the middle of the canvas and a little to one side usually looks more natural than dead center.
- Give the gaze room. If the cat looks to one side, leave more space in that direction so it does not appear to stare at the canvas edge.
- Use props sparingly. A blanket, a basket or a patch of sunlight adds context, but keep them simpler and lower in contrast than the cat.
- Think about light as mood. Warm afternoon light through a window suggests a lazy, cozy scene. Cool, soft light feels calm and quiet. Strong side light emphasizes texture and drama.
Before committing, make two or three small thumbnails with different crops and value patterns. The one that reads most clearly at a small size is usually the strongest painting.
Common Mistakes When Painting Cats
- Eyes misplaced or misaligned. Even a small error changes the cat’s expression and likeness.
- Hard outline around the body. Fur edges must be soft.
- Every hair painted. It flattens the form and looks artificial.
- Flat black or white fur. Both need color, value variation and reflected light.
- Too many whiskers. A few confident strokes look more natural.
- Missing catchlights. Without them, eyes look dull and lifeless.
Related Reading
FAQs
What colors do you need to paint a cat in oil?
Titanium white, yellow ochre, burnt sienna, burnt umber, raw umber, ultramarine blue, cadmium red light and cadmium yellow light cover most coats. Add a green for green or hazel eyes.
How do you paint realistic cat fur in oil?
Paint fur as large color masses first, then add strokes that follow the direction of hair growth, concentrating texture in the light. Soften the silhouette so the edges look furry.
How do you paint cat eyes in oil?
Paint the iris darker at its edge and under the upper lid, add the pupil with ultramarine and burnt umber, outline the eye with a thin dark rim and finish with a sharp catchlight.
What are the best oil painting tips for beginners painting pets?
Use a good, eye-level reference with side light, draw the structure carefully, underpaint values, and focus detail on the eyes and nose while keeping fur suggestive.
How do you paint whiskers in oil?
Use a rigger with thinned light paint and pull each whisker in a single tapering stroke from the whisker pad. Paint only a few and break them where they cross similar colors.
How long does a cat oil painting take?
A small head study can take two to four hours. A detailed full-body pet portrait may take several sessions over a few weeks so layers can dry.
Final Thoughts
A convincing painted cat rests on accurate structure, especially the eyes, ears and muzzle, combined with fur painted as soft, directional masses and edges that melt into the background. Keep detail for the face and the expression will carry the painting. For more subjects, techniques and practical advice on oil materials and styles, visit our oil paintings guide with styles and buying tips.




