
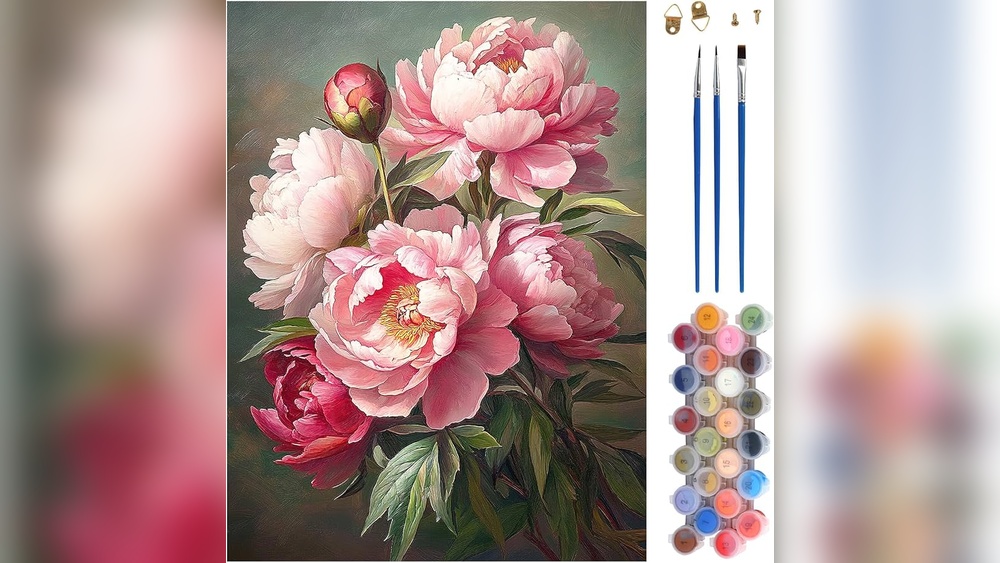
Quick answer: To paint a peony for DIY wall art, start with a loose circular or cup-shaped outline, then build the flower from the inside out in layers. Paint a dark, compact center of tightly packed petals, surround it with larger, ruffled cupped petals, and finish with a few broad outer petals that open outward. Use at least three values of pink or white (shadow, mid-tone and highlight), paint petal edges lighter than their bases, and keep the outer petals looser than the center. Acrylics on a 16×20 inch or larger canvas give room for the full, lush look peonies are known for.
Peonies are one of the most loved flowers in home décor. Their full, ruffled blooms suggest luxury and romance, and they suit everything from classic traditional rooms to modern glam bedrooms. They also have a reputation for being hard to paint, because dozens of petals overlap in every direction. The trick is to stop thinking about individual petals and think in zones: a dense center, a cupped middle and loose outer petals.
This guide breaks down how to paint a peony for wall art DIY projects, with a layered acrylic method, color recipes, a loose impressionistic option and ideas for multi-bloom arrangements.
Understand the Structure of a Peony
Peonies vary by variety, but the popular double and bomb-type peonies used in décor share a similar structure:
- Center: A tight cluster of small, crinkled petals, often darker or more saturated, sometimes with a hint of yellow stamens peeking through in semi-double varieties.
- Cup: Medium-sized petals curving inward around the center, forming a bowl shape.
- Guard petals: Large, broad outer petals that open outward and often droop slightly at their tips.
- Leaves: Deep green, divided leaves with pointed lobes, often glossy.
- Buds: Tight, round balls, sometimes showing a hint of color, which add interest to arrangements.
Supplies
| Item | Suggested | Why |
|---|---|---|
| Canvas | 16×20, 20×20 or 24×30 inches | Peonies look best large and full |
| Paints | Titanium white, quinacridone magenta or permanent rose, cadmium red light, alizarin crimson or a permanent alternative, yellow ochre, sap green, phthalo green, burnt umber, dioxazine purple | Covers pink, coral, red and white peonies |
| Brushes | Filberts (sizes 6, 10 and 14), 1 inch flat, size 4 round, liner | Filberts create natural petal edges |
| Medium | Slow-drying or glazing medium | Extra blending time for soft petals |
| Other | Spray bottle, palette knife, chalk | Keeps paint workable; loose sketching |
Pinks and magentas vary widely in strength between paint grades. Low-pigment paints can turn chalky when mixed with white, while stronger pigments stay vibrant. Our comparison of the best paints for wall art explains how pigment load affects bright floral colors.
Art Supplies for DIY Floral Painting: Keep the Palette Tight
Peonies look most natural with a limited palette. For pink peonies, three pigments plus white are enough: a cool pink (quinacridone magenta), a warm red (cadmium red light) and a dark (alizarin crimson with a touch of purple or burnt umber). For white peonies, use white with tiny amounts of yellow ochre for warmth and purple or blue for cool shadows. A focused palette keeps colors harmonious and makes mixing easier.
How to Paint a Peony for Wall Art DIY: Step-by-Step
Step 1: Paint the Background
Choose a background that flatters pink or white flowers. Soft gray, sage, dusty blue, cream and deep navy all work. Blend two close tones loosely with a large brush for a soft, out-of-focus look. Let it dry.
Step 2: Sketch the Bloom
Lightly draw a circle or oval for the overall bloom. Inside, mark a smaller off-center circle for the dense center. Draw a few loose curved lines for cup petals and larger shapes for the outer guard petals. Keep the sketch minimal; you will paint the petals, not trace them.
Step 3: Block In the Dark Center
Mix a deep pink from magenta, alizarin and a touch of purple. Paint the center area with small, overlapping filbert strokes, curving inward. This dark core gives the peony depth.
Step 4: Paint the Cup Petals
Mix a mid-tone pink with magenta and white. Paint medium petals around the center, curving them inward so they wrap the center like a bowl. Each petal should be slightly darker at its base (near the center) and lighter at its edge. Blend while wet, misting the canvas if needed.
Leave small dark gaps between some petals to suggest overlapping layers.
Step 5: Paint the Guard Petals
Mix a lighter pink with more white. Paint the large outer petals with broad filbert strokes, opening outward. Let some edges flip or curl, showing a lighter underside. Guard petals often have a slightly different, paler tone than the center.
Step 6: Add Shadows
Return to the darker mix and deepen shadows where petals overlap, under curled edges and at the base of the bloom where it meets the leaves. Soft, gradual shadows make the flower look rounded.
Step 7: Add Highlights
Mix a pale pink-white. With a small filbert or round, paint thin highlights along the top edges of petals and on curled tips facing the light. Keep highlights crisp on the front petals and softer toward the back.
Step 8: Leaves and Stems
Mix greens from sap green, phthalo green and a touch of burnt umber or red to tone them down. Paint leaves with filbert strokes, pressing and lifting to create pointed lobes. Add a lighter green on top surfaces and a darker green in shadows.
Step 9: Final Touches
Add a few tiny yellow ochre dots in the center if your peony type shows stamens. Paint a few loose petal fragments or a bud nearby. Step back and adjust contrast so the bloom reads clearly from across the room.
Peony Color Recipes
| Peony color | Shadow | Mid-tone | Highlight |
|---|---|---|---|
| Classic pink | Magenta, alizarin, touch of purple | Magenta plus white | White with a hint of magenta |
| Coral | Cadmium red light, alizarin | Cadmium red light, white, a hint of yellow | White with a touch of coral mix |
| White | White, purple and yellow ochre (soft gray) | White with a hint of yellow ochre | Pure white |
| Deep red | Alizarin with burnt umber | Alizarin and cadmium red | Cadmium red with a little white |
| Blush | Pink mix with a touch of burnt umber | White with a little pink and ochre | White |
Painting Light on Peony Petals
Peony petals are thin and slightly translucent, so light behaves in interesting ways that you can use to add realism.
- Backlighting: When light comes from behind, petal edges glow. Paint a thin, warm, lighter rim along edges facing away from the viewer.
- Cupped petals: The inside of a cup is often darker at the bottom and lighter on the far inner wall, which catches the light. Paint the near wall in shadow and the far wall lighter.
- Reflected color: Shadows inside the bloom often pick up warmer, more saturated color from neighboring petals. Slightly warmer, richer pinks in the deepest shadows look more natural than grayish ones.
- Curled edges: When a petal curls back, its underside usually shows a different value. Paint the curl with a crisp, light edge and a small shadow just underneath it.
Pick one light direction at the start, mark it with a small arrow on the edge of the canvas, and check every highlight against it.
Session Plan
| Stage | Approximate time on 16×20 |
|---|---|
| Background and drying | 45 minutes |
| Sketch and dark center | 20 minutes |
| Cup and guard petals | 60 to 90 minutes |
| Shadows, highlights and refinement | 45 to 60 minutes |
| Leaves, stems and buds | 30 minutes |
A first peony often takes longer. Breaking the work into two sessions, with the bloom finished in the first and leaves and refinements in the second, keeps the process relaxed.
Loose, Impressionistic Peonies
If detailed petals feel overwhelming, try a looser style. Load a large filbert with two colors at once (for example, pink on one side and white on the other) and paint petals with single, curved strokes. The colors blend on the canvas as you work. Leave edges unfinished and allow background color to show between strokes. This style is quick, expressive and very popular in modern décor.
DIY Large Canvas Art Ideas for Beginners With Peonies
- Oversized single bloom: One peony filling a 30×30 inch canvas, slightly cropped at the edges.
- Three-bloom arrangement: A large open peony, a half-open bloom and a bud, arranged in a triangle.
- Peony triptych: Three canvases, each with one bloom in pink, blush and white.
- Abstract peony: Loose color swirls with a few defined petals and gold leaf accents.
For a softer companion piece, the textured strokes in our guide to pampas grass wall art balance the fullness of peonies in a gallery arrangement.
DIY Art Kits for Adults: Helpful or Limiting?
Floral DIY art kits for adults, including paint-by-number peony designs, can be a relaxing way to try the subject without planning composition or mixing colors. They teach patience and layering. The limitation is that numbered areas flatten the petals into separate shapes, and the small paint pots rarely allow soft blending. Once you finish a kit, painting a peony freehand with a limited palette is a natural next step.
Common Mistakes
- Painting every petal the same. Vary size, shape and value.
- No dark center. Without depth at the core, the peony looks flat.
- Chalky pinks. Too much white dulls color. Use strong pigments and add white gradually.
- Uniform edges. Mix crisp and soft edges for depth.
- Bright green leaves straight from the tube. Tone greens down so they do not compete with the bloom.
- Overworking. Constant blending muddies petals. Place strokes and leave them.
Painting Peony Buds and Half-Open Blooms
Buds and partly open flowers add a sense of time and growth to an arrangement. A tight bud is a sphere: paint it in a mid-tone green or pink with a highlight on one side and a shadow on the other, then wrap two or three small sepals around its base. A half-open bloom shows a few petals peeling away from a still-closed center. Paint the center as a smaller version of the bud, then add three or four cupped petals opening outward on one side only. Including one of each alongside a fully open peony gives a classic, natural-looking composition.
Finishing and Display
Let the painting dry for at least 24 hours. A satin or gloss varnish enriches pinks and deep greens. Peony art suits bedrooms, dressing areas, dining rooms and feminine office spaces. Pair it with gold or white frames for a classic look, or hang a large frameless canvas for a modern feel. Keep floral paintings out of strong direct sun where possible, since bright pinks and magentas are among the colors most prone to fading over time.
Related Reading
FAQs
How do you paint a peony step by step?
Paint the background, sketch a loose circle and center, block in a dark center, add cup-shaped petals around it, paint broad outer petals, then add shadows, highlights and leaves.
What colors do you need to paint pink peonies?
A cool pink like quinacridone magenta, a warm red, a dark such as alizarin crimson, white and greens for leaves. Purple or burnt umber helps deepen shadows.
What brush is best for painting peony petals?
Filbert brushes in several sizes. Their rounded tips naturally create petal shapes and soft edges.
Are peonies hard to paint for beginners?
They can be challenging because of overlapping petals, but breaking the flower into a dark center, cupped middle and loose outer petals makes it manageable. A loose impressionistic style is also beginner-friendly.
What are good art supplies for DIY flower painting?
Quality acrylics in a limited palette, several filbert brushes, a slow-drying medium, a canvas sized for your wall, and a varnish to protect the finished piece.
How do you paint white peonies?
Use white with tiny amounts of yellow ochre for warm areas and soft gray-purple for shadows. Place the flower against a mid-tone or dark background so the white petals stand out.
Final Thoughts
Peonies reward patience. Work in zones, keep a dark center and lighter outer petals, and use a tight palette for natural color. Vivid pinks depend heavily on pigment strength, so before your next floral canvas, look over our recommendations for vibrant acrylic and craft paints for floral décor.




