
Creating your own geometric wall art can transform a plain room into a vibrant, modern space—without the need to buy expensive artwork. Many people think this project is only for artists, but with simple tools and a little planning, anyone can make bold, beautiful wall art at home. You do not need advanced skills, just patience and a clear guide. This article walks you through every step, from choosing your design to adding the finishing touches, so you can enjoy a personalized piece that reflects your style.
Why Choose Geometric Wall Art?
Geometric patterns are popular for several reasons. First, they suit almost every interior style, from minimalist to bohemian. Second, they can make small rooms feel bigger or add energy to blank spaces. Unlike complex murals, geometric art relies on straight lines and simple shapes, making it perfect for beginners and DIY lovers.
People also like geometric art because it lets you play with color, symmetry, and scale. You can choose calm, neutral tones for a peaceful effect or bold colors for a dramatic look. Geometric shapes are easy to adjust, so your design can be as simple or as complex as you want.
Planning Your Geometric Wall Art
Before you start painting, a little planning goes a long way. Rushing in without a clear idea often leads to mistakes and wasted time.
Pick The Right Wall
Not every wall is ideal for geometric art. Choose a wall that is:
- Free of windows and doors (for a clean look)
- Not too crowded with furniture
- Visible from the main areas of your room
Accent walls—like the one behind your bed or sofa—are popular choices. If you are unsure, use painter’s tape to outline a section and imagine how it will look.
Decide On A Design
There are endless options, but here are common geometric patterns:
- Triangles (classic and dynamic)
- Hexagons (modern, honeycomb style)
- Diamonds (bold and striking)
- Stripes or chevrons (clean, energetic lines)
- Random polygons (for a playful look)
Sketch a few ideas on paper. For your first project, simple shapes or repeating patterns are easiest to tape and paint. More complex designs require careful measuring.
Choose Your Color Scheme
Color choice can change the mood of your room. Use no more than three to four colors for a balanced look. Consider this:
- Monochrome (different shades of one color) creates harmony
- Complementary colors (opposite on the color wheel) add contrast
- Analogous colors (next to each other on the color wheel) feel relaxing
If you want to see how colors might look, try free online tools like Adobe Color or paint brand websites.
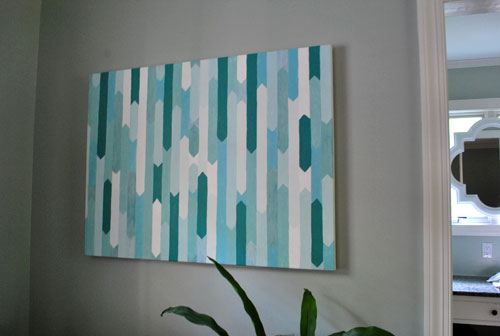
Credit: www.younghouselove.com
Gathering Materials And Tools
Having the right materials makes the process smoother. Here is what you need:
- Painter’s tape (1–2 inch wide, low-tack)
- Measuring tape or ruler
- Pencil (not pen or marker)
- Level (for straight lines)
- Drop cloths or old sheets (protect your floor)
- Paint rollers (small and medium sizes)
- Angled paintbrushes (for edges and small areas)
- Acrylic or wall paint (choose interior, matte or eggshell finish)
- Paint tray
- Sandpaper (medium-fine grit)
- Masking film or old newspapers (for covering areas)
- Gloves and old clothes
- Step ladder (if painting high areas)
- Eraser and clean rag
You may also want a sample board (like a large piece of cardboard) to test colors before painting your wall.
Cost Comparison
Here’s a quick look at what you might spend on this project compared to buying geometric art:
| Option | Average Cost | Notes |
|---|---|---|
| DIY Geometric Wall Art | $40–$100 | Varies by paint and tool quality |
| Ready-Made Wall Art (large) | $150–$600 | Framed and delivered |
DIY saves money, and you get a one-of-a-kind result.
Preparing Your Wall
Start with a clean, smooth surface. Any dust or bumps will show through your paint.
- Remove all wall decorations, nails, and outlet covers.
- Clean the wall with a damp cloth and mild soap if needed.
- Sand rough spots lightly for a smooth finish.
- Fill holes with spackling paste, let dry, then sand again.
- Wipe off any dust with a dry cloth.
If your wall is a dark color and you want light geometric shapes, consider applying a primer first. Let it dry fully before taping your design.

Credit: casawatkinsliving.com
Drawing And Taping Your Design
This is the most important step. Take your time—rushed taping leads to uneven lines.
Measuring And Marking
- Use a measuring tape and pencil to mark key points of your design.
- For straight lines, use a level.
- Lightly sketch the shapes you want to paint. Don’t press too hard; you’ll erase the lines later.
Applying Painter’s Tape
- Stick the tape just outside your pencil lines, so you paint inside the shape.
- Press tape edges down firmly to stop paint from leaking underneath.
- For tight corners or angles, tear tape into smaller pieces.
- Double-check symmetry and spacing before painting.
Tape Types Comparison
| Type | Best For | Notes |
|---|---|---|
| Standard Blue Tape | Most surfaces | Easy to remove, low risk of damage |
| FrogTape (Green) | Sharp paint lines | Special gel blocks bleeding |
| Yellow Delicate Tape | Fresh paint or wallpaper | Less sticky, for sensitive walls |
Painting Your Geometric Wall Art
Now The Fun Part Begins!
Painting Steps
- Protect your floor with a drop cloth.
- Pour paint into the tray.
- Start with light colors first. Paint one color at a time, letting each dry before moving to the next.
- Use a small roller for large shapes and an angled brush for edges.
- Apply two coats if needed. Allow each coat to dry fully (check paint can for drying times).
- Peel off the tape before the final coat is completely dry. This helps create crisp edges.
Paint Finishes Comparison
| Finish | Look | Durability | Best For |
|---|---|---|---|
| Matte | Soft, no shine | Medium | Modern, low-traffic rooms |
| Eggshell | Slight sheen | High | Family rooms, easy to clean |
| Satin | More shine | Very high | Kitchens, bathrooms |
Helpful Painting Tips
- Test colors on a sample board first.
- Don’t overload your brush—too much paint causes drips.
- Paint edges carefully to avoid going over the tape.
- Clean mistakes quickly with a damp cloth.
- Work in daylight if possible; colors look different at night.
Finishing Touches
After your last paint coat, wait at least one hour before removing tape. Pull the tape off slowly and at a 45-degree angle. If you see any minor leaks, touch them up with a small brush.
Let the wall dry completely before putting furniture back or hanging decorations. Clean your brushes and rollers right away.
Extra Details
- Frame your design with a thin painted border for a finished look.
- Add metallic or neon accents for a trendy touch.
- Use stencils inside shapes for added texture.
Common Mistakes And How To Avoid Them
Even with careful planning, beginners often make a few mistakes:
- Not pressing tape edges down: Causes fuzzy lines. Always run your finger along the tape.
- Painting too soon after taping: If paint seeps under, wait a few minutes for the tape to settle.
- Leaving tape on too long: Pull off tape before paint dries fully, or the paint may peel.
- Skipping primer: Dark walls can bleed through. If changing from dark to light, always prime first.
- Ignoring drying times: Rushing coats leads to smudges.
An advanced tip: If you want razor-sharp lines, seal the tape edge with a thin layer of your wall’s base color before painting your geometric color. This helps block leaks.
Showing Off Your New Art
Once dry, your wall is ready to enjoy. Move furniture back, add simple decor, and watch your space come alive. Take photos in natural light to capture the true colors and lines.
If you want, share your work on social media or creative platforms. You might inspire friends to try their own geometric wall art.
Where To Learn More
For more inspiration, search interior design blogs, Pinterest, or watch DIY videos on YouTube. The Architectural Digest website has examples from top designers.

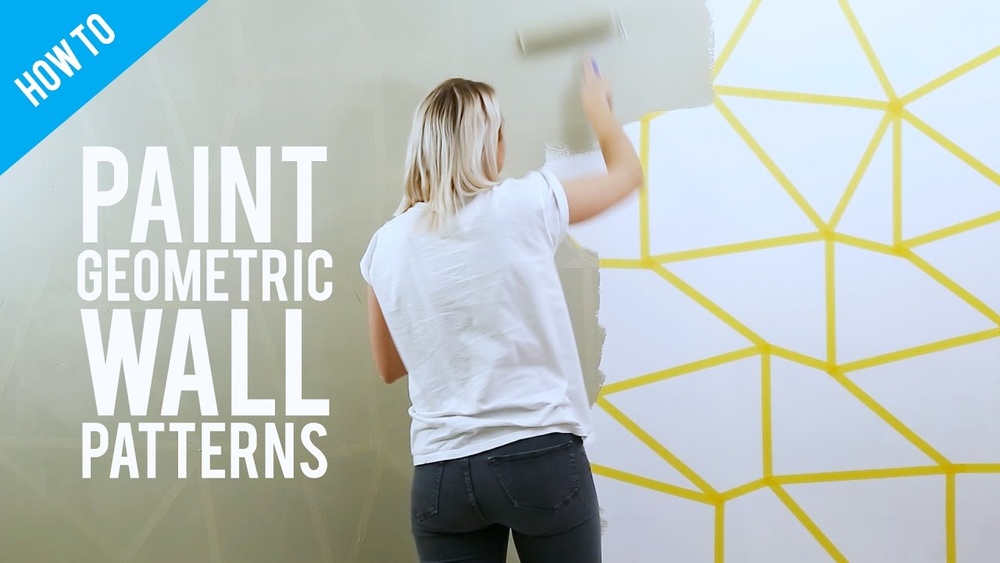
Credit: www.youtube.com
Frequently Asked Questions
How Long Does It Take To Paint Geometric Wall Art?
Most projects take 1–2 days. This includes time for planning, taping, painting, and drying. Simple designs or small walls can be finished in a few hours, but allow more time for complex patterns or multiple colors.
Can I Paint Geometric Art On Textured Walls?
Yes, but getting crisp lines is harder. Press tape edges down very firmly and use a small brush to seal tape edges with base color before painting your main colors. Some small paint bleed may still happen on very rough surfaces.
What Kind Of Paint Is Best For Geometric Wall Art?
Use interior latex paint with a matte or eggshell finish for most walls. These paints are easy to clean up and give a smooth look. For accent details, try acrylic craft paints. Always check that new colors look good with your wall’s lighting.
How Do I Fix Mistakes In My Design?
Wait for the paint to dry, then use a small brush and your base wall color to touch up any smudges or leaks. For bigger changes, lightly sand the area, wipe clean, and repaint.
Do I Need To Seal Or Protect The Painted Wall?
For most rooms, no extra sealant is needed if you use good-quality wall paint. In kitchens or bathrooms, consider a clear, matte topcoat for extra protection against moisture and stains.
Creating your own geometric wall art is a rewarding project that adds style and personality to any room. With careful planning and the right tools, you can achieve a professional look—even if you’ve never painted before. Take your time, enjoy the process, and soon you’ll have a wall that’s truly your own.


