
You want to bring the wild beauty of a wolf to life on your canvas, and acrylic paint is the perfect tool to do it. But where do you start?
How can you capture the wolf’s fierce eyes, textured fur, and powerful presence without feeling overwhelmed? This guide will walk you through every step, breaking down the process into simple, manageable parts. By the end, you’ll have the skills and confidence to create a stunning wolf painting that stands out.
Ready to unlock your artistic potential and paint a wolf that feels almost alive? Let’s dive in!
Materials And Tools
Gathering the right materials and tools helps create a beautiful wolf painting. Acrylic paint offers bright colors and quick drying time. Choosing proper brushes and supplies makes the process smooth and enjoyable.
Below are the essentials you need to start painting a wolf with acrylics.
Selecting Acrylic Paints
Choose high-quality acrylic paints for vibrant colors. Basic colors like white, black, brown, and gray are essential for wolf fur. Add blues and reds for shadows and highlights. Use artist-grade paints for better coverage and blendability.
Choosing Brushes
Use a variety of brushes for different details. Flat brushes help cover large areas quickly. Round brushes work well for fine lines and fur texture. A fan brush can create soft, natural fur effects. Select brushes with synthetic bristles made for acrylics.
Additional Supplies
Prepare a palette for mixing colors. Use a canvas or acrylic paper as your painting surface. Keep a jar of water nearby to clean brushes. Paper towels help remove extra paint and clean edges. Use a palette knife for mixing or adding texture.

Credit: stepbysteppainting.net
Preparing Your Canvas
Preparing your canvas is the first step in painting a wolf with acrylic paint. A well-prepared surface helps your paint stick better and last longer. It also enhances the colors and details of your artwork.
Spend time getting your canvas ready. This foundation sets the tone for your entire painting process.
Surface Selection
Choose a canvas suitable for acrylic paint. Cotton and linen canvases work well. Linen is stronger and smoother but costs more. Cotton is affordable and easy to find. Pick a size that fits your wolf painting idea. Stretched canvases offer a firm surface. Canvas boards can be handy for practice or smaller works.
Priming Techniques
Priming your canvas improves paint adhesion and color brightness. Use gesso, a white primer made for acrylics. Apply one or two coats with a wide brush or roller. Let each coat dry completely before adding the next. Sand lightly between coats for a smooth finish. A well-primed canvas prevents paint from soaking in and keeps colors vivid.
Sketching The Wolf
Sketching the wolf is the first step in creating a beautiful acrylic painting. It sets the foundation for your artwork. A clear sketch helps capture the wolf’s form and character. Start simple and build up the details gradually. This approach keeps your painting accurate and balanced.
Basic Shapes And Proportions
Begin by drawing simple shapes to represent the wolf’s body parts. Use circles for the head and chest. Add ovals for the legs and snout. This helps you place the wolf’s parts correctly on the canvas. Check the size and distance between shapes. Keep proportions natural to avoid distortions. Use light pencil strokes to make changes easy. Focus on the overall pose and structure first.
Refining Details
After the basic shapes look right, start adding details. Sketch the eyes, nose, and ears with more care. Outline the jawline and fur direction. Pay attention to the wolf’s expression. Small details bring life to your drawing. Erase unnecessary lines to clean up the sketch. Your refined sketch guides the painting process smoothly. Take your time to capture the wolf’s unique features well.
Blocking In Base Colors
Blocking in base colors sets the stage for your wolf painting. It creates a simple color map for the entire artwork. This step helps to organize the composition and guide later details. Use broad brush strokes and cover large areas quickly. Focus on shapes and tones, not fine lines. Let the paint dry before adding more layers. This method builds a strong foundation for your acrylic painting.
Background Layers
Start with the background before painting the wolf. Choose colors that match the mood of your scene. Use soft, muted tones to keep focus on the wolf. Apply paint evenly with a large brush. Blend colors smoothly to avoid harsh lines. Let the background dry to prevent mixing with foreground colors. A well-painted background adds depth to your artwork.
Wolf’s Primary Color
Pick the main color for the wolf’s fur. This color covers most of the body and sets the tone. Use a medium brush to fill in the wolf’s shape. Paint with flat, even strokes to block in this color quickly. Avoid details in this step; focus on size and placement. The base color acts as a guide for shadows and highlights later. Choose a color that fits the wolf species you want to paint.
Adding Shadows And Highlights
Adding shadows and highlights brings your wolf painting to life. These elements create a sense of volume and realism. Shadows add darkness where light is blocked. Highlights show where light hits the wolf’s fur directly. Using both helps your painting look three-dimensional.
Creating Depth
Start by identifying the darkest parts of the wolf’s fur. Use a darker shade of your base color for shadows. Apply this paint gently to areas like under the chin, behind the ears, and along the body curves. Avoid hard edges; blend shadows softly into the mid-tones.
For highlights, pick a lighter color with a small touch of white or yellow. Paint on the raised fur areas where light naturally falls. This includes the nose bridge, top of the head, and tips of the ears. Thin layers work best to keep the texture natural.
Light Source Considerations
Decide where your light source is coming from before shading. Shadows will fall opposite this light. For example, if the light is from the left, shade the right side of the wolf more.
Keep the light direction consistent throughout the painting. This creates a believable scene and helps the wolf stand out. Use soft brushes for highlights to mimic soft light on fur. Hard brushes can be used for sharp shadows near the edges.
Painting Wolf Fur
Painting wolf fur requires patience and attention to detail. The fur’s texture brings life and realism to your artwork. Using acrylic paint, you can create soft, layered fur that looks natural and full of depth.
Focus on small brush strokes and build layers carefully. This approach captures the complexity of wolf fur, from thick undercoat to long guard hairs. The right techniques make your wolf painting stand out.
Brush Stroke Techniques
Use short, quick strokes to mimic the look of fur strands. Thin brushes work best for fine hairs around the face and edges. For thicker fur areas, use a fan brush or stiff bristle brush. Vary the pressure to create different lengths and directions. Always follow the natural flow of the fur for a realistic effect. Avoid uniform strokes; irregularity adds to the texture.
Layering For Texture
Start with a base layer of mid-tone colors representing the wolf’s main fur color. Let it dry before adding darker shades for shadows. Use a dry brush technique to add lighter colors on top. Build layers slowly to create depth and volume. Each layer adds dimension and makes the fur look fluffy. Blend some areas softly while leaving others sharp for contrast. This layering process helps capture the wild, rugged look of wolf fur.
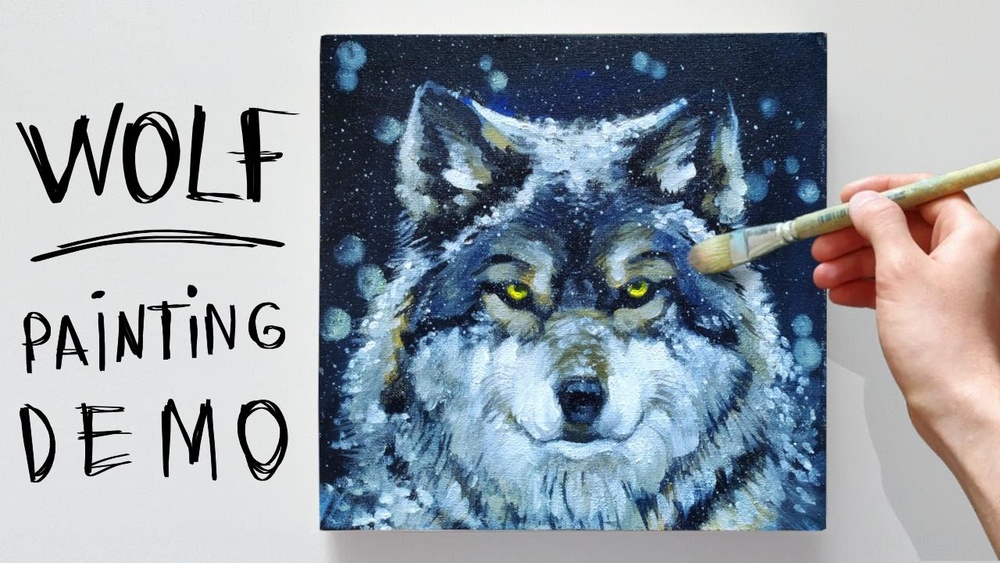
Detailing Facial Features
Detailing the facial features of your wolf painting brings life and character to the artwork. These small touches make the wolf look realistic and expressive. Pay close attention to the eyes, nose, and mouth. These areas hold the key to showing emotion and personality in your painting.
Eyes And Expression
Start with the eyes. Use a small, fine brush to paint the iris and pupil. Choose colors like amber, brown, or gray for a natural look. Add a tiny white dot to mimic light reflection. This creates a lively sparkle.
Shape the eyes carefully to match the wolf’s gaze. Slightly angled eyes give a fierce or alert look. Rounder eyes can show calmness or curiosity. Use darker shades around the eye to add depth and shadow. This defines the shape and adds realism.
Nose And Mouth
For the nose, use dark gray or black acrylic paint. Paint the nose tip with a slightly rounded shape. Add texture by layering small strokes to show roughness.
Highlight the nostrils with a lighter shade inside the dark base. This gives a three-dimensional effect. The mouth should be subtle but clear. Use thin brush strokes for the lips and outline the shape lightly.
Include small details like whisker spots and slight fur lines around the mouth. These details make the wolf’s face feel alive and detailed. Keep your brush controlled and steady for these final touches.

Credit: www.youtube.com
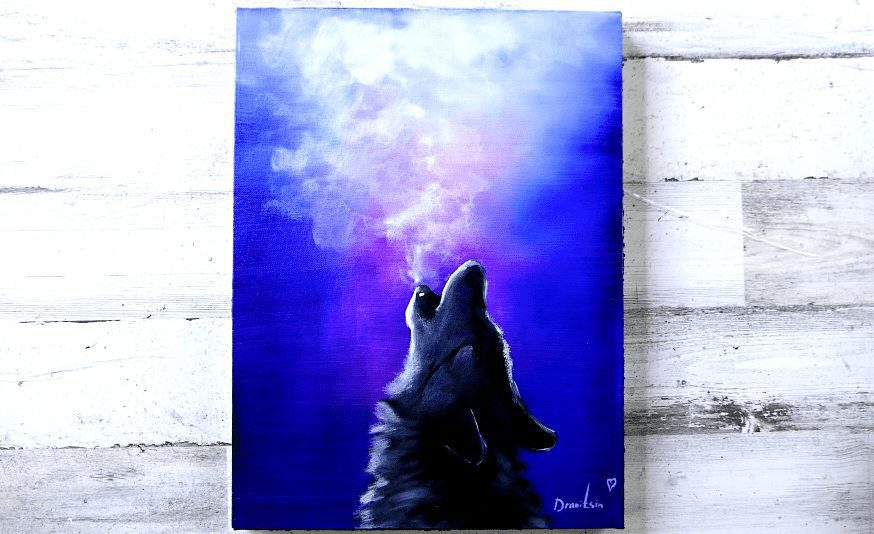
Enhancing The Background
Enhancing the background of your acrylic wolf painting brings depth and life to the artwork. It sets the scene and gives the wolf a natural place to exist. A simple background can make the wolf stand out more. A detailed background can tell a story.
Focus on colors and shapes that do not distract from the wolf. Use softer tones and blurred edges for distant parts. This makes the wolf the main focus. The background should support, not compete with the subject.
Adding Environment Elements
Include natural elements that fit the wolf’s habitat. Trees, rocks, and grass add realism. Paint these with loose strokes to keep the focus on the wolf. Use muted colors for these elements. This creates a calm and balanced scene.
Think about the season and time of day. Snowy branches or autumn leaves add mood. Simple shapes work better than detailed ones. These touches make your painting feel alive and natural.
Balancing Composition
Arrange background elements to balance the wolf’s position. Use shapes and colors to guide the viewer’s eye. Avoid placing heavy details only on one side. Spread visual weight evenly across the canvas.
Empty spaces help the wolf stand out. Use gradients or soft color shifts to create depth. Keep the background subtle but interesting. A balanced composition makes your painting pleasing and complete.
Final Touches
Adding final touches to your acrylic wolf painting brings it to life. This stage enhances details and protects your artwork. Take your time to make every stroke count. Small refinements can create a big impact on the overall look.
Fine Detailing
Use a fine brush for small details like fur strands and whiskers. Carefully add highlights to the eyes to give them a lively shine. Paint subtle shadows around the nose and mouth for depth. Work slowly and check your painting from a distance. This helps spot areas that need sharpening or softening.
Sealing Your Painting
Apply a clear acrylic varnish to protect your painting. Choose a matte or glossy finish based on your preference. Use a soft brush or spray varnish evenly over the entire surface. This step prevents dust and moisture damage. Let the varnish dry completely before handling your artwork.
Credit: urartstudio.com
Frequently Asked Questions
What Materials Do I Need To Paint A Wolf With Acrylics?
You need acrylic paints, brushes of various sizes, a canvas, palette, water cup, and paper towels. Optional items include a pencil for sketching and a palette knife for texture.
How Do I Start Painting A Wolf With Acrylic Paint?
Begin by sketching the wolf’s outline lightly on the canvas. Then, apply a base coat of colors, focusing on the wolf’s main shapes and shadows before adding details.
Which Brush Techniques Work Best For Wolf Fur?
Use dry brushing for soft fur texture and fine liner brushes for detailed hair strands. Layer colors gradually to create depth and realistic fur effects.
How Can I Achieve Realistic Wolf Eyes In Acrylic Paint?
Paint the eyes with multiple layers starting from dark tones to lighter highlights. Add small white reflections to give the eyes a lifelike shine and depth.
Conclusion
Painting a wolf with acrylics takes patience and practice. Start with simple shapes to build the wolf’s form. Use layers to add depth and texture. Focus on the eyes to bring life to your painting. Remember, mistakes help you improve your skills.
Enjoy the process of creating your wolf artwork. Keep painting and experimenting with colors and brushes. Each painting will get better with time. Let your creativity guide you as you explore acrylic painting.


