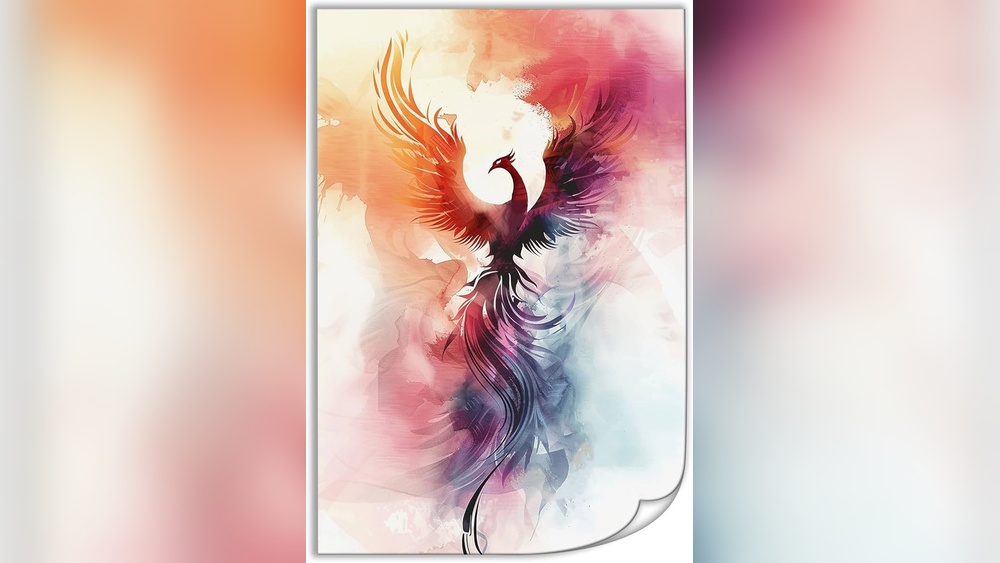
Quick answer: To paint watercolor style wall art, choose either real watercolor on heavy 140 lb (300 gsm) or thicker cold-press paper, or thinned acrylic on a white canvas for a durable, watercolor-look piece. Work light to dark: wet the area, drop in pale color and let it bloom, dry completely, then glaze stronger layers and add a few crisp details. Leave plenty of white space, which is what makes the piece read as “watercolor.”
The watercolor look is soft edges, transparent color, blooms where pigment spreads into water, and lots of breathing room. It’s one of the most popular styles for home decor because it feels light in almost any room. The good news is that you can get it two ways: with true watercolor on paper, or with diluted acrylic on canvas that you can hang without glass.
This step-by-step guide covers both routes, from supplies and composition to painting, finishing and framing. If you’re deciding which paints to buy for a canvas piece, our guide to the best paints for wall art covers acrylic and craft options that thin well.
Choose Your Route: Real Watercolor or Watercolor-Style Acrylic
| Factor | Watercolor on paper | Thinned acrylic on canvas |
|---|---|---|
| Look | Most authentic blooms and granulation | Very close, slightly less luminous |
| Forgiveness | Low; hard to cover mistakes | Higher; dried layers can be painted over |
| Rewetting | Paint lifts if rewet | Permanent once dry; layers stay put |
| Hanging | Needs a frame with glass or acrylic glazing | Can hang unframed once varnished |
| Size | Usually up to about 22 x 30 inches | Canvas can go much larger |
| Best for | Classic prints, gallery walls | Large statement pieces, kitchens and bathrooms |
If this is your first piece, either route works. Acrylic is more forgiving; watercolor gives the most genuine result.
Supplies
For watercolor on paper
- Cold-press watercolor paper, 140 lb (300 gsm) or heavier. Cotton paper handles washes and re-wetting better than cellulose student paper.
- Artist or student watercolors, in pans or tubes.
- Round brushes (size 8–12) and a 1 inch flat or mop brush for washes.
- Masking tape or a gummed tape and a rigid board.
- Two water jars, paper towels, a pencil and a kneaded eraser.
For watercolor-style acrylic on canvas
- A white primed canvas or canvas panel; a smooth surface gives the cleanest washes.
- Fluid acrylics, acrylic inks or soft-body acrylics, which thin more evenly than heavy-body paint.
- Acrylic glazing medium or a flow medium to extend transparency.
- Soft synthetic brushes, a spray bottle and a sponge.
- A satin or matte varnish for finishing.
Plan a Composition That Reads as Watercolor
The watercolor style is defined as much by what you leave out as what you paint. Before picking up a brush:
- Pick a simple subject. Florals, botanicals, feathers, abstract color fields, seascapes and mountains all suit the style.
- Leave 30–50% white space. Edges that fade into bare paper or canvas are part of the look.
- Limit the palette. Three to five colors that relate to the room keep the piece harmonious. Analogous schemes (for example blue, teal and green) are especially calm.
- Sketch lightly. Use a hard pencil (2H or H) and minimal lines; graphite can show through transparent paint.
- Do a thumbnail. A 3 x 4 inch sketch shows whether the shapes balance before you commit.
How to Paint Watercolor Style Wall Art on Paper, Step by Step
- Tape the paper. Tape all four edges to a board. This limits buckling and leaves a clean white border.
- Wet the first area. With a clean wide brush, wet the shape you’re painting (for example a flower head or the sky) with clean water until it has an even sheen, not puddles.
- Drop in pale color. Load a brush with a light, tea-like mix and touch it into the wet area. Let the pigment spread on its own. Add a second color while it’s still wet to get soft blends.
- Tilt to guide. Tip the board gently to move color where you want it. This is how soft gradients form.
- Dry completely. Wait until the paper has lost its sheen and feels room-temperature, not cool, to the back of your hand. A hair dryer on low speeds this up, held at a distance.
- Glaze stronger layers. Paint a slightly darker, more concentrated mix over parts of the dry first layer to add shape and depth. Each glaze should cover less area than the one below.
- Add details wet-on-dry. With a smaller round brush and thicker paint, add crisp edges, veins, stems or shadows. Keep these minimal.
- Add accents. Optional splatters, created by tapping a loaded brush over the paper, add energy. Cover areas you want to protect with scrap paper.
- Remove the tape slowly, pulling away from the painting at a low angle, only once everything is bone dry.
Water-to-paint ratios that help
Many teachers describe watercolor consistency with kitchen terms: “tea” for very pale washes, “milk” for mid-tones, “cream” for strong color and “butter” for the darkest details. The first layers of wall art usually stay in the tea-to-milk range.
How to Paint Watercolor-Style Wall Art with Acrylic on Canvas
- Prepare the canvas. A coat of gesso, lightly sanded when dry, gives a smoother, more paper-like surface.
- Thin the paint. Mix fluid acrylic with a glazing medium and some water until it is transparent. Using medium rather than water alone helps the paint stay bound and adhere well when heavily diluted.
- Mist the canvas. Lightly spray the area with water so thin paint spreads softly.
- Apply color in blooms. Drop thin color into the damp area and let it travel. Tilt the canvas to guide it. Dab away excess with a sponge for soft, lighter edges.
- Dry between layers. Thin acrylic dries quickly, often in 10–20 minutes. Once dry, it won’t lift, so you can glaze over it freely.
- Build depth. Add progressively more concentrated glazes in smaller areas.
- Finish with details using slightly thicker paint and a small round brush.
- Varnish. Once fully cured (wait a few days for thicker passages), brush on a satin or matte varnish to protect the surface and even out the sheen.
Acrylic can’t be lifted the way watercolor can, so lighten areas by leaving them unpainted, not by trying to remove paint later.
Watercolor Art for Beginners: Easy Wall Art Ideas
- Loose botanical leaves: a single-stroke leaf repeated in greens and blues.
- Abstract color field: three overlapping wet-in-wet blooms in an analogous palette.
- Misty mountains: three layered mountain ridges, each darker than the last.
- Feathers: a soft central shaft with blooming color. Our guide on painting a feather for wall art walks through the shape.
- Pampas grass: dry-brush plumes in warm neutrals. See our pampas grass wall art tutorial.
- Ocean horizon: a graded blue wash, a thin white gap for light on the water, and a darker band below.
Choosing colors that suit the room
Wall art lives with furniture, textiles and paint colors, so choose the palette with the room in mind. Pull one or two colors from cushions, rugs or curtains and use them as your main washes. Add a neutral, such as a soft gray mixed from ultramarine and burnt sienna, to tie everything together. If the walls are a strong color, a piece with mostly white space and a limited palette usually looks cleaner than a busy, saturated one. Cool blues and greens tend to feel calm in bedrooms and bathrooms, while warm ochres, corals and terracottas feel inviting in living and dining areas.
Watercolor Pencil Art Ideas for Wall Decor
Watercolor pencils give more drawing control. Sketch with the pencils, then brush clean water over the marks to dissolve them into washes. They’re useful for:
- Line-and-wash botanicals, where pencil lines stay partly visible.
- Small series of three or four matching prints.
- Adding fine texture, such as feather barbs or leaf veins, over dried washes.
Watercolor brush pens work similarly and are handy for lettering or quotes that pair with painted elements.
Using Glazing Medium for Watercolor Art
Watercolor glazing mediums, usually based on gum arabic or a similar binder, can increase transparency and help layers stay put when glazed over, depending on the product. For acrylic watercolor-style pieces, an acrylic glazing medium does a similar job and is almost essential for very thin washes. Test any medium on scrap first; some add gloss.
Sizing and Planning for a Wall
A piece that looks right on the table can look tiny on a wall. Think about where it will hang before choosing a size.
- Above a sofa or bed: art about two-thirds the width of the furniture tends to look balanced. For a 7-foot sofa, that’s roughly a 48–56 inch wide piece, or a group of smaller pieces spanning that width.
- Gallery wall: a set of three or four matching 11 x 14 or 12 x 16 inch paintings in the same palette looks cohesive.
- Narrow spaces: tall, vertical compositions such as botanical stems or pampas plumes suit hallways and spaces beside doors.
If you want a larger piece than a full sheet of watercolor paper allows, the acrylic route on canvas is usually more practical.
Creating a matching series
Series look intentional when they share a few constants. Use the same three to five colors, the same amount of white space, a similar scale of subject and the same type of paper or canvas. Paint them in one session if you can, using the same premixed washes, so the colors match closely. Small differences in subject (three different leaves, or three stages of a sunset) keep the set interesting.
Common Mistakes
- Overworking. Brushing back and forth over a wet wash lifts and muddies it. Put color down and leave it.
- Not letting layers dry. Painting into a half-dry wash creates hard-edged “cauliflower” blooms where you don’t want them.
- Too many colors. More than five colors usually looks busy on a wall.
- Filling the whole surface. White space is essential to the style.
- Thin paper. Paper under 140 lb buckles badly with wet washes.
- Diluting acrylic with water alone, heavily. Extreme dilution without medium can weaken adhesion; use a glazing or flow medium.
Framing and Hanging Your Wall Art
- Watercolor on paper: frame behind glass or UV-filtering acrylic with an acid-free mat, so the glazing doesn’t touch the paint. Standard mat and frame sizes (such as 11 x 14 inches with an 8 x 10 inch opening) keep costs down.
- Acrylic on canvas: varnish, then hang as-is, or add a simple floater frame.
- Placement: keep pieces out of strong direct sunlight, which can fade some pigments over time, and away from bathroom steam unless sealed and glazed.
- Height: a common guideline is to center art about 57–60 inches from the floor.
FAQs
What paper is best for watercolor wall art?
Cold-press watercolor paper at 140 lb (300 gsm) or heavier. Cotton paper handles repeated washes and soft blending better than cellulose paper, and heavier weights buckle less.
Can I make watercolor style art with acrylic paint?
Yes. Thin fluid or soft-body acrylic with glazing medium and water, then apply it in transparent layers on a white surface. It dries permanent, so you can layer freely, and it can hang without glass once varnished.
Is watercolor art for beginners hard to learn?
Watercolor takes practice because it’s hard to correct, but simple wall art subjects such as leaves, abstract blooms and layered mountains are very achievable. Working light to dark and letting layers dry are the two most important habits.
How do you protect watercolor wall art?
Frame it behind glass or acrylic glazing with a mat to keep the surface from touching the glazing. Hang it away from direct sun and humidity. Some painters also apply a spray fixative or varnish designed for watercolor, but test it first.
What are easy watercolor pencil art ideas for walls?
Line-and-wash botanicals, feather studies, simple mushrooms, citrus slices and small landscape vignettes all work well. Draw with the pencils, then activate with a damp brush, leaving some lines visible.
How many colors should I use for watercolor wall art?
Three to five usually look best. An analogous palette feels calm, while a single complementary accent adds a focal point without clutter.
Final Thoughts
Whichever route you choose, the formula is the same: simple subject, light-to-dark layers, patient drying and lots of white space. For a large canvas piece built with diluted acrylic, the paint you start with matters; our guide to choosing acrylic and craft paints for wall art highlights options that thin smoothly and hold color.