Are you ready to unlock a powerful secret that can make your oil paintings truly come alive? The glazing technique is the key to adding stunning depth, rich color, and a luminous glow to your work—effects that many artists spend years trying to achieve.
Whether you’re just starting out or looking to refine your skills, this guide will walk you through simple, clear steps to master glazing in oil painting. By the end, you’ll have the confidence to create layers that enhance every detail and give your art a vibrant, professional finish.
Dive in and discover how glazing can transform your paintings and elevate your artistic expression like never before!
Credit: www.annabregmanportraits.co.uk
Glazing Basics
Understanding the basics of oil painting glazing is key to adding depth and richness to your artwork. Glazing involves applying thin, transparent layers of paint over a dry base layer. This method allows colors to glow and interact in unique ways.
Each glaze changes the look of the colors underneath. This creates effects that are hard to achieve with thick, opaque paint alone. Beginners can learn to control light and shadow by mastering this simple yet powerful technique.
What Is Glazing
Glazing is a painting method where artists apply thin, see-through layers of paint. These layers are placed over a fully dried, solid base layer. The glaze changes how light passes through the paint, giving a luminous effect.
The layers are often made with oil paint mixed with a medium to make them transparent. This technique builds color gradually. It helps create smooth transitions and realistic textures.
Benefits Of Glazing
Glazing adds depth and vibrancy to paintings. It enhances color richness without thick paint. This method also creates a smooth surface that catches light beautifully.
It allows corrections and improvements without damaging earlier work. The layers dry slowly, giving artists time to refine details. Glazing can make portraits and landscapes appear more lifelike.
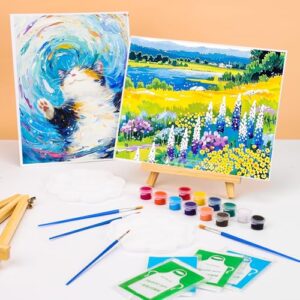
Materials Needed
Start with high-quality oil paints and a drying base layer. Use glazing mediums like linseed oil or specialized glazing medium to thin your paint. These help keep the paint transparent and smooth.
Soft brushes work best for even glaze application. A palette knife can mix paint and medium well. Also, have clean rags or paper towels ready for any adjustments.
Preparing Your Canvas
Preparing your canvas is the first step to a successful oil painting glazing technique. A well-prepared surface ensures smooth paint application. It also helps colors shine through each glaze layer. This section guides you through key preparation steps.
Choosing The Right Surface
Select a surface that holds paint well. Linen and cotton canvases are popular choices. Linen is stronger and lasts longer. Cotton is more affordable and easy to find. Panels and boards offer a smooth, firm surface. Make sure the surface is properly primed with gesso. This prevents paint from soaking into the fibers. A smooth surface helps glazes appear clear and even.
Underpainting Techniques
Start with a monochrome underpainting. Use neutral colors like burnt umber or gray. This sets the value and tone of your artwork. The underpainting guides your glaze layers. Keep it thin and let it dry well. This layer creates depth and contrast. It supports the transparent colors you will add later.
Drying Time Importance
Let each layer dry fully before glazing. Oil paint can take days or weeks to dry. Patience is key to avoid mixing or muddiness. Dry layers allow the glaze to sit on top. This enhances color vibrancy and clarity. Use a drying medium or thin layers to speed drying. Proper drying keeps your painting clean and bright.
Mixing Glazes
Mixing glazes is a key step in oil painting glazing. It controls the paint’s transparency and depth. Proper mixing helps create smooth, clear layers that glow with color. Understanding how to blend pigments and mediums is essential. These layers should be thin enough to let light pass through. This section explains how to mix glazes for vibrant effects.
Selecting Pigments
Choose pigments with strong tinting strength and transparency. Some colors are naturally more transparent than others. For example, alizarin crimson and burnt sienna work well. Avoid opaque pigments like titanium white or cadmium red. They block light and reduce glaze clarity. Use colors that enhance depth without dulling the base layer.
Mediums For Transparency
Mix pigments with oil mediums to increase transparency. Linseed oil is common for a smooth finish. Stand oil creates a glossy, slow-drying glaze. Alkyd mediums speed drying and keep gloss. Avoid thick mediums that make paint heavy or cloudy. The right medium thins paint and boosts light reflection.
Creating Thin Paint Layers
Thin paint enough to spread easily in light coats. Use a palette knife or brush to mix pigment and medium well. Apply the glaze in a fluid, even layer over dry paint. Thin layers avoid cracking or peeling later. Multiple thin glazes build rich color depth better than thick layers. Patience is key for a luminous finish.
Applying Glazes
Applying glazes is a key step in the oil painting glazing technique. It involves placing thin, transparent layers of paint over a dried base. These layers add depth, richness, and luminosity to your artwork. Each glaze must be applied carefully to enhance the colors below without hiding them.
Glazing requires patience and attention to detail. The paint should be mixed with a medium to increase transparency. The surface must be dry before adding new layers to avoid smudging or cracking. Proper application creates a glowing effect that draws viewers into the painting.
Brush Selection
Choose soft, wide brushes for smooth glaze application. Natural bristle brushes work well for spreading thin layers evenly. Avoid stiff brushes as they can disturb previous layers. Small detail brushes help in delicate areas where precision is needed. Clean brushes thoroughly between layers to keep colors clear.
Layering Methods
Start with thin, transparent paint mixed with medium. Apply each glaze in smooth, even strokes. Let every layer dry fully before adding the next. Build up color gradually to avoid heavy, opaque results. Use lighter colors first, then add darker tones to deepen shadows and highlights. Layering creates a rich, luminous surface.
Avoiding Common Mistakes
Do not apply glazes on wet paint to prevent blending issues. Avoid thick paint as it blocks light and loses transparency. Skip rough brush strokes that break smooth glaze layers. Don’t rush drying times; moist layers cause cracking. Avoid using too much medium, which can weaken the paint film. Careful technique keeps glazes clear and vibrant.
Enhancing Color And Depth
Enhancing color and depth in oil painting creates a captivating visual experience. This technique uses thin, transparent layers to enrich the base colors. Each layer adds richness and luminosity, making the painting appear alive. The process demands patience but rewards with vibrant results that simple brushwork cannot achieve.
Understanding how to control transparency and color interaction is key. Glazing helps artists produce subtle shifts in tone and light. It adds complexity to shadows and highlights without harsh lines. This section explores practical glazing methods that boost your artwork’s brilliance and dimension.
Building Vibrant Layers
Start with a solid, dry base layer for best results. Apply thin coats of translucent paint over it gently. Each layer should be smooth and even to avoid streaks. Let each glaze dry fully before adding the next. This slow buildup creates glowing colors that seem to come from within. Use a soft brush to maintain the delicate surface. Layering multiple glazes intensifies the color depth dramatically.
Balancing Opacity And Transparency
Control the mix of paint and medium to adjust glaze transparency. More medium means thinner, more transparent layers. Less medium thickens the glaze for stronger color impact. Experiment to find the right balance for your desired effect. Transparent glazes let light pass and reflect off lower layers. Opaque layers block light and create solid color areas. Combining both types adds complexity and realism to your painting.
Using Complementary Colors
Complementary colors lie opposite each other on the color wheel. Layering these colors in glazes creates vibrant contrasts and depth. For example, a blue glaze over an orange underlayer makes colors pop. Use this technique to add warmth or coolness to shadows and highlights. Avoid overusing complements to prevent muddy colors. Thoughtful color pairing enhances the painting’s visual interest and harmony.

Credit: willkempartschool.com
Advanced Glazing Techniques
Advanced glazing techniques in oil painting create stunning effects that simple layers cannot achieve. These methods add depth, richness, and luminosity to your artwork. Patience and precision are key. Each glaze layer must dry completely before applying the next. This process builds vibrant colors and realistic textures. Understanding how to use glazing in different subjects enhances your skill and creativity.
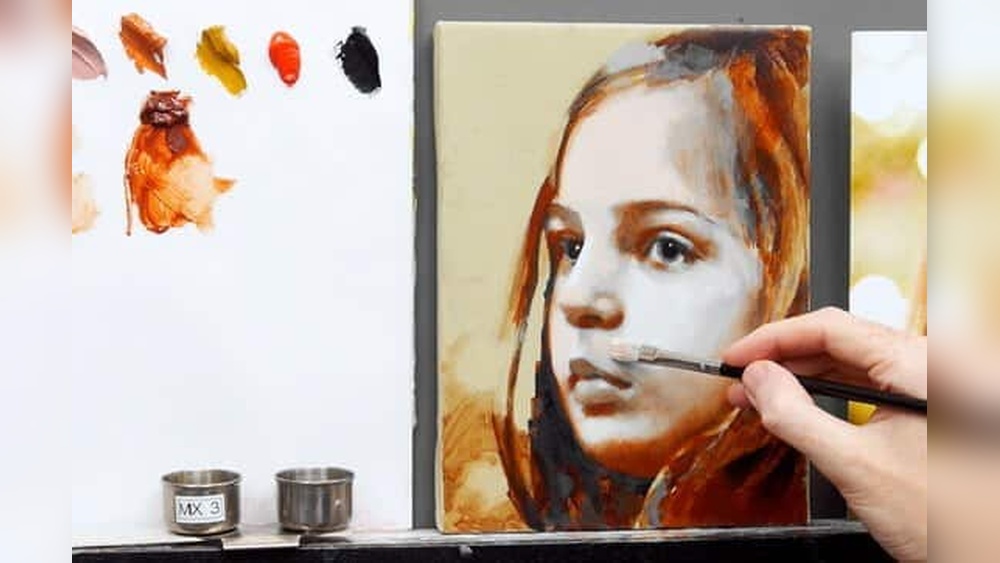
Glazing In Portraits
Glazing in portraits helps capture lifelike skin tones and subtle shadows. Start with a detailed underpainting to define shapes and values. Apply thin, transparent layers of color to build warmth and depth. Use warm glazes to mimic blood flow beneath the skin. Cool glazes add shadow and contour. This layering creates a glowing, three-dimensional effect. Avoid thick paint to keep the transparency clear. Soft brushes help blend glazes smoothly for natural transitions.
Landscape Glazing Tips
In landscapes, glazing enhances atmosphere and light effects. Begin with a solid base layer showing main shapes and tones. Use cool glazes for distant skies and warm glazes for sunlight areas. Thin your paint with medium for smooth, even coats. Build color gradually to avoid muddy results. Glazing can simulate mist, haze, or water reflections. Experiment with layering colors to enrich natural scenes. Let each glaze dry fully to keep colors vibrant and clear.
Combining Glazing With Other Techniques
Glazing works well with techniques like impasto and scumbling. Use impasto for texture in foreground details. Apply glazes over impasto to soften highlights and unify colors. Scumbling adds a broken, textured look under glazes. This contrast enhances depth and interest. Mix glazing with dry brushing for delicate color shifts. Each technique complements the other, creating complex and rich paintings. Plan your layers carefully for best results. Patience ensures a refined final image.
Troubleshooting Glazing Issues
Oil painting glazing is a delicate process that demands patience and precision. Sometimes, issues arise that can frustrate even the most careful artist. Troubleshooting glazing problems helps keep your artwork vibrant and smooth. Understanding common challenges lets you fix mistakes and improve your technique quickly.
This section covers key solutions to typical glazing issues. Learn how to fix muddy colors, prevent cracking, and speed up drying time.
Fixing Muddy Colors
Muddy colors happen when glazes mix improperly. Thin glazes with too much medium can lose pigment strength. Avoid this by using transparent pigments and fewer layers. Let each layer dry fully before adding the next. Clean your brush well to prevent unwanted mixing. Correcting muddy colors requires patience and careful layering for clarity and depth.
Dealing With Cracking
Cracking appears when paint layers dry unevenly or too fast. Thick glazes trap moisture under thin layers, causing cracks. Use thinner, more even layers of glaze. Wait longer between coats to allow proper drying. Use a slow-drying medium to keep the paint flexible. Proper surface preparation and gentle brush strokes also reduce cracking risks.
Speeding Up Drying Time
Drying oil paint can be slow, delaying your glazing process. Use a drying medium with alkyd oils to speed up drying. Keep your painting in a warm, well-ventilated area. Thin layers dry faster than thick ones. Use a fan or natural airflow to improve air circulation. Faster drying helps you add more glaze layers in less time, improving workflow.
Famous Artists And Glazing
Many famous artists have used the glazing technique to create stunning oil paintings. This method allows for rich colors and deep shadows. It builds layers that catch the light in unique ways. Artists from different periods have adapted glazing to fit their style and vision.
Understanding their work can inspire painters today. It shows how glazing adds life and depth to art. Let’s explore the secrets and styles of these artists.
Old Masters’ Secrets
Old Masters like Rembrandt and Titian used glazing to add glow and realism. They applied many thin layers of transparent paint. Each layer changed the color and light beneath it. This gave their paintings a glowing effect. Their careful layering created depth and richness.
They mixed pigments with oil mediums to make thin, smooth glazes. Patience was key, as each layer needed to dry. This slow process gave their art a unique vibrance.
Modern Interpretations
Modern artists use glazing but often with faster drying oils or mediums. They mix traditional ideas with new materials. Some use acrylics under oil glazes for quick drying. Others combine glazing with texture or bold brush strokes.
This flexibility keeps glazing alive and fresh. It helps artists create luminosity and subtle color shifts. The technique adapts to express modern themes and styles.
Inspiration From Vermeer
Johannes Vermeer is famous for his smooth, glowing surfaces. His glazing technique made his paintings look almost like light itself. He applied very thin glazes over a detailed underpainting.
This gave soft transitions between light and shadow. Vermeer’s work shows how glazing can create calm and realism. Artists still study his method to learn about light and color layering.
Tools And Resources
Using the right tools and resources is key for successful oil painting glazing. These help you apply thin, transparent layers smoothly. Choosing quality brushes, mediums, and learning materials makes the process easier and more enjoyable.
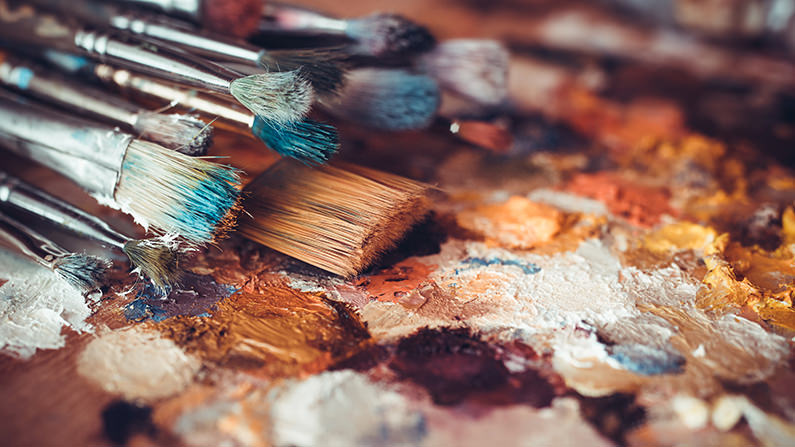
Recommended Brushes
Soft, wide brushes work best for glazing. Look for natural bristle or synthetic brushes with smooth tips. Fan brushes and flat brushes allow even application. Small detail brushes help with fine areas. Clean brushes carefully after each use to keep them soft.
Mediums And Additives
Glazing needs mediums that thin paint without losing color. Linseed oil is a classic choice for smooth, transparent layers. Stand oil creates a glossy finish and slows drying. Liquin speeds drying and improves flow. Avoid thick mediums that block light and reduce transparency.
Online Tutorials And Courses
Free videos and paid courses teach glazing step-by-step. Look for clear instructions and demonstrations. Many artists share tips on brush handling and layering. Practice along with tutorials to improve skills. Online art schools offer structured lessons for all levels.

Credit: www.sadievaleriatelier.com
Frequently Asked Questions
What Is The Oil Painting Glazing Technique?
Glazing in oil painting means applying thin, transparent layers of paint. Each layer sits over a dried, opaque base, enhancing depth and luminosity. This technique builds richness in colors and creates a glowing effect in the artwork.
How Do I Prepare My Painting For Glazing?
Ensure the base layer is completely dry before glazing. Use a smooth, even underpainting to allow transparent layers to show clearly. Proper drying prevents mixing and preserves the clarity of each glaze layer.
What Mediums Are Best For Oil Paint Glazing?
Use glazing mediums like linseed oil or stand oil mixed with a small amount of solvent. These mediums increase paint transparency and flow, helping thin layers adhere smoothly without losing color intensity.
How Many Glaze Layers Should I Apply?
Apply multiple thin layers, usually 3 to 5, depending on desired depth. Each layer must dry fully before adding the next. Thin layers prevent cracking and maintain the painting’s luminosity.
Conclusion
Oil painting glazing adds rich depth and vibrant color to artworks. It uses thin, transparent paint layers over dry paint. This simple method creates glowing effects and fine details. Patience matters; each glaze must dry fully before the next. Practice glazing to see how colors blend and shine.
Experiment with different mediums and pigments for best results. Keep your brush soft and strokes gentle to avoid disturbing layers. This technique brings life and luminosity to your paintings. Try glazing to enhance your oil painting skills today.