Are you ready to transform your old or plain picture frames into stunning décor pieces? Painting DIY picture frames is a simple way to add personality and style to your home without breaking the bank.
But how do you make sure your paint job looks smooth, lasts long, and highlights your photos perfectly? In this guide, you’ll discover easy tips and tricks that anyone can follow—even if you’ve never picked up a paintbrush before. Keep reading to learn how to prepare your frames, choose the right paint, and create a flawless finish that will make your pictures truly shine.
Your next favorite home project starts here!
Choosing Paint Types
Choosing the right paint type is essential for a successful DIY picture frame project. Different frame materials need specific paints to achieve a smooth, lasting finish. Understanding paint types helps avoid peeling, cracking, or uneven color. This guide explains the best options for wood, metal, and plastic frames.
Best Paints For Wood Frames
Wood frames work well with latex and oil-based paints. Latex paint dries fast and cleans easily with water. Oil-based paint offers a durable finish but takes longer to dry. Use a primer first to seal the wood and improve paint adhesion. Satin or semi-gloss finishes add subtle shine and protect the frame.
Spray Paints For Metal And Plastic
Spray paint is perfect for metal and plastic frames. It creates an even coat without brush marks. Choose spray paint labeled for metal or plastic to ensure proper sticking. Clean the frame before painting to remove dust and oils. Several thin coats are better than one thick coat to prevent drips and runs.
Acrylic Paint Uses
Acrylic paint works on many surfaces, including wood and plastic. It is water-based, non-toxic, and dries quickly. Acrylics offer vibrant colors and good coverage. For extra durability, seal the paint with a clear acrylic spray or varnish. Acrylic paint is great for detailed designs and small projects.
Preparing Frames For Painting
Preparing picture frames for painting is a crucial step in any DIY project. Proper preparation ensures the paint sticks well and lasts longer. It also helps you avoid uneven surfaces and peeling paint. Follow simple steps to clean, sand, and prime your frames before painting. This makes a big difference in the final look.
Cleaning And Sanding Tips
Start by wiping the frame with a damp cloth. Remove dust, dirt, and grease completely. Use mild soap if needed, then dry the frame fully. Sand the frame gently with fine-grit sandpaper. Focus on rough spots and old paint layers. Sanding creates a smooth surface and helps paint adhere better. Wipe off sanding dust before priming or painting.
Using Primer Effectively
Primer seals the surface and improves paint adhesion. Choose a primer suitable for your frame material. Apply a thin, even coat of primer with a brush or spray. Let the primer dry completely before painting. This step reduces the number of paint coats needed. It also prevents blotchy or uneven paint finish on your frame.
Handling Different Frame Materials
Wood frames need light sanding and a wood-friendly primer. Metal frames require a rust-resistant primer to prevent corrosion. Plastic frames benefit from a primer designed for plastics. Avoid skipping primer on plastic and metal frames. It helps paint stick and prevents peeling. Knowing your frame material guides you to the right prep steps and paint choices.
Painting Techniques
Painting techniques can change the look of your DIY picture frames. Choosing the right method makes your frame look smooth and neat. Different tools and styles give different finishes. Understanding these techniques helps you get better results.
Small details and corners need special care. Multiple coats improve color and durability. Knowing when to brush or spray paint saves time and effort.
Brushing Vs Spray Painting
Brushing gives you control over small areas. Use a soft brush for smooth strokes. Brush painting works well on wood frames. It allows for careful detail work.
Spray painting covers large surfaces quickly. It creates a smooth, even finish. Spray paint works best on metal or plastic frames. Keep the can 6-12 inches away for best results. Use light coats to avoid drips.
Painting Corners And Details
Corners are tricky to paint well. Use a small brush to reach tight spaces. Paint slowly to avoid paint buildup. Thin layers prevent drips in corners. Details like carvings need gentle brushing. Take time to cover all edges evenly.
Applying Multiple Coats
One coat rarely gives full coverage. Wait for the first coat to dry fully. Lightly sand between coats for smoothness. Apply 2-3 thin coats for best color. Multiple coats make paint last longer. Avoid thick layers to prevent cracking.

Credit: clinicaveterinariavetfamily.com
Creative Finishing Touches
Creative finishing touches give your DIY picture frames a unique and personal look. These details enhance the paint job and make the frame stand out. Simple techniques can change the whole style of your frame. Below are some easy ways to add charm and protect your work.
Adding Distressed Or Rustic Effects
Distressing adds character to new or plain frames. Lightly sand edges after painting to reveal some wood or base color. Use a coarse sandpaper for a rougher look. Apply a dark wax or glaze to highlight cracks and crevices. This creates an aged, rustic feel that suits farmhouse or vintage decor.
Using Mod Podge For Protection
Mod Podge seals and protects your painted frames. Brush a thin layer over the entire surface once paint dries. It dries clear and helps prevent chips and scratches. Choose a finish type: matte for a soft look or gloss for shine. This simple step keeps your frame looking fresh for longer.
Incorporating Tape And Stencils
Use painter’s tape to create clean lines and geometric patterns. Stick tape firmly to avoid paint bleed. Paint over the exposed areas, then remove tape carefully. Stencils offer fun shapes and designs with little effort. Hold the stencil in place and dab paint lightly. Both methods add interest and style to plain frames.
Drying And Curing
Drying and curing are crucial steps in painting DIY picture frames. Proper drying ensures the paint sets well, giving a smooth finish. Curing strengthens the paint, making it durable and long-lasting. Rushing these steps can lead to smudges and uneven surfaces. Patience during drying and curing improves the final look of your frame.
Optimal Drying Times
Allow each coat of paint to dry fully before adding another. Drying times vary by paint type and humidity. Acrylic paint usually dries in 20 to 30 minutes. Oil-based paints take longer, often several hours. Keep the frame in a dust-free area during drying. Avoid touching the frame to prevent fingerprints or marks.
Avoiding Smudges And Drips
Hold the frame carefully to avoid smudging wet paint. Place the frame on a flat, clean surface to dry. Use a drying rack or hang the frame if possible. Apply thin coats of paint to reduce drips. Thick paint layers take longer to dry and drip easily. Check the frame often and fix drips with a brush before the paint dries.

Credit: www.walmart.com
Common Mistakes To Avoid
Painting DIY picture frames can be fun and creative. Many beginners make simple errors that affect the final look. Avoiding common mistakes saves time and improves results. Focus on these key areas to get a smooth and lasting finish.
Skipping Prep Work
Preparation is vital before painting any frame. Dirt, dust, or old paint can ruin your work. Always clean the frame with a damp cloth. Sand the surface lightly to help paint stick better. Skipping these steps causes uneven paint and peeling later.
Using Wrong Paint Types
Not all paints work well on picture frames. Wood frames need different paint than metal or plastic ones. Use acrylic or latex paint for wooden frames. Spray paint suits metal and plastic frames best. Wrong paint type leads to poor coverage and chipping.
Ignoring Drying Times
Let each paint layer dry fully before applying the next. Rushing this step causes smudges and bubbles. Drying times vary by paint type and room conditions. Patience ensures a smooth, professional-looking finish. Avoid touching the frame too soon to keep it perfect.
Upcycling Old Frames
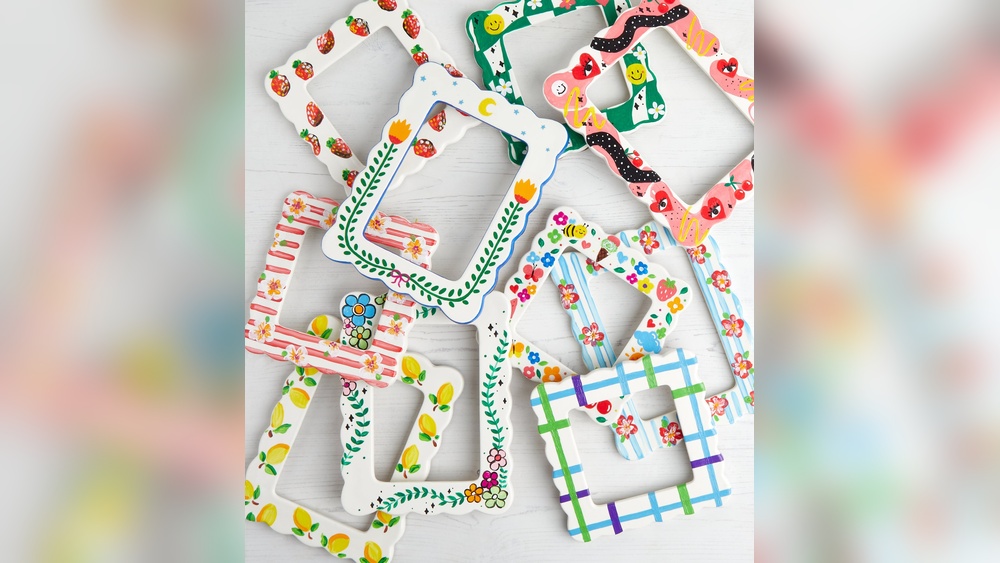
Upcycling old picture frames is a creative way to refresh your home decor. It saves money and reduces waste. Old frames often have unique shapes and details not found in new ones. With a little paint and imagination, you can transform these frames into stunning art pieces. This process gives your frames new life and personal style.
Revamping Thrift Store Finds
Thrift stores are treasure troves for old picture frames. Look for frames with interesting designs or sturdy wood. Clean the frame well before painting. Lightly sand rough areas to help paint stick. Use primer for better color and smooth finish. Choose paint types based on the frame material. Acrylic paint works great for wood frames. Spray paint suits metal or plastic frames perfectly. Paint in thin layers and let each dry fully. This method prevents drips and uneven surfaces.
Mixing Colors For Unique Looks
Mixing paint colors creates custom shades just for your frames. Start with base colors like white, black, or primary colors. Add small amounts of other colors gradually. Test the mix on a paper before applying it to the frame. Try combining matte and glossy finishes for depth. Use painter’s tape to create stripes or patterns. Color mixing lets you match your frame to any room theme. It also helps highlight the frame’s details and shape.
Incorporating Texture And Layers
Texture adds interest and character to plain frames. Use sponges, brushes, or cloth to apply paint in layers. Dry brushing highlights raised details by applying light paint coats. Add texture paste or glue small objects for a 3D effect. Layer different colors for a worn or antique look. Let each layer dry before adding the next. Texture and layers make your frame unique and eye-catching. Experiment with techniques to find what suits your style best.

Credit: www.youtube.com
Frequently Asked Questions
What Is The Best Way To Paint Picture Frames?
Lightly sand the frame, apply a primer if needed, then paint with acrylic or spray paint. Let each coat dry fully.
Can I Paint Acrylic Paint Straight Onto Wood?
Yes, you can paint acrylic paint directly onto wood. Lightly sand the surface first for better adhesion. Use a primer for smoother, longer-lasting results.
What Kind Of Paint Is Best For Picture Frames?
Acrylic paint works best for wooden picture frames due to its durability and ease of use. Spray paint suits plastic or metal frames for smooth, even coverage. Always sand surfaces lightly and apply primer if needed for better paint adhesion and lasting finish.
Is It Better To Spray Paint Or Paint A Picture Frame?
Spray paint works best for metal or plastic frames, providing an even finish. Brush painting suits wooden frames for detailed control. Proper surface prep and drying time improve results. Choose spray paint for quick, smooth coverage; use brush paint for texture and customization.
Conclusion
Painting DIY picture frames can refresh your home decor with ease. Choose the right paint type for your frame material. Prepare the surface well by cleaning and sanding lightly. Apply paint evenly and let each coat dry fully. Small details like edges and corners need extra care.
Personalize frames with colors that match your style. This simple project brings creativity and charm to any space. Try these tips to enjoy a fun and rewarding painting experience.