Want to add a personal touch to your morning coffee routine or create a heartfelt gift for someone special? Learning how to do DIY painted mugs at home is easier than you think—and it’s a fun way to express your creativity.
Imagine sipping from a mug you designed yourself, with colors and patterns that reflect your style. In this guide, you’ll discover simple steps to transform plain mugs into beautiful, lasting works of art using affordable materials you can find right at home.
Ready to unleash your inner artist and make mugs that stand out? Keep reading, and let’s get started!
Credit: www.youtube.com
Materials Needed
Before starting your DIY painted mug project, gather all necessary materials. Having the right supplies makes painting easier and more fun. This section covers essential items to prepare.
Choosing The Right Mug
Select a plain ceramic or porcelain mug. Avoid mugs with textured surfaces or patterns. White or light-colored mugs work best to show paint colors clearly. Ensure the mug is clean and dry before painting.
Selecting Paint Types
Use paint designed for ceramics or glass. Acrylic paint is popular but not always dishwasher safe. For lasting results, choose oil-based or enamel paints. Paint markers offer precision and ease for detailed designs.
Additional Tools And Supplies
Gather paintbrushes of various sizes for different details. Have a palette or plate for mixing colors. Use rubbing alcohol and cotton pads to clean the mug surface. Seal your design with a clear ceramic sealer for durability.

Credit: www.cravingsomecreativity.com
Preparing The Mug
Preparing the mug is the first step in creating a beautiful DIY painted mug. It ensures the paint sticks well and lasts longer. Proper preparation helps avoid peeling and fading after washing. Taking time to prepare the mug will improve your final design.
Cleaning The Surface
Start by washing the mug with warm soapy water. Remove all dirt, dust, and oils that can block paint adhesion. Rinse the mug well and dry it completely with a clean cloth. Avoid using any lotion or grease on your hands while handling the mug. A clean surface is key to good paint results.
Sanding For Better Adhesion
Use fine-grit sandpaper to gently sand the mug’s surface. This creates tiny scratches for the paint to grip onto. Sand only the areas where you want to paint. Wipe off the sanding dust with a damp cloth and let it dry. Sanding helps the paint stick firmly and reduces the chance of chipping later.
Design Planning
Design planning is the first step in creating beautiful DIY painted mugs at home. It helps you organize your ideas and get clear on the look you want. A good plan saves time and prevents mistakes. It also makes the painting process more fun and rewarding.
Think about colors, patterns, and themes. Decide if you want something simple or detailed. Sketching your ideas on paper or using tools can help you visualize the final design. You can also use stencils and tape to create clean lines and shapes. Careful planning brings your vision to life with ease.
Sketching Ideas
Start by drawing your design on paper. Use a pencil so you can erase and change parts. Keep your sketches simple at first. Focus on shapes and placement on the mug. Try different styles and layouts. Sketching helps you see what works best before painting.
Draw several versions if needed. Look at your sketches and pick the one you like most. This step reduces mistakes and builds confidence. It also gives you a clear guide when you start painting on the mug.
Using Stencils And Tape
Stencils and tape make painting easier and cleaner. Use stencils for shapes or letters you want to repeat. They help keep lines sharp and even. Tape works well for stripes and geometric patterns. It prevents paint from spreading outside the lines.
Place the stencil or tape carefully on the mug. Press down edges to stop paint from leaking. Paint over or around the stencil, then remove it while paint is still wet. Let the paint dry before adding more details. These tools give your mugs a professional look with less effort.

Credit: tulipcolor.com
Painting Techniques
Painting techniques shape the look and feel of your DIY painted mugs. Simple steps and the right method help create beautiful designs. Focus on three key areas: base coats, details, and paint types. Each step builds on the last to make your mug stand out.
Applying Base Coats
Start with a clean, dry mug surface. Use a soft brush to apply an even base coat. Choose light colors to make designs pop later. Let the base dry completely before adding more paint. This layer protects the mug and improves paint adhesion.
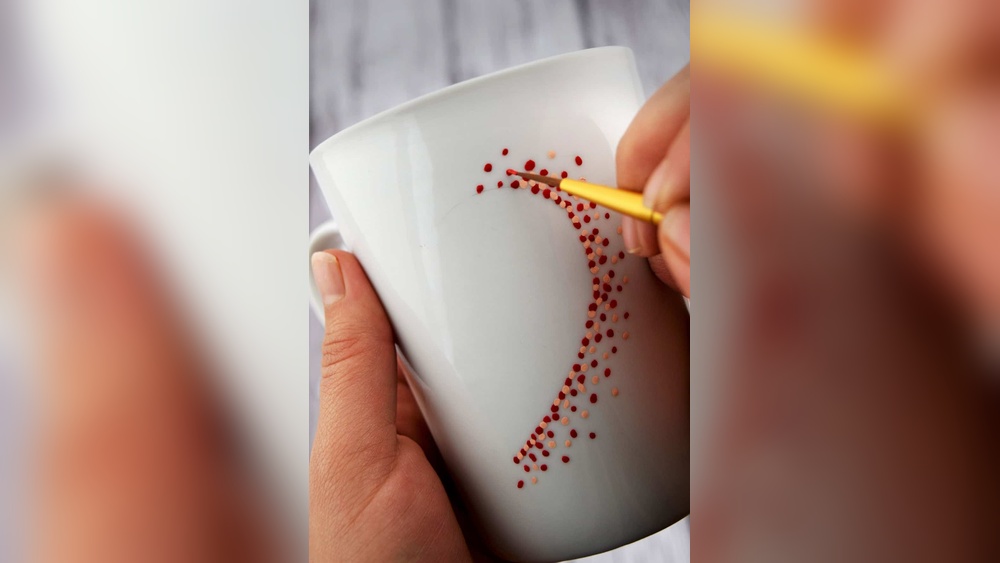
Adding Details And Patterns
Use fine brushes or paint pens for small details. Simple shapes like dots, lines, or flowers work well. Plan your design lightly with a pencil first. Layer colors carefully and let each dry before the next. Patience here brings sharp, clear patterns.
Using Acrylic Vs. Enamel Paints
Acrylic paints dry fast and are easy to use. They suit casual mugs that don’t face heavy washing. Enamel paints offer a shiny, durable finish. They require baking in an oven to set properly. Choose paint based on your mug’s use and desired look.
Drying And Curing
Drying and curing are crucial steps in making DIY painted mugs at home. These stages ensure your artwork stays vibrant and lasts through regular use. Proper drying prevents smudging and peeling. Effective curing bonds the paint firmly to the mug surface.
Choosing the right drying and curing method depends on the type of paint used. Some paints dry well at room temperature, while others need heat to set fully. Follow these tips to protect your designs and enjoy your custom mugs for a long time.
Air Drying Tips
Air drying is the simplest way to dry your painted mugs. Place the mug on a clean, dust-free surface. Avoid touching the painted areas during this time. Let the mug dry for at least 24 hours to ensure the paint sets well.
Keep the mug in a cool, dry place away from direct sunlight. Sunlight can cause paint colors to fade or crack. Make sure the air circulates freely around the mug. This helps the paint dry evenly without moisture buildup.
Oven Baking Methods
Baking your painted mug in the oven helps cure the paint for a longer-lasting finish. Preheat the oven to the temperature recommended on your paint’s label, usually around 300°F (150°C). Place the mug upside down on a baking sheet to avoid smudging.
Bake the mug for 30 minutes, then turn off the oven. Let the mug cool completely inside the oven before removing it. This gradual cooling reduces the risk of cracks. Oven curing makes your painted mug more durable and often dishwasher safe.
Sealing And Finishing
Sealing and finishing your DIY painted mugs is a key step. It protects your design and makes the mug last longer. Proper sealing keeps the paint from chipping or washing away. It also gives your mug a polished, smooth look. Without sealing, your hard work might fade quickly.
Choosing Sealants
Select the right sealant for your mug’s paint type. Acrylic sealants work well for most painted mugs. Look for non-toxic, food-safe options. Some sealants come in spray or brush-on forms. Sprays give an even coat but need good ventilation. Brush-on sealants allow more control over coverage. Make sure the sealant is clear to keep your design vibrant. Let the sealant dry fully before touching or using the mug.
Making Mugs Dishwasher Safe
To make your mug dishwasher safe, use a sealant that is heat-resistant. Oven-bake your painted mug after sealing to set the paint and sealant. Follow the sealant instructions for baking time and temperature. This step hardens the finish and helps it resist water and heat. Hand washing is still gentler and extends the life of your mug design. Avoid scrubbing painted areas to keep the artwork intact.
Troubleshooting
Troubleshooting is an important part of creating DIY painted mugs. Small problems can happen, but they are easy to fix with the right steps. This section helps you solve common issues and avoid errors. Follow these tips to keep your mugs looking great.
Fixing Paint Chips
Paint chips can occur if the paint does not stick well. First, clean the chipped area gently with rubbing alcohol. Wait for it to dry completely. Then, apply a thin layer of paint over the chip using a small brush. Let it dry and bake the mug again if needed. This helps the paint bond better and last longer.
Avoiding Common Mistakes
Do not skip cleaning the mug before painting. Oils and dirt stop paint from sticking. Use rubbing alcohol to clean the surface well. Avoid thick paint layers; they can crack when drying. Thin layers dry more evenly and look smoother. Do not touch the paint before it dries to prevent smudges. Finally, follow baking instructions carefully to set the paint firmly.
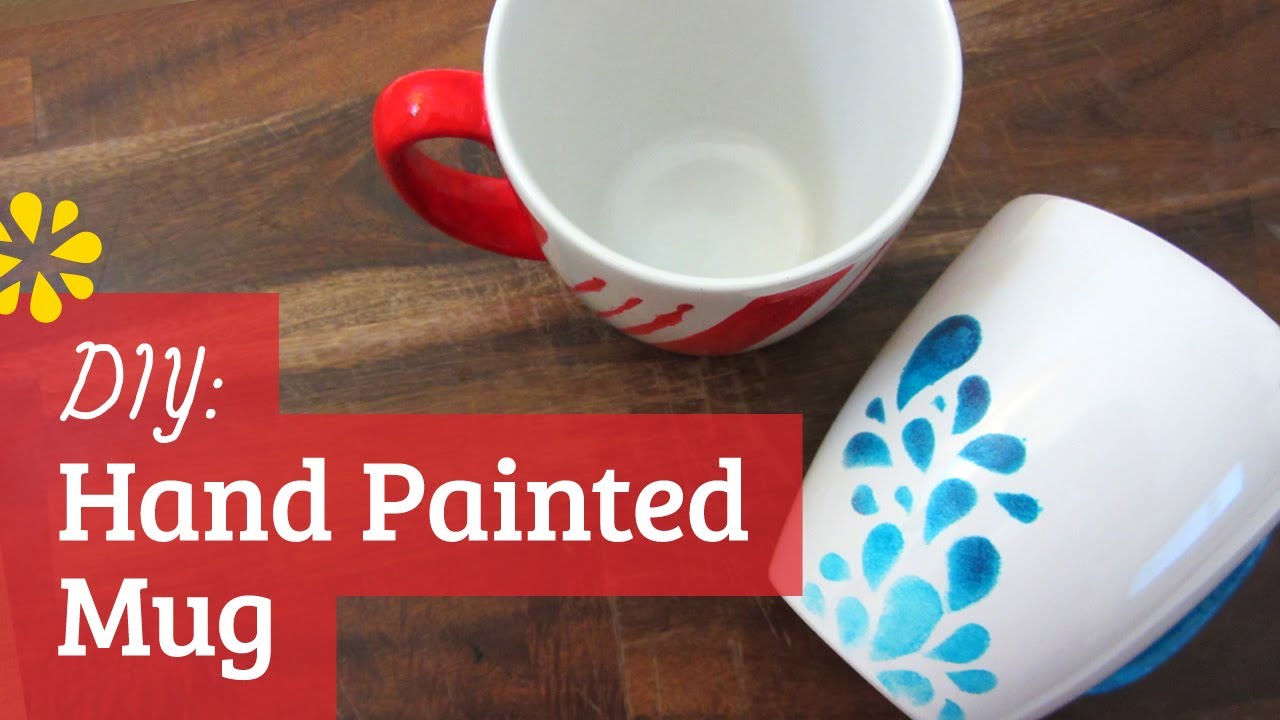
Creative Ideas
Creative ideas make DIY painted mugs fun and unique. They help you design mugs that stand out. Simple themes can turn plain mugs into special treasures. Use colors and patterns that match your style and mood. Here are two inspiring ideas to try at home.
Seasonal Themes
Seasonal themes add charm to your painted mugs. Paint bright flowers for spring or warm leaves for fall. Use snowflakes and stars for winter designs. Summer can have beach or fruit patterns. These themes make mugs perfect for holiday drinks or gifts. Change the colors to suit each season’s mood.
Personalized Gifts
Personalized mugs show care and thoughtfulness. Add names, initials, or special dates on the mug. Draw simple pictures or symbols that match the person’s interests. Use fun fonts for messages or quotes. These mugs become keepsakes that friends and family will love. Personal touches make each mug one of a kind.
Frequently Asked Questions
What Type Of Paint Is Best For Diy Painted Mugs?
Enamel or oven-bake paints are best for DIY mugs. Acrylic paints often peel off. Enamel paints create durable, dishwasher-safe designs after baking.
How Do You Bake A Painted Mug At Home?
Bake mugs at 350°F (175°C) for 30 minutes. Let mugs cool inside the oven to avoid cracking. Baking sets paint, making it permanent.
Can I Make Painted Mugs Dishwasher Safe?
Yes, if you use oven-bake enamel paint and properly bake the mug. This creates a durable, dishwasher-safe finish. Hand washing is still recommended for longevity.
What Materials Do I Need For Painting Mugs?
You need plain ceramic mugs, enamel or oven-bake paint, paintbrushes or paint markers, and an oven for baking. Optional: painter’s tape and stencils for designs.
Conclusion
DIY painted mugs add a personal touch to your daily routine. Creating them at home is simple and fun. Choose the right paint to ensure your design lasts long. Take your time and enjoy each step of the process. These mugs make thoughtful gifts for friends and family.
Try different colors and patterns to express your style. With practice, your skills will improve quickly. Start your DIY mug project today and brighten up your kitchen.