If you’ve ever wanted to create stunning, realistic artwork that truly pops, mastering perspective painting in Procreate is your secret weapon. Imagine transforming flat sketches into vibrant scenes that draw viewers in, making them feel like they’re stepping right into your digital canvas.
Whether you’re a beginner or looking to sharpen your skills, this guide will walk you through simple, clear steps to harness Procreate’s powerful perspective tools. By the end, you’ll know exactly how to add depth and dimension to your paintings, making your art stand out in ways you never thought possible.
Ready to elevate your digital art game? Let’s dive in!

Credit: www.reddit.com
Setting Up Perspective Guides
Setting up perspective guides in Procreate helps create accurate depth and dimension. These guides act like invisible rulers for your artwork. They make drawing buildings, roads, and objects in space easier. Procreate offers flexible options to customize these guides to fit your scene.
Using perspective guides saves time and improves the realism of your painting. Follow the steps below to access and adjust these guides for your project.
Accessing Drawing Guide Settings
Open your Procreate canvas and tap the Actions menu (wrench icon). Go to the Canvas tab and select “Edit Drawing Guide.” This opens the guide settings screen. Here, you can enable and customize different guide types for your artwork. This setting lets you control the visual aid for perspective drawing.
Choosing Perspective Types
In the guide settings, tap “Perspective” at the bottom. Procreate supports one-point, two-point, and three-point perspective. Choose the type that suits your scene. One-point works for flat, straight views. Two-point fits corner angles. Three-point adds height or depth views. Selecting the right type sets your base for drawing with perspective.
Adjusting Horizon And Vanishing Points
Once you choose a perspective, adjust the horizon line by dragging it up or down. The horizon represents the viewer’s eye level. Next, move the vanishing points along the line. These points guide where lines converge in your drawing. Proper placement ensures accurate depth and scale in your painting. You can add or move points by dragging on the screen.
Credit: bardotbrush.com
Using Drawing Assist For Accuracy
Using Drawing Assist in Procreate helps create precise perspective paintings. It guides your strokes along perspective lines. This feature reduces errors and saves time. Drawing Assist ensures your lines stay straight and follow the correct angle. It is perfect for beginners and advanced users alike.
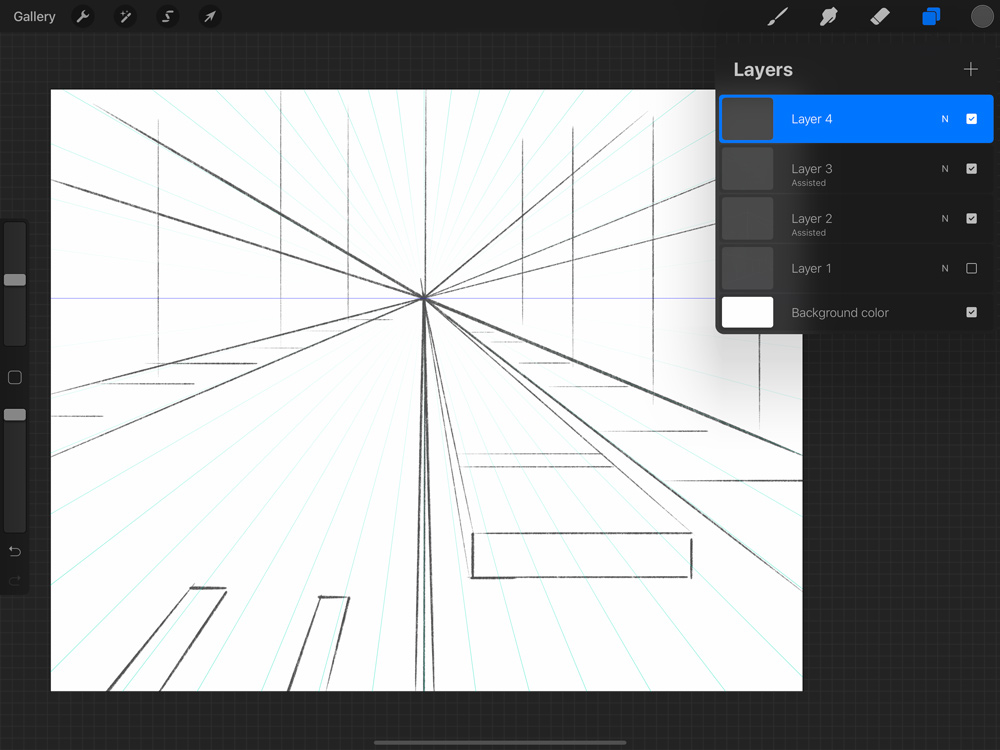
Enabling Drawing Assist
Open your Procreate canvas and select the layer you want to draw on. Tap the layer thumbnail to open layer options. Turn on “Drawing Assist” by toggling the switch. This activates the assist feature on that layer. Now your strokes will snap to the perspective guide automatically.
Benefits Of Drawing Assist
Drawing Assist helps keep lines accurate and clean. It saves time by reducing the need to erase and redraw. The feature supports different perspective guides like one-point, two-point, and three-point. It helps maintain consistent angles throughout your painting. Your final artwork looks more professional and polished.
Troubleshooting Common Issues
If Drawing Assist does not work, check if it is enabled on the active layer. Make sure the perspective guide is visible and properly set up. Restart Procreate if the feature seems unresponsive. Sometimes switching off and on Drawing Assist fixes glitches. Update Procreate to the latest version to avoid bugs.
Basic Perspective Techniques
Understanding basic perspective techniques is key for creating realistic art in Procreate. Perspective helps show depth and space on a flat screen. It makes your drawings look more natural and three-dimensional.
Procreate offers tools to set up different types of perspective grids. These grids guide your strokes and shapes to align with the chosen perspective. Learning these basics will improve your digital paintings greatly.
One-point Perspective Basics
One-point perspective uses a single vanishing point on the horizon line. All lines lead straight to this point. It works well for scenes like roads, hallways, or railways.
In Procreate, enable the perspective guide and place the vanishing point. Draw horizontal and vertical lines to create objects that shrink toward this point. This technique creates a simple, yet effective depth.
Two-point Perspective Setup
Two-point perspective uses two vanishing points on the horizon line. It creates a more dynamic view, often showing corners of objects. This method suits buildings or cityscapes.
Set up two points in Procreate’s perspective guide tool. Draw lines from each point to build your shapes. This setup helps capture angles and edges with correct depth.
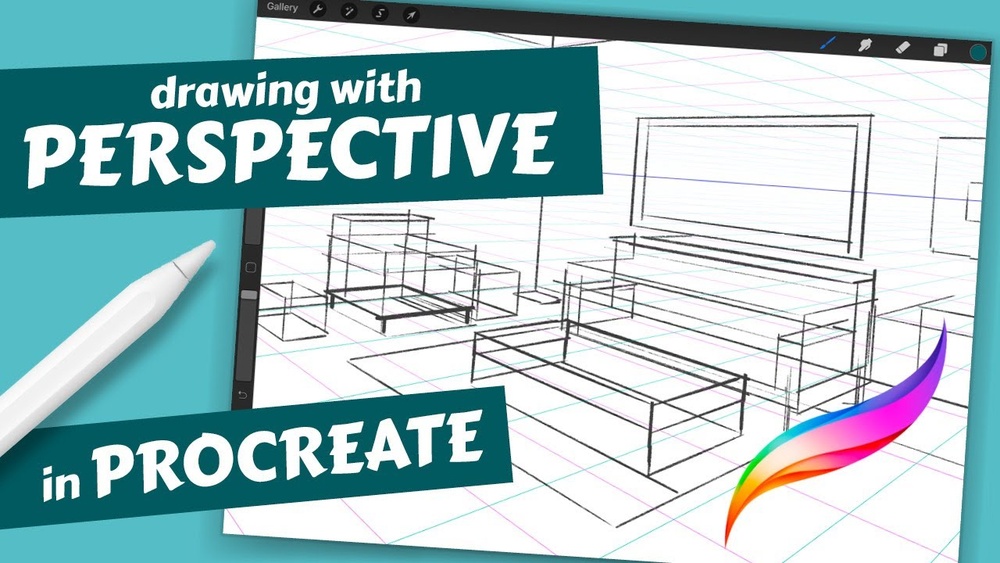
Three-point Perspective Introduction
Three-point perspective adds a third vanishing point above or below the horizon. It simulates looking up or down at tall objects. This technique gives dramatic effects to skyscrapers or towers.
Activate the three-point perspective grid in Procreate. Position all three vanishing points carefully. Use this guide to draw objects that appear tall and towering with realistic proportions.

Credit: www.youtube.com
Creating Depth With Overlapping And Size
Creating depth in your Procreate paintings makes your art look more real and engaging. Overlapping objects and changing their size help show distance between elements. These simple tricks guide the viewer’s eye and add dimension to your work. Use these techniques to build a strong sense of space and form in your paintings.
Applying Overlapping Objects
Place one object partly in front of another to show which is closer. Overlapping creates a clear layer order that our eyes understand easily. It adds a feeling of three-dimensional space. Use the selection tool in Procreate to move objects and experiment with different overlaps. Keep overlaps natural to avoid confusion in the scene.
Using Size Variation For Distance
Objects closer to the viewer appear larger, while distant ones look smaller. Reduce the size of faraway elements to push them back in space. Increase the size of objects in the foreground to bring them forward. Use Procreate’s transform tool to adjust sizes smoothly. Size variation helps the brain read depth instantly in your painting.
Incorporating Atmospheric Perspective
Light and color change with distance in the real world. Distant objects often look lighter, less detailed, and slightly blue or gray. Use soft brushes in Procreate to fade far elements and reduce sharp details. Adjust color saturation and brightness to enhance the sense of depth. Atmospheric perspective adds realism and mood to your artwork.
Building A Simple Scene In Perspective
Building a simple scene in perspective helps create depth and realism. Procreate offers tools to guide your drawing. Start with basic shapes. Then align elements to vanishing points. Finally, add details while keeping perspective in mind. This method makes complex scenes easier to handle. Follow these steps to paint a scene that feels three-dimensional and natural.
Sketching The Basic Shapes
Begin by sketching simple shapes like cubes and rectangles. These forms act as building blocks for your scene. Use light strokes to keep the sketch flexible. Focus on the overall composition before adding complexity. Keep shapes large and clear to define space and scale.
Aligning Elements To Vanishing Points
Set up one or two vanishing points in your canvas. These points control how objects shrink and align. Draw lines from edges of shapes toward these points. This ensures your objects follow the rules of perspective. Make sure all elements point toward the correct vanishing point for realism.
Adding Details With Perspective In Mind
Once shapes align, add details like windows, doors, and textures. Draw these details following the angle toward vanishing points. Keep sizes smaller for objects farther away. This keeps the sense of depth intact. Use Procreate’s tools like grids and rulers to maintain accuracy.
Coloring And Shading In Perspective
Coloring and shading add life to your perspective paintings in Procreate. They help create depth and realism. Proper use of color and light makes objects appear three-dimensional. This section explains how to use coloring and shading effectively in perspective art.
Light Source And Shadow Placement
Identify your light source early. It determines where shadows fall on objects. Shadows must follow the perspective lines to keep them realistic. Use Procreate’s layer features to separate shadows from base colors. This makes adjusting shadows easier. Shadows closer to the light source are sharper and darker. Shadows further away become softer and lighter. Correct shadow placement builds a convincing sense of space.
Color Gradients To Enhance Depth
Color gradients show how light changes over surfaces. Use gradients to add volume and shape to objects. Darker tones represent areas away from light. Lighter tones highlight surfaces facing the light. Apply gradients along the perspective planes. This enhances the illusion of depth. Procreate’s gradient tools help blend colors smoothly. Gradients keep your painting dynamic and visually interesting.
Maintaining Consistency Across Planes
Consistent coloring and shading unify your painting. Each plane must reflect the same light source and shadow logic. Avoid changing colors arbitrarily between planes. Use the same color palette and shadow tone across the scene. Check your work often by zooming out. Consistency helps viewers understand the spatial relationship of objects. It strengthens the overall perspective effect.
Refining And Finalizing The Painting
Refining and finalizing your perspective painting in Procreate is the last step to make your artwork shine. This stage focuses on cleaning up lines, adding textures, and preparing your piece for sharing. Each detail matters to enhance the overall look and feel.
Cleaning Up Lines And Edges
Begin by zooming in to check all lines and edges. Use the eraser tool to remove any unwanted marks or smudges. Smooth out rough edges to create clean, sharp lines. Adjust line thickness to add depth and focus. This step helps improve clarity and visual appeal.
Adding Texture And Effects
Textures bring life and realism to your painting. Experiment with brushes to add subtle patterns or surface details. Use shading to emphasize light and shadow, enhancing the three-dimensional feel. Layer effects like grain or blur to create atmosphere. Keep effects balanced to avoid overpowering the perspective.
Exporting Your Artwork
Once satisfied, prepare your work for export. Choose the correct file format, such as PNG or JPEG, based on your needs. Set the resolution to maintain quality for print or web use. Export with transparent background if you want to add the painting to other projects. Save a copy with layers intact for future edits.
Tips For Mastering Perspective In Procreate
Mastering perspective in Procreate enhances the depth and realism of your digital paintings. It helps create scenes that look natural and believable. With the right approach, even beginners can improve their perspective skills quickly. Below are useful tips to help you get better at perspective painting in Procreate.
Using Layers Effectively
Layers organize your artwork and make editing easier. Separate objects on different layers to adjust their position independently. Use layers to test perspective changes without affecting the whole painting. Lock layers to avoid accidental edits. Group layers for similar elements to keep your canvas tidy.
Practicing With Reference Images
Reference images guide your understanding of perspective in real life. Study photos to see how objects shrink with distance. Trace or sketch over references to learn vanishing points and horizon lines. Observe how light and shadow change with perspective. Regular practice with references builds visual accuracy.
Exploring Advanced Perspective Tools
Procreate offers advanced tools to refine perspective work. Use the Perspective Drawing Guide to create accurate vanishing points. Experiment with 1-point, 2-point, or 3-point perspective grids. Adjust the grid size and angle to fit your scene. Use the snapping feature to align strokes perfectly with the guide.
Frequently Asked Questions
How To Do Perspective In Procreate?
Open Actions > Canvas > Edit Drawing Guide. Select Perspective, choose 1, 2, or 3-point perspective. Adjust vanishing points and enable Drawing Assist to draw accurately.
Can You Do 4 Point Perspective In Procreate?
Procreate supports 2, 3, and 1-point perspectives natively. You can create 4-point perspective manually by combining guides and adjusting vanishing points. Use multiple drawing guides and drawing assist to simulate 4-point perspective effectively in your artwork.
How To Set Up A 3 Point Perspective?
To set up a 3-point perspective, draw three vanishing points: two on the horizon and one above or below. Connect lines from each point to form the object’s edges. This creates depth and realistic angles in your drawing.
How To Add Perspective To Painting?
Add perspective by using vanishing points and horizon lines to guide object placement. Vary object sizes and overlap elements to create depth. Use converging lines that lead to vanishing points for realistic spatial effects. These techniques give paintings a three-dimensional appearance.
Conclusion
Practice using Procreate’s perspective tools often to improve your skills. Start with simple shapes and vanishing points for clarity. Use layers to separate different parts of your painting. Watch how objects change size and overlap to create depth. Keep experimenting with one-point, two-point, and three-point perspectives.
Remember, patience helps you create better digital art. Soon, your paintings will look more realistic and vibrant. Enjoy the process and keep drawing regularly. Perspective painting in Procreate becomes easier with time and practice.