
Are you ready to dive into a fun and relaxing art form that anyone can try? Dot painting is a simple yet beautiful way to create eye-catching designs using just dots of paint.
Whether you want to decorate rocks, canvas, or even cards, this DIY guide will show you exactly how to get started. You don’t need to be an expert artist—just a few basic tools and a little patience. Keep reading, and you’ll discover easy steps and tips that will have you creating stunning dot paintings in no time.
Let’s turn your creativity into colorful art you’ll be proud of!
Credit: getpottd.com
Materials Needed
Starting dot painting requires certain materials to create beautiful, precise designs. Gathering the right supplies helps you work smoothly and enjoy the process. This section covers the essential tools, the best paints, and the perfect surfaces to use.
Essential Tools
Dot painting needs specific tools for accuracy and control. Dotting tools or stylus pens come in different sizes. These tools help you make dots of various diameters. Toothpicks, cotton swabs, or even the ends of paintbrushes can work as alternatives. Having a palette or plate to hold and mix paints is useful. A cup of water and paper towels help clean tools between colors.
Choosing Paints
Acrylic paints are the best choice for dot painting. They dry fast and have bright colors. Choose high-quality acrylics for smooth, vibrant dots. Water-based paints work well and are easy to clean. Avoid paints that are too runny or thick. You want paint that stays on the surface without spreading too much.
Selecting A Surface
Pick a flat surface to paint on for the best results. Canvas boards and wooden panels are popular choices. Smooth stones or tiles also work well for dot art. Paper or cardstock can be used for practice or smaller projects. Make sure the surface is clean and dry before you start painting.

Credit: www.hjoerringmusikforening.dk
Basic Techniques
Dot painting is a fun and creative art form. It uses small dots to create beautiful patterns and images. Learning the basic techniques helps you start your own dot painting projects. These simple skills build a strong foundation. You will enjoy making detailed and colorful designs.
Practice these techniques to gain control and precision. Each step improves your ability to paint clear and neat dots. This guide covers how to hold the tool, make different dot sizes, and layer dots for texture. Follow these tips to create stunning dot paintings.
Holding The Dotting Tool
Hold the dotting tool like a pencil. Keep a relaxed grip to control the pressure. Use your dominant hand for steady movements. Rest your arm on the table for support. This helps you place dots exactly where you want. Avoid gripping too tightly, which can cause shaky dots.
Creating Different Dot Sizes
Use different tools or tips for varied dot sizes. Larger dots come from bigger tool ends or more paint. Small dots need fine tips and less paint. Press gently for tiny dots and harder for bigger ones. Practice on paper to see how pressure changes dot size. Mix large and small dots to add interest.
Layering Dots For Texture
Layer dots by painting one dot over another once dry. This creates depth and texture in your design. Use contrasting colors to make layers stand out. Overlapping dots give a 3D effect. Let each layer dry before adding the next. Layering makes your dot painting more dynamic and rich.
Color Mixing Tips
Color mixing plays a key role in dot painting. It helps create depth, interest, and balance in your artwork. Choosing and blending colors carefully can make your dots stand out. This section offers simple tips to improve your color mixing for dot painting.
Combining Primary Colors
Start with primary colors: red, blue, and yellow. Mix two primary colors to get secondary colors. For example, red plus blue makes purple. Yellow plus blue makes green. Red plus yellow makes orange. Try small amounts first. Adjust the mix until you like the shade. Use a palette or paper plate for mixing. Clean your brush between colors to keep shades pure.
Using Contrast And Harmony
Contrast means using colors that look different together. This makes dots pop and grab attention. For example, blue and orange create strong contrast. Harmony means using colors that look good together. These colors feel calm and balanced. Examples are blues and greens or reds and pinks. Use contrast for focal points. Use harmony for background or filler dots.
Adding Highlights And Shadows
Highlights add light to your dots. Use white or a lighter shade of your color. Place highlights on one side of the dot. Shadows add depth and roundness. Use black or a darker shade of your color. Place shadows opposite highlights. This technique makes dots look three-dimensional. Practice this to bring your dot painting to life.
Step-by-step Project
Starting a dot painting project is simple and fun. This step-by-step guide breaks down the process into clear, easy tasks. Follow each step to create your own beautiful dot art.
Take your time and enjoy each part of the process. Your patience will show in the final design.
Preparing Your Workspace
Choose a clean, flat surface with good light. Gather all materials like paints, dotting tools, and canvas. Cover the area with paper or cloth to catch spills. Arrange tools within easy reach. Make sure your hands are clean to avoid smudges.
Sketching Your Design
Use a pencil to lightly draw your pattern on the canvas. Start with simple shapes like circles or lines. This sketch will guide your dot placement. Keep the lines faint so they do not show through the paint. You can erase any mistakes easily at this stage.
Applying Base Dots
Dip your dotting tool into the paint. Start placing dots along your sketched lines. Use steady pressure for even dots. Begin with larger dots as your base layer. Space them evenly to create a balanced look. Let the paint dry before adding more dots.
Building Patterns
Add smaller dots around the base dots to create patterns. Change colors and dot sizes to add interest. Work from the center outward for symmetry. Use different tools for varied dot shapes. Take breaks to check your progress and adjust spacing.
Finishing Touches
Fill empty spaces with tiny dots or accents. Add highlights with white or bright colors. Carefully clean any stray paint spots with a damp cloth. Let your artwork dry completely in a dust-free area. Optionally, seal your painting with a clear varnish for protection.
Common Mistakes
Dot painting is fun but can be tricky for beginners. Common mistakes often slow progress. Avoiding these errors helps create neat, beautiful designs. Focus on steady hands and patience. Practice makes better dots and cleaner patterns.
Uneven Dot Sizes
Many beginners make dots too big or too small. Uneven sizes can spoil the pattern’s balance. Use the same tool for each dot size. Dip it lightly in paint for smaller dots. Press harder for bigger dots. Keep your hand steady to control size.
Overlapping Colors
Colors can blend if dots overlap too soon. Wait for one color to dry before adding another nearby. Overlapping wet paint makes a messy look. Use light layers to build color depth. Plan your design to avoid crowded dots.
Smudging Paint
Smudges happen when touching wet paint. Avoid moving your hand over fresh dots. Let paint dry completely before adding details. Use tools gently to prevent dragging paint. Clean your tools often to stop mixing colors.

Credit: www.amazon.com
Advanced Tips
Advanced tips help you add depth and style to your dot painting. These ideas make your art more detailed and unique. Try these techniques to improve your skills and enjoy the creative process more.
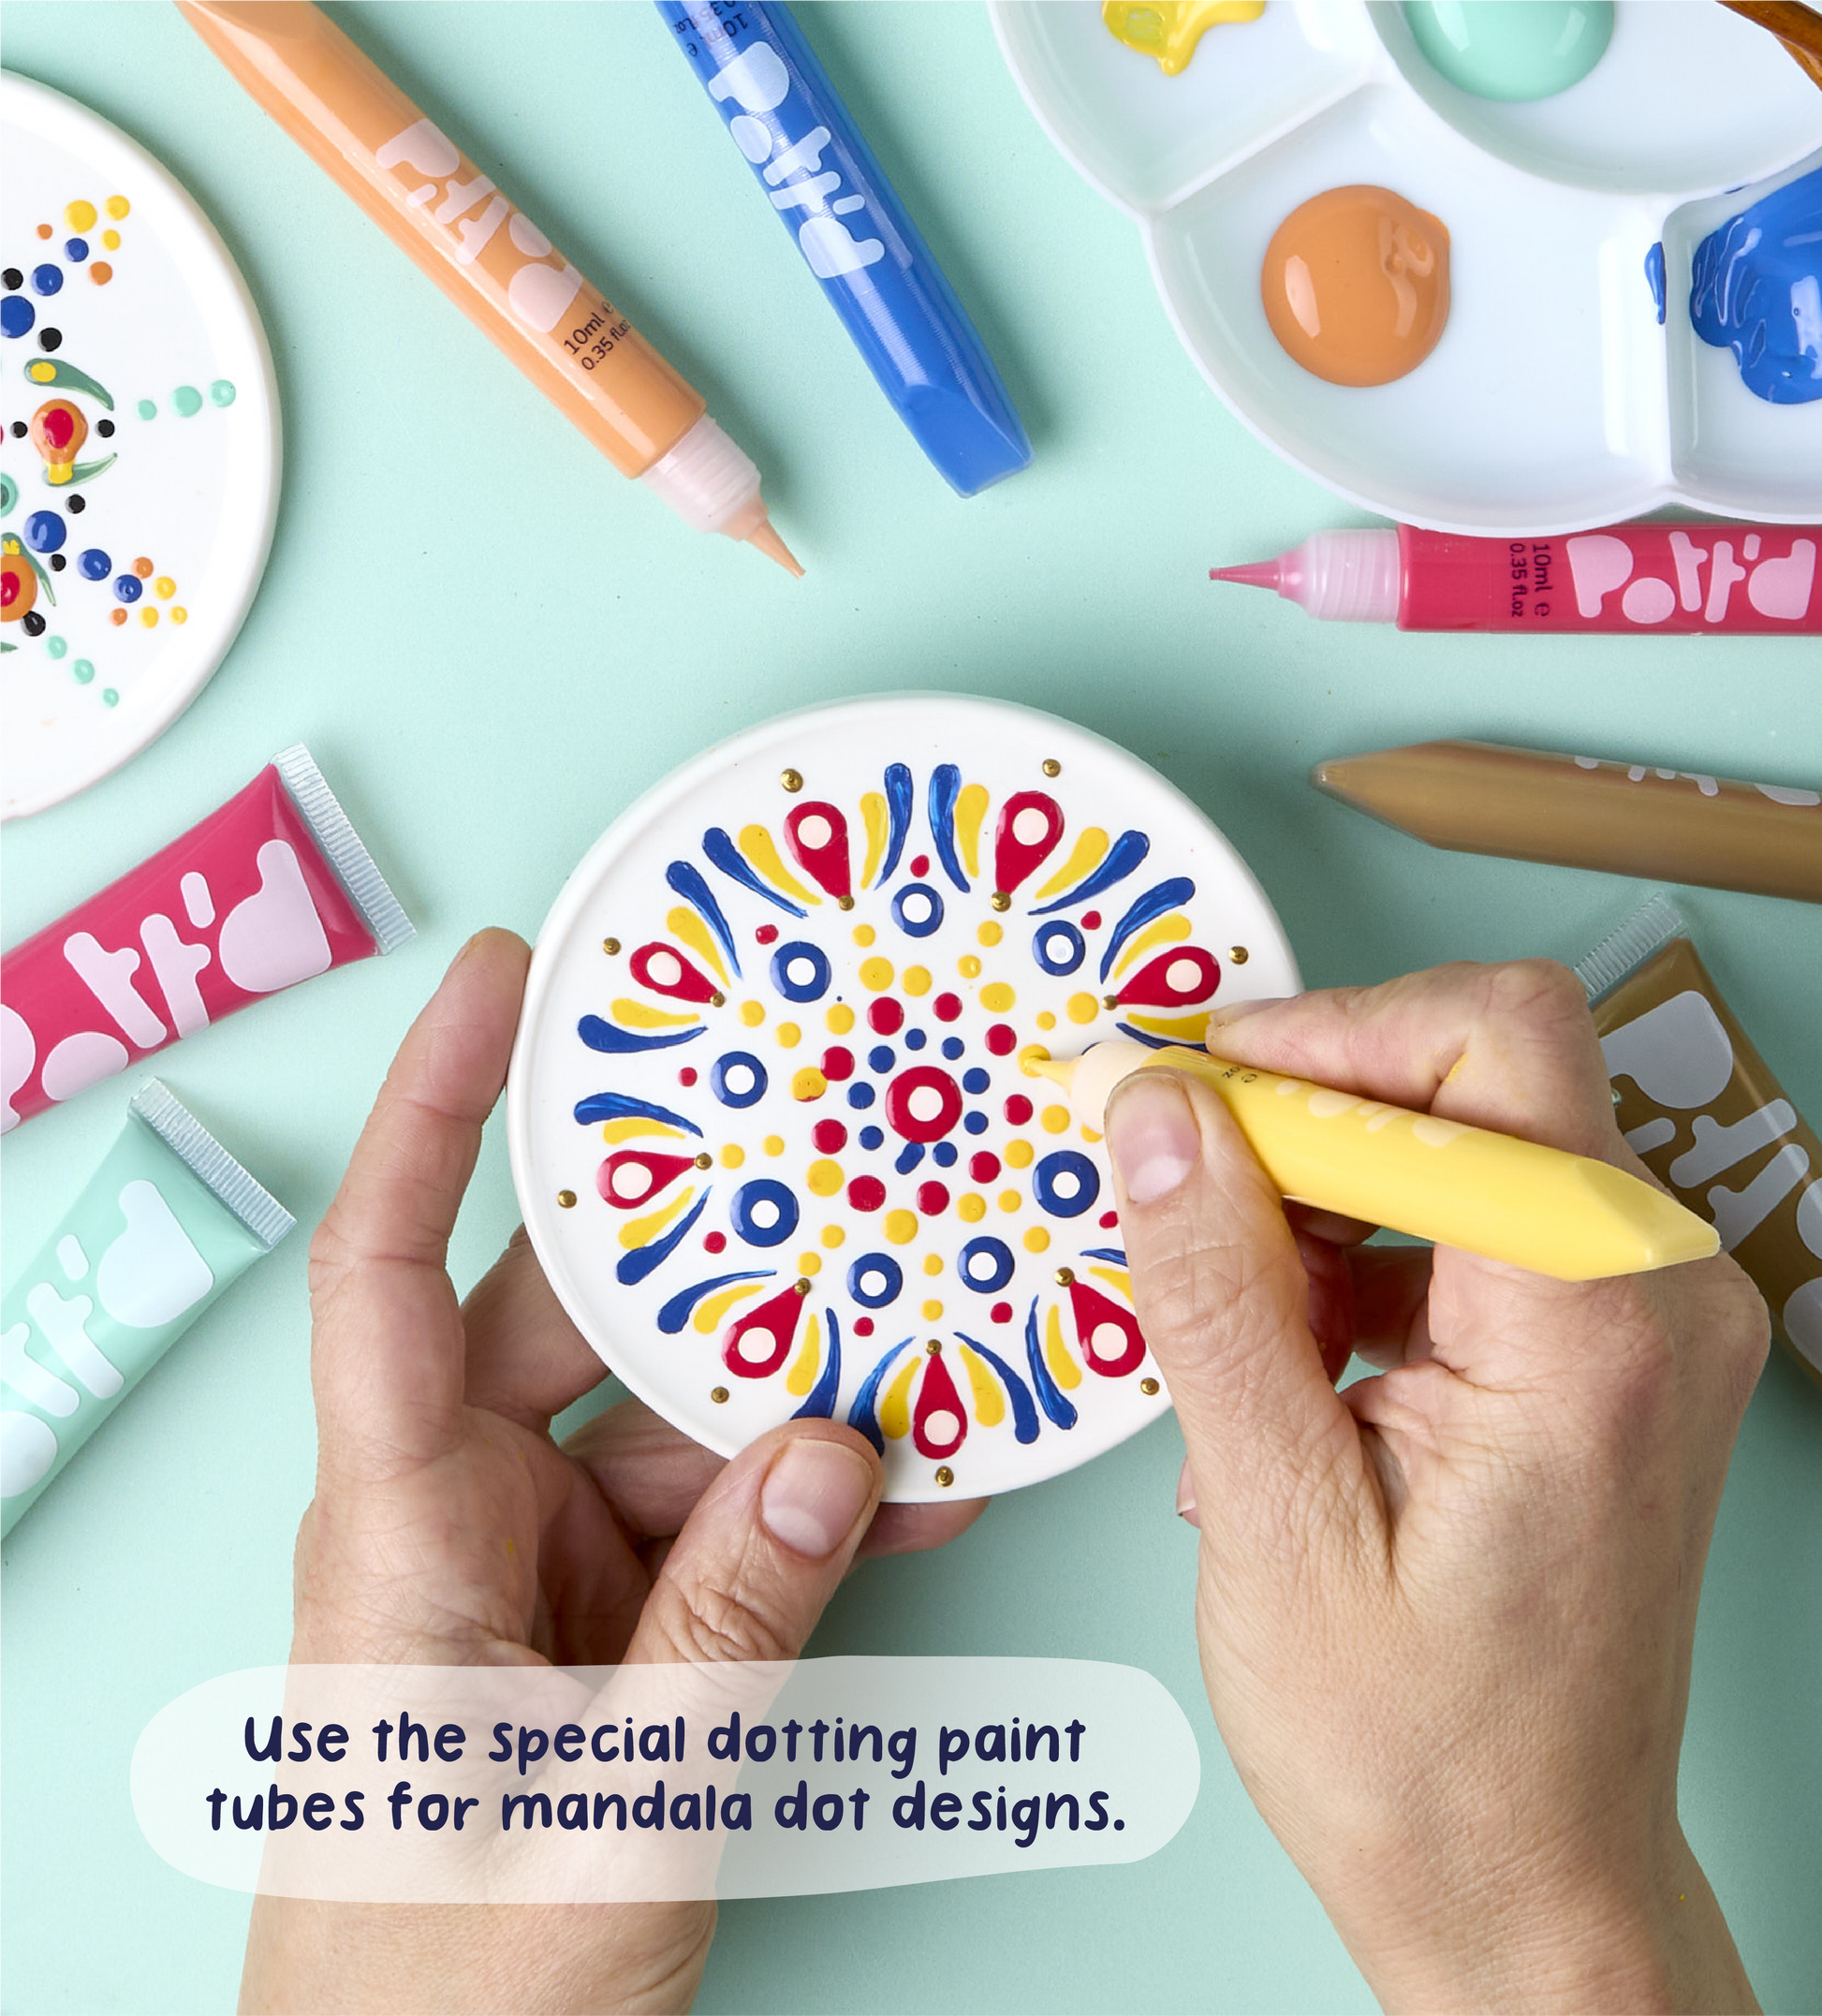
Creating Mandalas
Mandalas are circular designs with repeating patterns. Start by drawing a light circle on your canvas. Divide the circle into equal sections using a pencil. Place dots carefully along these lines to form symmetrical patterns. Use different sizes of dots to add texture. Work from the center outwards for balance. This method creates a calm and focused design.
Using Different Tools
Dot painting does not need only traditional dotting tools. Try using toothpicks, cotton swabs, or the back of paintbrushes. Each tool makes a different dot size and shape. Experiment with tools to find new effects. Change pressure to vary dot thickness. Mixing tools keeps your work interesting and fresh.
Incorporating Mixed Media
Add other materials to your dot painting to give it a new look. Use glitter, beads, or small stones for texture. Glue these items carefully onto your painting after the paint dries. You can also paint on different surfaces like wood or rocks. Mixed media adds a 3D effect and makes your art stand out. It invites viewers to look closer and touch your work.
Project Ideas
Dot painting offers many creative options for art lovers. This technique uses small dots to make beautiful patterns. You can try dot painting on various surfaces to create unique art pieces. These project ideas are easy and fun for all skill levels.
Canvas Art
Canvas is a popular base for dot painting. Start with a blank canvas and choose your colors. Use dotting tools or even household items like toothpicks. Create mandalas, flowers, or abstract patterns with colorful dots. Layer dots to add depth and texture. Canvas art makes great wall decorations or gifts.
Decorative Rocks
Painted rocks brighten gardens and homes. Find smooth stones and clean them well. Use bright paint colors to make dots in patterns or shapes. You can create animals, spirals, or simple designs. Seal the rocks with varnish to protect your art. Decorative rocks are perfect for beginners and kids.
Greeting Cards
Personalize greeting cards with dot painting. Use thick cardstock as your canvas. Create small dot patterns or pictures on the front. Add messages inside for a personal touch. Dot painted cards stand out and show extra care. They work well for birthdays, holidays, or thank you notes.
Care And Maintenance
Taking care of your dot painting supplies and finished art is essential. Proper care keeps your tools in good shape and your artwork looking fresh. Simple steps in cleaning, storing, and preserving ensure your dot painting lasts long.
Cleaning Tools
Clean your dotting tools immediately after use. Use warm water and mild soap to remove paint. Avoid harsh chemicals that can damage tool tips. Dry tools thoroughly with a soft cloth. Proper cleaning prevents paint build-up and extends tool life.
Storing Paints
Store paints in a cool, dry place away from sunlight. Keep paint containers tightly sealed to avoid drying out. Organize paints by color to find them quickly. Proper storage maintains paint quality for future projects.
Preserving Finished Art
Allow your dot painting to dry completely before handling. Use a clear varnish or sealant to protect the surface. Keep artwork away from direct sunlight and moisture. Store or display paintings in a dust-free area to keep colors vibrant.
Frequently Asked Questions
How To Do Dot Painting For Beginners?
Start with acrylic paint, dotting tools, and a blank surface. Dip tools in paint, then apply dots in patterns. Use varying sizes for depth. Let paint dry between layers. Practice simple designs and build complexity gradually for best results.
How To Do Pointillism For Beginners?
Start with a clean surface and select acrylic paints. Use a dotting tool or brush tip. Apply small, evenly spaced dots of different colors. Layer dots to create shades and shapes. Step back often to see how colors blend visually.
Practice patience and enjoy the process.
What Do I Need For Dot Painting?
You need acrylic paint, dotting tools or styluses, and a surface like canvas, paper, or rocks for dot painting.
Can A Non-indigenous Person Do Dot Painting?
Non-indigenous people can create dot paintings but these works do not represent authentic Indigenous art or culture. Respect cultural origins.
Conclusion
Dot painting offers a fun and relaxing creative experience. Start with simple tools and basic colors. Practice dot sizes and patterns slowly. Enjoy the process without rushing your work. Each painting becomes unique with your personal touch. Keep experimenting to improve your skills.
This DIY guide helps you create beautiful dot art. Grab your supplies, and begin your dot painting journey today!


