Quick answer: To paint forest wall art for your home, work from back to front in layers. Start with a light sky or misty background, add the most distant trees in pale, blue-gray tones, then paint each closer row of trees darker, warmer and more detailed. Finish with the foreground trunks, branches and ground, plus a few highlights where light hits. This atmospheric layering creates depth even with simple tree shapes and works on canvases from 16×20 inches up to oversized statement pieces.
A forest scene changes the feel of a room. Misty pines calm a bedroom, autumn woods warm a living room, and a dark, moody forest gives an office a dramatic focal point. The appeal for DIY painters is that you do not need to draw individual trees perfectly. A forest reads as believable when its layers get lighter and cooler as they recede, which is a technique anyone can learn.
This guide explains how to paint a forest wall art piece for home decor, from choosing a style to building depth, and includes palettes for different seasons and room styles.
Choose Your Forest Style
Decide on the mood before buying paint. Each style uses the same layering principle but different colors and brushwork.
| Style | Look | Key technique | Suits |
|---|---|---|---|
| Misty pine forest | Soft gray-green silhouettes fading into fog | Atmospheric perspective, glazing white over layers | Bedrooms, Scandinavian and minimalist decor |
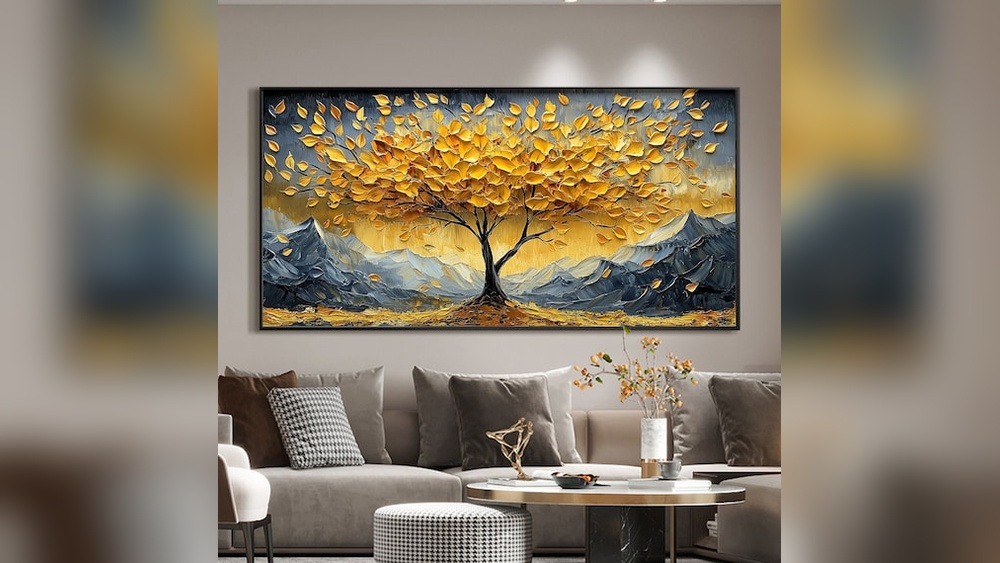
| Autumn woodland | Orange, gold and red canopies with dark trunks | Dabbing foliage, warm-cool contrast | Living rooms, rustic and farmhouse decor |
| Birch grove | White trunks with dark marks on a colored background | Palette knife or tape-resist trunks | Modern, boho |
| Dark moody forest | Deep greens and blacks with light rays | Value contrast, dry-brushed light beams | Offices, dens, dramatic accent walls |
| Abstract forest | Stylized vertical strokes and color blocks | Flat shapes, limited palette | Contemporary interiors |
Supplies
- Canvas: 16×20, 18×24 or 24×36 inches. Vertical formats emphasize tall trees; horizontal ones suggest a wide forest.
- Acrylic paints: titanium white, ultramarine blue, phthalo blue or green, sap green, yellow ochre, burnt sienna, burnt umber, payne’s gray
- Brushes: 2 inch flat or a hake brush for the background, 1 inch flat, a fan brush, a size 6 round, a liner
- Palette knife (great for birch trunks and texture)
- Spray bottle with water to keep acrylics workable
- Painter’s tape (optional, for crisp birch trunks)
Large backgrounds use more paint than people expect, and color consistency across a big canvas depends on paint quality. If you are deciding between craft and artist acrylics for a big piece, compare options in our guide to the best paints for wall art.
The Principle That Makes Forests Work: Atmospheric Perspective
Air contains moisture and particles that scatter light. Objects far away therefore look lighter, bluer, less saturated and less detailed than objects up close. Painters call this atmospheric or aerial perspective. In a forest painting, it means:
- Far trees: pale, bluish gray, soft edges, no detail
- Middle trees: medium value, muted greens, some branch structure
- Near trees: darkest values, warmest and most saturated colors, sharp edges, visible bark and needles
If you follow this rule, even simple triangle-shaped pines will create convincing depth.
How to Paint a Forest Wall Art for Home: Step-by-Step
Step 1: Paint the Sky and Background
Mix white with a touch of ultramarine and payne’s gray for a cool, misty sky. Paint the whole canvas with the large flat or hake brush, lightening toward the horizon line, which is often placed about one-third up from the bottom. For a warm dawn, blend in a little yellow ochre or soft pink near the horizon.
Let it dry completely.
Step 2: Paint the Farthest Tree Line
Mix your sky color with a small amount of green and gray so it is only slightly darker than the background. Use the fan brush held vertically: tap it down to create the tip of a pine, then widen the taps as you move down to form the triangular shape. Paint a row of these ghostly trees across the horizon at varying heights.
For deciduous forests, dab a soft, irregular canopy line with a round brush or sponge instead.
Step 3: Add Mist
Once the far trees are dry, mix white with plenty of glazing medium or water. Brush or sponge it across the bottom of the tree line and blend upward. This fog layer separates the distant row from the next one and is the secret to a soft, layered look.
Step 4: Paint the Middle Distance
Mix a darker, slightly greener version of the tree color. Paint a second row of trees, a little larger and placed lower than the first. Let some overlap the far row. Add another thin mist glaze along their bases when dry. Repeat with a third row if you want more depth.
Step 5: Paint the Foreground Trees
Use your darkest mixes: sap green with phthalo green and burnt umber, or payne’s gray with green. Paint two to five large trees, some extending off the top of the canvas. Cropped trees make the viewer feel like they are standing inside the forest. Paint trunks with the edge of a flat brush or a palette knife and add branches with a liner.
Step 6: Add the Forest Floor
Paint the ground with dark greens, browns and ochres. Suggest grass, ferns or fallen leaves with quick upward flicks of a fan brush or round. Keep detail concentrated in the very front.
Step 7: Add Light
Light makes a forest come alive. Use a dry brush with a little warm white or pale yellow to touch the edges of the foreground trees on one side. For dramatic light rays, mask diagonal lines with tape, then dry-brush a very thin, pale glaze between them and remove the tape. Keep the rays angled consistently from one light source, and make them fade out before they reach the ground so they look like light filtering through haze rather than painted stripes.
Step 8: Final Details
Add a few fine branches, needles, a distant bird or a path that leads into the trees. Paths and streams create a visual entry point that draws the eye into the painting.
Seasonal Forest Palettes
| Season | Background | Far trees | Near trees | Accent |
|---|---|---|---|---|
| Spring | Pale blue and soft yellow | Light gray-green | Fresh sap green and yellow-green | Pink blossoms |
| Summer | Clear blue | Blue-green | Deep phthalo and sap green | Bright light rays |
| Autumn | Warm cream or peach | Muted rust and gray | Burnt sienna, orange, gold | Red leaves on the ground |
| Winter | Gray-blue or lavender | Pale blue-gray | Dark green pines with white snow on branches | Soft snowflakes |
Painting a Birch Forest With a Palette Knife
Birch forests are popular in modern decor and are surprisingly easy. Paint a colorful background, perhaps a sunset gradient or autumn tones. When dry, load the edge of a palette knife with white and drag it vertically down the canvas to make each trunk. Vary widths and spacing. While the white is still wet, scrape a little payne’s gray horizontally across the trunks with the knife edge to create bark marks. Taping trunk edges first produces crisp, graphic lines.
For softer, more organic botanical shapes to hang alongside a birch piece, our guide to painting feather wall art uses similar dry-brush techniques.
Painting Large Forest Wall Art
Big canvases need a slightly different approach:
- Use bigger brushes. A 3 inch house painting brush is fine for backgrounds.
- Mix generous batches of each color and store them in airtight containers to keep them consistent.
- Mist the canvas with water to extend blending time.
- Stand back often. Large paintings are seen from several feet away, so detail matters less than strong value contrast.
What About the “Home Depot Apron Art” Trend?
Some searchers look for apron art, a style of loose, colorful painting done on work aprons or fabric scraps. Forest designs translate well to fabric. If you try it, use acrylic mixed with a fabric medium so the paint stays flexible, heat-set it according to the medium’s instructions, and keep designs bold and simple since fabric texture reduces fine detail.
Composition Tips for Forest Paintings
A forest can easily become a wall of evenly spaced trees. A few composition habits prevent that.
- Create a focal point. A gap in the trees with light coming through, a path, a lone tall pine or a small cabin gives the eye somewhere to land.
- Use the rule of thirds. Place the horizon and focal point near the one-third lines rather than in the exact center.
- Group trees. Cluster foreground trees in twos and threes with irregular spacing, leaving one larger open gap.
- Lead the eye. Paths, streams and fallen logs that angle into the scene pull the viewer inward.
- Frame the edges. Dark trees cropped at the left and right edges act like a natural frame.
Troubleshooting Forest Paintings
| Problem | Cause | Fix |
|---|---|---|
| Painting looks flat | Not enough value change between rows | Glaze a thin white mist over the back rows and darken the foreground |
| Trees look like cutouts | Hard edges everywhere | Soften distant tree edges with a dry brush; keep only the front edges sharp |
| Greens look artificial | Tube green used straight | Mix greens with ochre, burnt sienna or blue to vary temperature |
| Background streaky | Paint dried while blending | Mist with water, use a slow-drying medium, or repaint in one larger session |
| Mist looks chalky | Too much white pigment | Thin the white heavily with glazing medium and build it gradually |
Common Mistakes
- All trees the same value. Without lighter distant trees, there is no depth.
- Trees lined up evenly. Vary height, spacing and lean.
- Too much detail in the background. Save details for the foreground.
- Straight, stiff trunks. Real trunks taper and bend slightly.
- Using pure black. It flattens shadows. Mix darks from blue, green and umber.
Finishing and Hanging Forest Wall Art
Let the painting dry for at least a day, and longer if you used thick paint or texture. A satin varnish suits most forest pieces because it deepens dark greens without the glare of gloss. Matte varnish keeps a misty scene soft and is a good choice for rooms with bright windows opposite the wall.
Continue the background colors around the canvas edges for a gallery-wrap look, or add a thin floating frame in natural wood, which echoes the subject. A wide horizontal forest works well above a sofa or bed; aim for the artwork to span roughly two-thirds of the furniture width. Tall vertical forest canvases suit narrow walls beside doorways or at the end of a hallway, where they add a sense of height.
FAQs
What colors do I need to paint a forest?
White, ultramarine blue, a green such as sap green, yellow ochre, burnt sienna, burnt umber and payne’s gray cover most forest scenes. Add phthalo green for deep shadows and a warm orange for autumn.
How do you paint trees in the distance?
Mix tree colors with the background or sky color so they are paler and bluer, keep their edges soft and leave out detail. A thin white glaze between rows adds mist and separation.
Which brush is best for painting pine trees?
A fan brush held vertically and tapped from tip to base creates pine shapes quickly. A small round or liner adds individual branches in the foreground.
How long does a forest painting take?
A medium canvas typically takes three to six hours including drying between layers. Large or detailed pieces can take longer or be split across sessions.
Can beginners paint forest wall art?
Yes. A misty pine forest uses simple triangle shapes and relies on layering for depth, which makes it one of the most beginner-friendly landscape subjects.
Should I varnish forest wall art?
Varnish protects acrylic paintings from dust and fading and evens out sheen. Wait at least 24 hours for thin paint and longer for thick layers before applying it.
Next Step
Paint one misty forest to learn the layering rhythm, then try a different season or a birch grove for a matching set. Rich darks and clean pale mixes depend heavily on pigment quality, so look over our picks for acrylic paints that suit large home decor canvases before you start a bigger piece.