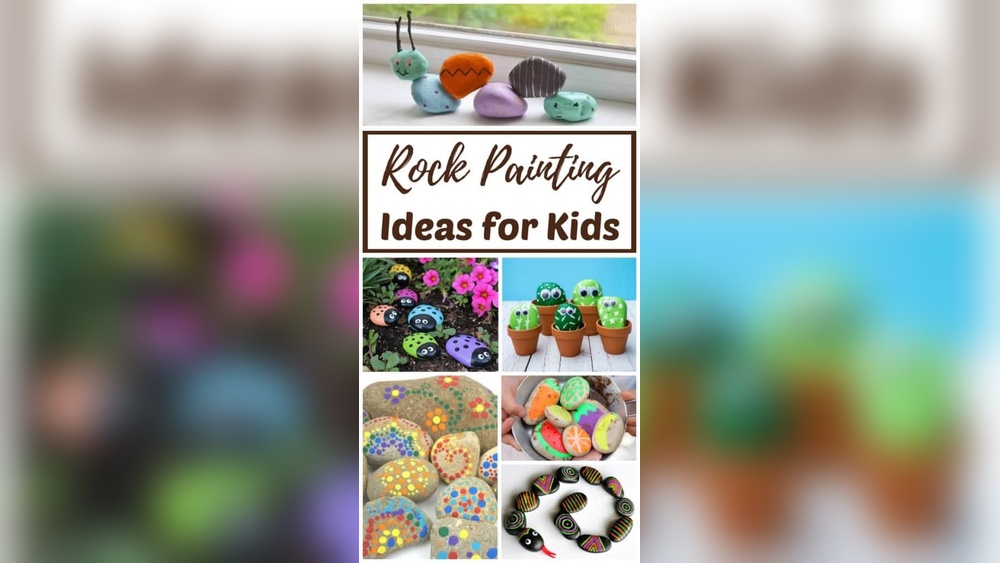
Quick answer: Here is how to paint rocks for kids: choose smooth, flat or rounded rocks, scrub and dry them, then paint a solid base coat with acrylic craft paint and let it dry 15 to 20 minutes. Add designs on top with brushes, cotton swabs or paint pens: ladybugs, faces, hearts, rainbows, flowers and simple animals are easy rock painting ideas for kids. Once everything is fully dry, an adult can seal the rocks with a clear water-based sealer if they will be handled often or kept outdoors.
Rock painting is part craft, part treasure hunt. Kids get to search for the perfect stone, decide what it looks like (a bug? a fish? a monster?) and then bring it to life with paint. The finished rocks can decorate a garden, become paperweights or be hidden around the neighborhood for others to find.
This guide covers how to paint rocks for kids from start to finish, along with 25 easy ideas sorted by age, tips for finding and prepping rocks, the paint and tools that work best on stone and how to seal and display the results.
Finding the Right Rocks
The rock itself makes a big difference in how easy the project feels.
- Smooth surface: River rocks and beach pebbles are ideal. Rough or porous rocks soak up paint and make details harder.
- Flat or gently rounded: Flat rocks are easiest to paint and display. Rounded rocks suit ladybugs, turtles and faces.
- Palm-sized: Rocks about 2 to 4 inches across are easiest for little hands. Very small rocks are fiddly; very large ones take many coats.
- Light-colored: Pale gray or white rocks make paint colors brighter with fewer coats.
Collect rocks from your own yard or buy bags of smooth river rocks from garden or craft stores. Check local rules before collecting from parks, beaches or protected areas, since many prohibit removing rocks.
For a full look at rock-painting supplies, surfaces and techniques beyond kids’ projects, the rock painting essentials guide covers everything from paint types to sealers.
Prepping Rocks for Paint
- Scrub: Wash rocks in warm, soapy water with an old toothbrush to remove dirt and algae.
- Rinse: Rinse away all soap.
- Dry completely: Let rocks air-dry for a few hours or overnight. Paint does not stick well to damp stone.
- Optional primer: For very dark or porous rocks, a base coat of white paint makes colors pop and reduces the number of coats needed.
Paint and Tools for Kids’ Rock Painting
| Supply | Why | Notes for kids |
|---|---|---|
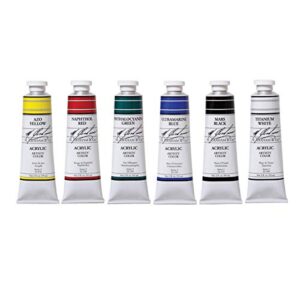
| Acrylic craft paint | Grips stone, dries fast, bright colors | Stains clothes; use smocks |
| Washable tempera | Easy cleanup | Can flake or rub off rocks; best for very young kids and indoor use |
| Water-based paint pens | Precise lines, lettering, small details | Great for ages 6 and up over dry paint |
| Brushes (flat and small round) | Base coats and details | A 1/2-inch flat for base, a fine round for details |
| Cotton swabs, pencil erasers, toothpicks | Dots and tiny details | Easy for little hands |
| Clear water-based sealer | Protects finished rocks | Adults apply in a ventilated area |
How to Paint Rocks for Kids: Step-by-Step
Step 1: Set up a protected workspace
Cover the table with newspaper or a plastic cloth. Give each child a paper plate or egg carton to hold their rock while painting; it makes turning the rock easy and catches drips.
Step 2: Plan the design
Look at the rock’s shape together. Ask, “What does it look like?” A long rock might become a fish or a caterpillar. A round one might be a ladybug, a face or a planet. Kids can sketch the idea on paper first or draw lightly on the rock with a pencil.
Step 3: Paint the base coat
Paint the top and sides with a solid color using a flat brush. Let it dry 15 to 20 minutes. Most rocks need a second coat for even, bright color. Leave the bottom unpainted so the rock can rest on the plate, then paint the bottom later if desired.
Step 4: Add the main design
Paint the main shapes of the design with a medium brush. Larger shapes first, details last.
Step 5: Details
Use a small brush, cotton swab, toothpick or paint pen for eyes, dots, outlines and patterns. Let each color dry before painting another color right on top of it.
Step 6: Dry and seal
Let the rock dry for several hours, ideally overnight. An adult can then apply a clear water-based sealer, following the product label for drying time and ventilation. Sealing helps protect the design from scratches, moisture and fading.
Easy Rock Painting Ideas for Kids by Age
Ages 2 to 4: Big, simple and sensory
- Dot rocks: Cotton swab or fingertip dots in many colors.
- Single-color rocks: Paint the whole rock one bright color; a set of rainbow rocks is beautiful.
- Fingerprint bugs: Fingerprints with marker legs added by an adult.
- Sponge-stamped rocks: Small sponge shapes pressed on a painted base.
- Swirl rocks: Two colors swirled together with a brush.
Ages 5 to 7: Recognizable shapes
- Ladybugs: Red base, black head and spots. The ladybug rock painting tutorial walks through it in detail.
- Smiley faces and emojis: Yellow base with simple expressions.
- Hearts: A red or pink heart on a white base.
- Rainbows: Curved bands across a white or blue base.
- Watermelon slices: Green rim, pink middle, black seeds.
- Strawberries: Red base, green leaves on top, yellow seed dots.
- Flowers: Daisy petals around a yellow center.
- Fish: Long rock, tail painted at one end, dot eye, scales.
Ages 8 and up: More detail and imagination
- Animal critters: Owls, foxes, cats, turtles and hedgehogs. The guide to painted rock critters kids will love has more animal ideas.
- Monsters: One eye, three eyes, teeth, horns; anything goes.
- Planets and galaxies: Sponged dark blue and purple with white star dots.
- Mandala dot rocks: Rings of dots in increasing sizes around a center.
- Kindness rocks: Short positive words written with paint pens: “Smile,” “Be kind,” “You rock.”
- Story stones: A set of rocks with characters and objects (sun, tree, house, dog) used to tell stories.
- Tic-tac-toe set: Five rocks painted as X’s and five as O’s, plus a painted board on fabric or cardboard.
- Cactus garden: Green rocks with white spine lines, set in a small pot.
Rock Painting Ideas Easy Enough for a Group
Rock painting works well for parties, classrooms and family gatherings. A few tips keep it smooth:
- Pre-wash and dry all rocks the day before.
- Give each child two or three rocks so fast finishers stay busy.
- Put paint in muffin tins or egg cartons shared between two or three kids.
- Write names on the bottom of rocks with a permanent marker before painting.
- Set up a drying tray away from the painting area.
- Seal all rocks at once after the event, then send them home.
Easy Paint Ideas for Kids: Techniques Worth Trying on Rocks
| Technique | How to do it | Age |
|---|---|---|
| Dotting | Press swabs, pencil erasers or brush ends to make dots; vary sizes for patterns | 3 and up |
| Sponging | Dab a sponge with two colors for a textured, blended base (great for galaxies) | 4 and up |
| Splattering | Flick white paint from a toothbrush for stars or speckles | 6 and up, with help |
| Outlining | Use a black paint pen to outline shapes once dry for a crisp look | 6 and up |
| Layering | Paint a base, let dry, add shapes, let dry, add details | 5 and up |
How to Paint Rocks Easy: A Rainbow Stripe Starter Project
For a first session, a “rainbow stripe” rock is a reliable win for kids aged 4 and up, because it practices base coats, drying and clean color changes without any tricky details.
- Paint the whole top of a flat rock white and let it dry for 15 to 20 minutes. Add a second coat if the gray of the rock shows through.
- With a small flat brush, paint a curved band of red across one end of the rock.
- Rinse and blot the brush, then paint orange right next to the red, touching it.
- Continue with yellow, green, blue and purple until the rock is covered in curved stripes.
- Let it dry, then add a small white cloud at each end or a few dots between the stripes.
- Once fully dry, an adult can seal it.
The whole project takes about 30 minutes, and it shows kids how much brighter colors look over a white base than straight on stone.
Finger Paint Ideas for Kids on Rocks
Very young children can still join in with fingertip painting. Give them a base-coated rock and small dabs of paint on a plate. Fingerprints make ladybug spots, flower petals around a center dot, caterpillar segments or a ring of colorful dots. Use washable paint for this age, and keep the rocks large enough that they cannot be swallowed.
Displaying and Using Painted Rocks
- Garden border: Line a flower bed or path with painted rocks. Sealing is important outdoors. Rocks that live outside face sun, rain and frost, so a sealer and an occasional fresh coat help them last.
- Paperweights and gifts: Painted rocks make thoughtful handmade gifts for teachers and grandparents.
- Kindness rock hunts: Some communities hide painted rocks in public spaces for others to find. Follow local rules and avoid parks or trails where it is not allowed.
- Games: Story stones, tic-tac-toe and memory matching games all work with painted rocks.
- Pet rocks: Add googly eyes and a name for a classic pet rock.
Common Problems and Fixes
- Paint looks patchy. Add another base coat once the first is dry. Two or three coats are normal.
- Details smeared. The base was still wet. Let it dry, paint over with base color and redo the detail.
- Paint peeling off. The rock was dusty or damp, or tempera was used. Clean and dry rocks thoroughly and use acrylic.
- Sealer made paint run or smear. Paint was not fully dry, or the sealer was brushed too hard. Wait longer and apply sealer gently, or use a spray sealer (adults only, outdoors).
- Paint pen skipping. Prime it on scrap paper first, and use it only on fully dry paint.
- Sticky finish. Some sealers stay tacky in humid conditions. Let rocks cure longer in a dry room, following the product’s directions.
Safety Tips
- Choose nontoxic paints labeled for children’s use.
- Keep small rocks away from toddlers who put things in their mouths.
- Adults should handle spray sealers outdoors or in a well-ventilated space.
- Wash hands after painting.
Related Reading
FAQs
What paint is best for kids painting rocks?
Acrylic craft paint is the most common choice because it grips stone well and dries quickly. Washable tempera is easier to clean but can rub or flake off rocks. Water-based paint pens are great for details.
What are easy rock painting ideas for kids?
Ladybugs, smiley faces, hearts, rainbows, watermelon slices, strawberries, flowers, fish, dot patterns and simple animals are all easy and fun for kids.
How do you prep rocks before painting?
Scrub them in warm soapy water with a toothbrush, rinse and let them dry completely, usually a few hours or overnight. A white base coat helps colors look brighter on dark rocks.
Do painted rocks need to be sealed?
Sealing is recommended for rocks that will be handled often or placed outdoors. A clear water-based sealer applied by an adult after the paint fully dries helps protect the design.
How long does paint take to dry on rocks?
Thin acrylic coats usually dry to the touch in 15 to 20 minutes. Let the finished rock dry several hours or overnight before sealing.
What are some easy ideas for painting rocks with toddlers?
Dot rocks, single-color rocks, sponge-stamped rocks and fingerprint bugs are toddler-friendly. Use large rocks, supervise closely and choose washable, nontoxic paint.
Final Thoughts
Rock painting combines nature, creativity and play in one simple activity. With smooth rocks, the right paint and a few easy ideas, kids of every age can make something they are proud to display or share.
When you are ready to stock up or explore more advanced designs, the complete guide to rock painting supplies and techniques covers the paints, pens, brushes and sealers that make rock art easier and longer-lasting.