
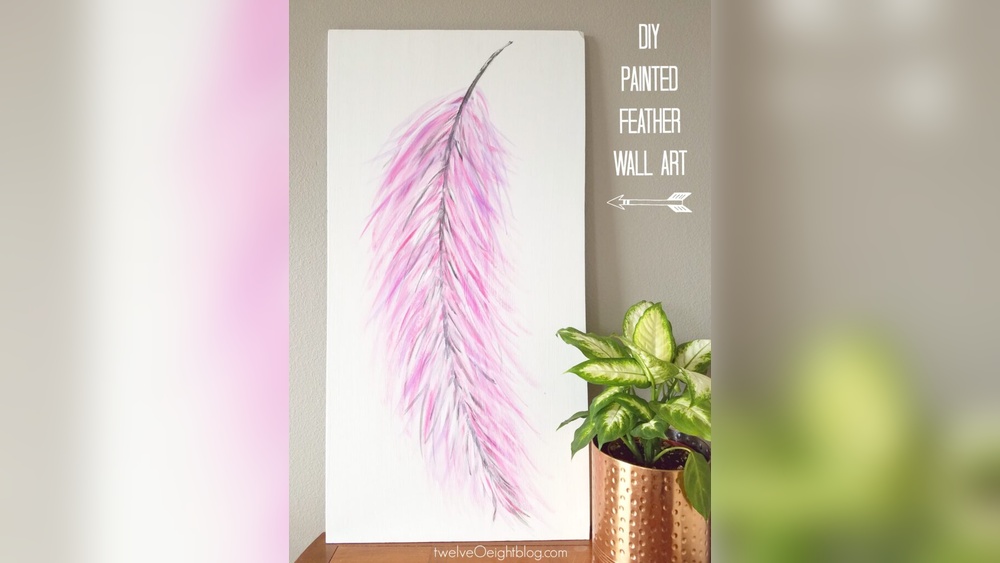
Quick answer: To paint a feather for DIY wall art, draw a gently curved central shaft, sketch the feather outline around it, and paint the vane (the soft flat part) with a dry, lightly loaded flat brush using short strokes that angle away from the shaft. Build color from dark at the base to light at the tip, add a few deliberate splits in the vane, then define the shaft with a thin bright line and finish with fine highlight strokes. Acrylics on a 11×14 or 16×20 canvas are the easiest way to get it done in an afternoon.
Feathers work on almost any wall. They suit boho living rooms, neutral bedrooms and nature-themed nurseries, and they look good whether painted realistically or as bold graphic shapes. The good news for anyone learning how to paint a feather for wall art DIY style is that the subject forgives small errors. Real feathers are irregular, so a slightly uneven edge reads as natural rather than wrong.
This tutorial covers a single large feather, a trio of feathers for a set, and a few variations such as watercolor-style and metallic feathers. It also suggests ways to turn the painting into a finished decor piece without a frame shop.
What Makes a Painted Feather Look Real
A feather has three visual parts. Understanding them will guide every brushstroke.
- Shaft (rachis): The central stiff spine. It tapers from thick at the base to a fine point at the tip and usually curves slightly.
- Vane: The flat surface on either side of the shaft, made of hundreds of tiny barbs that hook together. Barbs angle toward the tip, never straight out.
- Afterfeather or down: Fluffy, loose barbs at the base where the barbs no longer interlock.
Feathers also split. Where the barbs separate, they leave small V-shaped gaps along the edge. Painting two or three of these splits is the fastest way to make a feather look real.
Art Supplies for DIY Feather Painting
You do not need a large kit. A focused set of art supplies for DIY projects like this one keeps costs down and makes color mixing easier.
- Canvas or canvas panel, 11×14 inches for a single feather or three 8×10 panels for a set
- Acrylic paints: titanium white, mars black or payne’s gray, burnt umber, yellow ochre, and one accent color (teal, rust or blush pink work well)
- Brushes: 3/4 inch flat, size 4 flat, size 2 round, liner or rigger
- An old, splayed flat brush or a fan brush for barb texture
- Palette, water jar, paper towels
- White chalk or a light pencil for sketching
- Optional: metallic gold or copper acrylic, matte or satin varnish
Paint body affects texture. Heavy body acrylic holds the crisp ridges of dry-brushed barbs, while very fluid craft paint tends to flatten out. If you are choosing paints for repeated decor projects, the guide to the best paints for wall art projects compares acrylic types and finishes.
How to Paint a Feather for Wall Art DIY: Step-by-Step
1. Prepare the Background
Choose a background that contrasts with your feather. A pale feather needs a mid-tone or dark ground; a dark feather looks best on white or cream. Popular choices include:
- Warm white with a hint of yellow ochre for a soft, natural look
- Muted sage or dusty blue for a calm bedroom piece
- Charcoal or navy for a dramatic white or metallic feather
Paint two even coats and let them dry for at least 30 minutes.
2. Sketch the Shaft and Outline
Draw one gentle curve from the bottom third of the canvas toward the top corner. A diagonal feather feels livelier than a vertical one. Then sketch the vane outline around the shaft, making one side slightly narrower than the other. Flight feathers are asymmetrical, and that small imbalance adds realism.
Mark where you want two or three splits along the edges.
3. Block In the Base Color
Using the 3/4 inch flat brush, fill the vane with a mid-tone version of your feather color. Stroke from the shaft outward at an angle toward the tip, never perpendicular. Leave the shaft line unpainted or paint it slightly lighter.
At the base of the feather, let your strokes become looser and wispier to suggest the fluffy down.
4. Build Shading and Gradient
Most feathers are darker at the base and edges and lighter toward the middle or tip, or they have bands of color. Mix a darker value of your base and dry-brush it near the base and along the outer edges. Wipe most of the paint off the brush on a paper towel first; you want streaky, broken strokes that follow the barb direction.
For banded feathers, like those of hawks or pheasants, paint stripes that curve with the barbs rather than running straight across.
5. Paint the Splits
At each marked split, paint a narrow V shape in the background color, cutting into the vane from the edge toward the shaft at the same angle as the barbs. Then use the liner to drag a few loose barbs across the gap, as if they are pulling apart.
6. Add Barb Texture
Take the splayed flat or fan brush, load it with a lighter value, blot it, and pull short, feathery strokes over the vane. Work from the shaft outward. Repeat with the darker value in a few areas. This step creates the fine, hair-like texture that makes a feather look soft.
7. Define the Shaft
Paint the shaft with the liner brush in a light color, thick at the base and tapering to a hairline at the tip. Add a thin dark line along one side of the shaft as a shadow so it appears raised.
8. Final Highlights
With nearly dry white or a pale tint, touch in a few highlight strokes along the shaft and at the tops of the barbs. Add a soft cast shadow beneath the feather with a glaze of the background color mixed with a little gray if you want it to appear resting on a surface.
Feather Styles to Try
| Style | Technique | Difficulty | Best background |
|---|---|---|---|
| Realistic natural | Dry brushing, layered values, splits | Intermediate | Cream or warm gray |
| Watercolor look | Fluid acrylic thinned with water, soft bleeding edges | Beginner | Bright white |
| Boho graphic | Flat color blocks, outlines, dots and stripes | Beginner | Terracotta, mustard, blush |
| Metallic accent | Gold or copper leaf or paint on the tip or shaft | Beginner to intermediate | Black, navy, deep green |
| Peacock | Eye spot in layered teal, blue and gold with loose barbs | Advanced | Dark teal or black |
Color Mixing Recipes for Natural Feathers
Ready-made browns and grays from a tube often look flat on feathers. Mixing your own gives warmer, more varied results. These starting ratios use a small set of colors:
- Soft dove gray: titanium white with a small touch of payne’s gray and a speck of burnt umber to warm it.
- Owl brown: burnt umber plus yellow ochre in roughly equal parts, lightened with white for the barb highlights.
- Cream highlight: titanium white with a pinhead of yellow ochre. Pure white can look harsh against warm tones.
- Deep base shadow: burnt umber with a little payne’s gray. Avoid pure black, which deadens the color.
- Muted teal accent: a teal or turquoise knocked back with a touch of burnt umber, so it sits with the neutrals instead of shouting.
Mix three values of your main color before you start (dark, mid and light) and keep them on the palette. Having all three ready lets you move quickly while the brush is still in rhythm.
Watercolor-Style Feather Method
If you prefer a soft, airy look, acrylic can mimic watercolor. Thin fluid acrylic with water to the consistency of milk. Wet the feather shape with clean water first, then drop color in at the base and let it bloom outward. Tilt the canvas slightly to guide the pigment toward the tip. While damp, lift a few streaks with a clean, thirsty brush to suggest barbs. Once dry, add the shaft and a few crisp barb lines with a liner. This approach works best on smooth surfaces such as cold-press watercolor paper or a gessoed panel, which you can then frame behind glass.
DIY Large Canvas Art Ideas for Beginners Using Feathers
If you want a statement piece above a bed or sofa, feathers scale up well. A few ideas:
- Oversized single feather: One feather on a 24×36 inch canvas, painted with large flat brushes. Bigger brushes keep strokes loose and save time.
- Feather triptych: Three canvases, each with one feather in a different shade of the same color family.
- Scattered feathers: Five to seven small feathers drifting across one canvas at varying angles.
- Feather and botanicals: Combine feathers with dried grasses for a natural boho look. The soft plume techniques in our tutorial on pampas grass wall art pair well with this.
For large pieces, pre-mix more paint than you think you need. Matching a custom color halfway through a big canvas is difficult.
Are DIY Art Kits for Adults Worth It for Feather Painting?
DIY art kits for adults bundle a pre-printed or blank canvas, paints and brushes, sometimes with a guide. They are convenient for a first project or a gift. The trade-offs are usually small paint quantities, a limited color range and brushes that shed. If you plan to paint more than one or two pieces, buying a small selection of quality acrylics and two or three good brushes typically gives more control and lasts longer.
Common Feather Painting Mistakes
- Straight-out strokes. Barbs angle toward the tip. Perpendicular strokes make the feather look like a fish skeleton.
- Too much paint on the dry brush. Overloaded brushes create solid streaks instead of fine hairs. Always blot first.
- A perfectly symmetrical outline. Make one side narrower.
- Thick, uniform shaft. The shaft must taper.
- No splits. Without them, the feather looks like a leaf.
How to Display Your Feather Painting
Paint the canvas edges in the background color for a clean, frameless look. A floating frame in light oak or black also suits feather art. Once the paint has dried for a day or more, apply a satin varnish to protect the surface and unify sheen between dry-brushed and smooth areas.
Feathers hung in a vertical group of three suit narrow walls in hallways and beside doorways. A horizontal row of three works above a headboard or console table.
FAQs
What brush is best for painting feathers?
A flat brush for blocking in, a fan brush or an old splayed flat for barb texture, and a liner for the shaft and fine details. The splayed brush is often the most useful tool because it creates many fine lines in one stroke.
How do you paint a feather with acrylic for beginners?
Start with a simple outline and a curved shaft, block in one color, add a darker value at the base with a dry brush, then paint two splits and a tapered shaft. Skip fine details until you are comfortable with the stroke direction.
What colors look good for feather wall art?
Neutral feathers in browns, grays and creams suit most rooms. Teal, blush, rust and mustard are popular accents in boho decor, and metallic gold on a dark background suits modern interiors.
How long does a feather painting take?
A single feather on a medium canvas usually takes two to four hours including drying time between layers. Large or highly detailed pieces such as peacock feathers can take longer.
What are good art supplies for DIY wall art?
A few artist or student-grade acrylics, a stretched canvas, two or three quality synthetic brushes and a varnish cover most projects. This setup also works for florals, botanicals and simple abstract pieces.
Can I paint a feather on wood instead of canvas?
Yes. Sand the wood smooth, apply a coat or two of gesso or primer, and paint as usual. Wood slices and planks suit rustic and farmhouse decor.
Final Thoughts
Feather art rewards a light touch: blot the brush, follow the barb direction and let a few imperfections stay. Once you have painted one, try a set in a coordinated palette for a cohesive wall. For richer color and better dry-brush texture, choosing the right paint body helps a lot, so check our picks for acrylic and craft paints suited to decor canvases before your next project.





3 Comments