
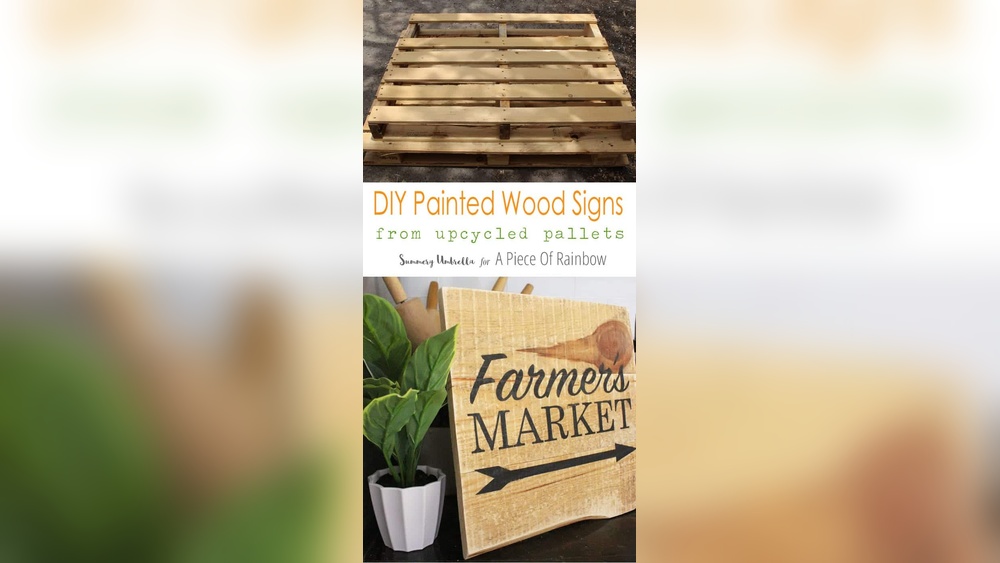
Are you ready to transform simple wooden pallets into charming, personalized signs that add character to your space? Painting DIY wooden pallet signs is a fun and easy way to bring your creativity to life while giving new purpose to old wood.
Whether you want a rustic welcome sign for your porch or a unique piece of home décor, this guide will walk you through every step. You’ll learn the best painting techniques, which paints to choose, and helpful tips to make your pallet sign stand out.
Keep reading, and you’ll soon be crafting beautiful wooden pallet signs that grab attention and make your space truly yours.
Credit: salvagedinspirations.com
Choosing Pallets
Choosing the right pallet is the first step to create a beautiful wooden pallet sign. Not all pallets are suitable for painting or crafting. Picking the best pallet ensures your project looks great and lasts long. Some pallets are better quality and safer to use than others. Knowing how to select and prepare pallets will save time and effort.
Types Of Pallets
Wooden pallets come in different types and sizes. Some pallets are made of softwood, while others use hardwood. Softwood is easier to paint but less durable. Hardwood pallets are stronger but harder to work with. Some pallets are new, while others are used or weathered. New pallets have smooth surfaces, making painting easier. Used pallets may have rough spots and need extra sanding.
Checking For Safety
Safety is very important when choosing pallets. Some pallets are treated with chemicals that can be harmful. Look for pallets marked with “HT” which means heat-treated and safe. Avoid pallets stamped with “MB” as they contain toxic pesticides. Check for nails, splinters, or broken boards before using. Always wear gloves when handling pallets to protect your hands.
Preparing Pallets For Painting
Preparing pallets well makes painting easier and better. Start by cleaning the pallet with soap and water to remove dirt. Let it dry completely before sanding. Sand the surface to smooth rough spots and remove old paint or stains. Wipe the dust off with a cloth after sanding. Apply a primer to help paint stick and last longer. Now your pallet is ready for painting your design.
Selecting Paint
Selecting the right paint is a key step for painting DIY wooden pallet signs. The choice affects how the paint sticks, how long it lasts, and how good your sign looks. Understanding paint types, colors, and finishes helps you create a beautiful and lasting project.
Best Paint Types
Acrylic latex paint works great for wooden pallet signs. It dries fast and sticks well to wood. It also handles weather changes, making it ideal for outdoor signs. Oil-based paint is stronger and lasts longer but takes more time to dry. For beginners, acrylic paint is easier to use and clean up.
Color Choices
Pick colors that match your style and the sign’s message. Bright colors grab attention and make the text easy to read. Soft colors create a calm, rustic look. Consider the background color of the wood too. Choose colors that stand out well against the pallet’s natural tones.
Paint Finishes
Matte finish hides wood imperfections and gives a natural look. Satin finish adds a little shine and is easier to clean. Glossy finish is very shiny and shows off bold colors but can highlight flaws. Choose a finish based on the look you want and how you plan to use the sign.
Gathering Tools
Gathering the right tools is key for painting DIY wooden pallet signs. A good start makes your project easier and more fun. Preparing before you paint saves time and helps get better results. Below are the main supplies you will need to create beautiful pallet signs.
Essential Brushes And Rollers
Choose brushes that fit the size of your sign. A wide flat brush covers large areas quickly. Small angled brushes help with detailed edges. Foam rollers work well for smooth, even coats. Use synthetic bristles for acrylic paints. Keep a brush for touch-ups and fine lines.
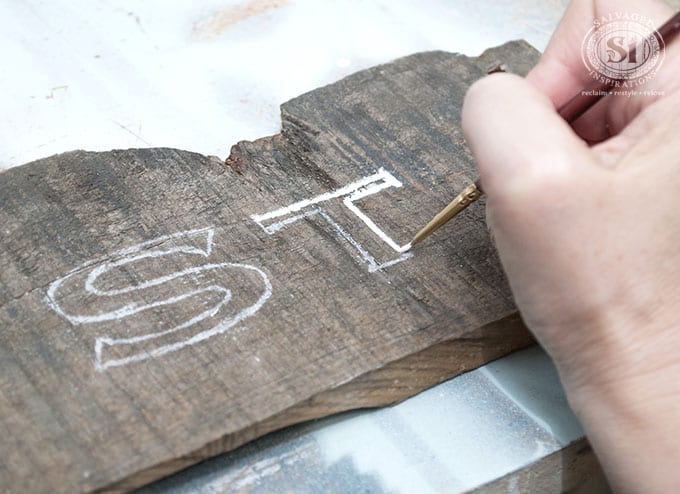
Stencils And Lettering Supplies
Stencils make letters and shapes neat and clear. Buy reusable plastic stencils or create your own from cardboard. Use painter’s tape to hold stencils in place. For hand lettering, get fine-tipped paint markers or detail brushes. Practice your design on paper before painting on wood.
Additional Materials
Sandpaper smooths the wood surface and removes splinters. Get medium and fine grit for best results. Painter’s tape protects areas you don’t want to paint. Use a drop cloth or old newspapers to keep your workspace clean. Have a cup of water and cloth for cleaning brushes during work.
Preparing The Surface
Preparing the surface is the first important step for painting DIY wooden pallet signs. A clean and smooth base helps paint stick better and look great. It also makes your sign last longer. Take time to clean, sand, and prime the wood well.
Cleaning Pallets
Start by removing dirt, dust, and any old paint from the pallets. Use a stiff brush or a cloth to wipe the surface. For stubborn grime, mix mild soap with water and scrub gently. Let the pallets dry completely before moving on. Clean pallets ensure paint goes on smoothly without bumps.
Sanding Techniques
Sanding smooths the wood and removes rough spots. Use medium-grit sandpaper to start, then switch to fine-grit for a soft finish. Sand along the wood grain to avoid scratches. Pay attention to edges and corners where splinters hide. After sanding, wipe the dust off with a dry cloth or brush.
Priming Wood
Apply a wood primer to seal the surface and improve paint adhesion. Choose a primer suitable for outdoor use if your sign stays outside. Use a brush or roller to spread a thin, even coat over the entire pallet. Let the primer dry fully before painting. Priming protects wood and makes colors appear brighter.
Painting Techniques
Painting wooden pallet signs requires simple techniques to create beautiful results. Using the right methods can make your sign stand out and last longer. The painting process starts with preparing the wood and applying a base coat. Then, you can add designs or patterns to give your sign personality. Stencils help create clear lettering and professional-looking details. Each step shapes the final look of your pallet sign.
Base Coat Application
Apply a base coat to smooth the wood surface. Use exterior acrylic latex paint for durability and quick drying. Choose a color that matches your design idea. Use a wide brush or roller to cover the entire pallet. Paint in the direction of the wood grain. Let the base coat dry completely before adding more layers or designs.
Adding Designs And Patterns
Use brushes or sponges to add shapes and patterns on your pallet. Simple shapes like stripes, dots, or chevrons work well for beginners. Mix colors to create unique effects or use contrasting colors to make patterns pop. Layer the paint carefully to avoid smudging. Allow each layer to dry before applying the next. This process adds depth and style to your sign.
Using Stencils For Lettering
Stencils help paint clean and clear letters or words. Choose stencil designs that fit your sign’s theme. Secure the stencil firmly to prevent paint from bleeding underneath. Use a small brush or sponge to dab paint inside the stencil. Remove the stencil gently while the paint is still wet. This method ensures sharp and professional lettering on your pallet sign.
Finishing Touches
Finishing touches bring your DIY wooden pallet sign to life. These final steps protect your work and enhance its look. Proper finishing ensures your sign stays beautiful longer and fits your style perfectly.
Sealing The Paint
Sealing protects your paint from damage and fading. Use a clear acrylic sealer for indoor signs. For outdoor signs, pick a weather-resistant sealer. Apply a thin, even coat using a brush or spray. Let it dry fully before touching the sign. Sealing adds a smooth finish and keeps colors bright.
Distressing For Rustic Look
Distressing adds charm and character to your pallet sign. Lightly sand edges and corners to reveal wood beneath. Use sandpaper or a sanding block for control. Focus on areas that would wear naturally. This technique gives your sign a vintage, rustic feel. Avoid over-sanding to keep the design visible.
Drying And Curing Tips
Drying time varies by paint and sealer type. Allow paint to dry for at least 24 hours. After sealing, cure the sign in a dry, dust-free place. Avoid stacking or handling during curing. Full curing can take up to 72 hours. Proper curing strengthens the finish and prevents damage.
Displaying Pallet Signs
Displaying your DIY wooden pallet signs properly ensures they catch attention and last long. Good placement and secure hanging make a big difference. Consider where you want to show your artwork and how to keep it safe. This section covers smart ways to hang, use, and maintain your pallet signs.
Hanging Methods
Choose a hanging method that fits your wall and sign size. Sawtooth hangers work well for lightweight pallet signs. D-rings and wire offer stronger support for bigger signs. Command strips provide a no-damage option for renters. Always use anchors if you hang on drywall to avoid falls. Check that the pallet sign is level and secure before letting go.
Outdoor Vs Indoor Use
Decide if your pallet sign will live inside or outside. Outdoor signs need weatherproof paint and sealant. Use exterior acrylic latex paint for durability. Place outdoor signs where they avoid heavy rain and direct sun. Indoor signs last longer and need less protection. Keep indoor signs away from moisture spots like kitchens or bathrooms.
Maintenance Tips
Clean your pallet signs gently with a dry or slightly damp cloth. Avoid harsh chemicals that can damage paint. Reapply sealant every year for outdoor signs to protect from weather. Check hanging hardware regularly to prevent accidents. Touch up paint chips quickly to keep the sign looking fresh. Proper care extends the life of your pallet art.

Credit: www.amazon.com

Credit: www.amazon.com
Frequently Asked Questions
What Kind Of Paint To Use On Wooden Pallets?
Use exterior acrylic latex paint for wooden pallets. It dries fast, adheres well, and resists weather damage. Oil-based paint offers durability but takes longer to dry. Choose high-quality paint for vibrant, lasting color on your pallet projects.
What Kind Of Paint Do You Use For Wooden Signs?
Use exterior acrylic latex paint for wooden signs. It adheres well, dries fast, and resists weather. Choose high-quality paint for vibrant, lasting colors. Oil-based paints offer durability but dry slower.
Why Is Burning Pallets Illegal?
Burning pallets releases toxic chemicals from treatments, harming air quality and health. It also increases fire hazards, making it illegal in many areas.
What Are Wooden Pallets Coated With?
Wooden pallets are coated either by heat treatment or with methyl bromide pesticide to prevent pests. Heat treatment uses high kiln temperatures. Methyl bromide is toxic and harmful to health and the environment. Many pallets now prefer heat treatment due to safety concerns.
Conclusion
Painting DIY wooden pallet signs brings charm to any space. Choose the right paint and prepare your wood well. Simple steps create beautiful, personalized decor with ease. Take your time and enjoy the creative process. This project fits any skill level and budget.
Try different colors and designs to match your style. Wooden pallet signs add warmth and character to homes. Start your painting journey today and make unique art.


