
PaintingProGuide is reader-supported. When you buy through links on this page we may earn an affiliate commission at no extra cost to you.
The best palette layout for acrylic painting is one you can use without looking: colors in a fixed order around the edge, a large open mixing area in the middle, and white and your darkest color far apart so they do not contaminate each other. Acrylics add a complication that oils do not have: the paint on your palette starts skinning over within minutes, so the layout also has to minimize how long each pile sits exposed.
This guide explains the standard spectrum layout and two alternatives, shows how to adapt them to small, large and wet palettes, and then recommends five palettes whose shape and surface make a disciplined layout easier to maintain.
Quick answer: Arrange your acrylics in spectrum order around the top and sides of the palette: white at one corner, then yellows, oranges, reds, violets, blues, greens, and earth colors, with black or your darkest mixer at the opposite corner. Keep the center clear for mixing and squeeze out small, tall piles rather than flat smears so they skin over more slowly. For the surface itself, a neutral grey glass palette such as the ELFULLY 12×16 gives the most honest color read, while a 20-well tray like the DUGATO is the easiest way to keep colors separated if you are new to acrylics.
Why Palette Layout Matters More With Acrylics
Oil painters can leave paint out for days, so a messy palette is an inconvenience. Acrylic painters are racing a clock. Every minute you spend hunting for the blue you squeezed out somewhere is a minute the yellow is drying. A fixed layout means your hand goes to the right color automatically, you mix faster, and you waste less paint. It also trains your eye: when colors always sit in spectrum order, you start to see temperature relationships between neighbors.
Layout also controls contamination. Acrylic white is opaque and tints everything it touches; a stray streak of white in your dark pile turns a rich shadow chalky. Placing white and your darks at opposite ends of the palette, with the mixing area between them, is the single most effective habit you can adopt.
The Standard Spectrum Layout
Most acrylic painters use some version of the following, running clockwise from the top left on a rectangular palette:
- Titanium white in the top left corner, with its own generous space.
- Yellows, lightest first: lemon or primary yellow, then a warmer cadmium-type yellow.
- Oranges and warm reds: cadmium red hue or naphthol red.
- Cool reds and violets: quinacridone magenta or alizarin hue, then dioxazine purple if you use it.
- Blues: ultramarine, then phthalo blue.
- Greens, if you carry any pre-mixed: phthalo or sap green.
- Earth colors: yellow ochre, burnt sienna, burnt umber.
- Black or Payne’s grey in the bottom right corner, farthest from white.
The order matters less than its consistency. Pick an order, use it for every painting, and within a dozen sessions you will stop thinking about it.
Two Alternative Layouts
Warm-and-cool split
Painters who mix from a limited palette of a warm and cool version of each primary often lay out warm colors along one edge and cool colors along the opposite edge, with white in the middle of a short side. Mixing a neutral then means pulling from both edges toward the center, which makes temperature decisions explicit. This layout suits landscape painters working with six tubes.
Value ladder
Portrait and still-life painters sometimes pre-mix a string of five to seven values of their main color before painting, laying them out in a row from light to dark. The tube colors sit along the top as usual, and the value string occupies the mixing area. It is more work up front but makes consistent modeling of form much easier, and with acrylics the pre-mixed string should be kept moist with a mist of water.
Adapting the Layout to Your Palette Type
Flat glass or acrylic sheet
The most flexible surface. Squeeze colors in small piles about an inch from the edge, leaving a clear band between piles and the mixing field. On neutral grey glass you judge value accurately; on clear plastic, put a sheet of grey paper underneath.
Well palettes
Wells keep acrylics physically separated and the slight depth slows drying. Assign one well per color in spectrum order around the rim, and reserve the large central wells or flat area for mixing. Never mix in a color’s home well.
Wet palettes
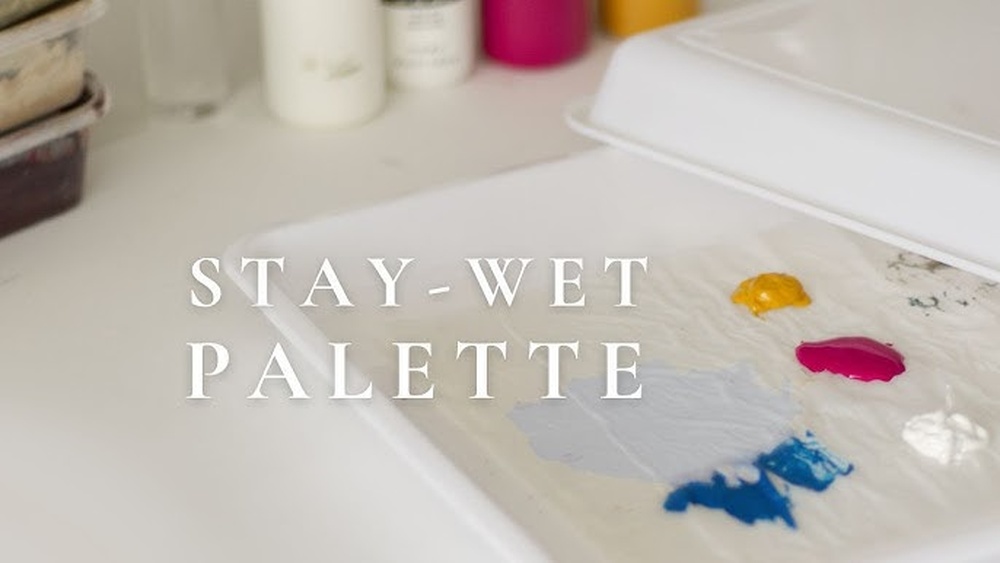
Stay-wet palettes with a damp sponge and membrane keep acrylics workable for days. The layout rule is identical, but leave more space between piles because paint spreads slightly on the moist paper, and keep white far from everything else since it migrates most.
Small travel palettes
With only a few square inches, drop to a limited palette of five or six colors around three sides and mix in the middle. Carry a second small palette for white alone.
Managing Drying Time Within Your Layout
- Squeeze tall, compact piles rather than flat smears. Less surface area means slower skinning.
- Put out only what you expect to use in the next 30 to 45 minutes; return to the tube for more.
- Mist the palette lightly with a spray bottle every 15 to 20 minutes, aiming at the edges where the piles sit.
- Mix on the side of the field nearest the colors you are using so wet mixes stay close to their sources.
- Scrape dried mixes off glass with a razor; leave them on a well palette until the session ends to avoid disturbing wet neighbors.
- If a color skins, peel the skin and use the wet paint beneath rather than adding water, which thins it unevenly.
Supplies That Help
The palettes below were selected from Amazon listing details and specifications checked in October 2026 for how well their size, surface and shape support a consistent acrylic layout, and for how widely each is reviewed by Amazon buyers. We have not mixed paint on them ourselves. Prices are shown as tiers.
| Product | Best For | Key Spec | Key Strength | Price Tier |
|---|---|---|---|---|
| ELFULLY 2-Pack Grey Glass 12×16 | Accurate value judgment | 2 x 12×16 in tempered glass, 10 anti-slip pads | Neutral grey backing | $$ |
| Geetery 24×17 Clear Acrylic | Large layouts, many colors | 24×17 in, 3 mm acrylic, thumb hole | Largest mixing field | $$ |
| DUGATO 20-Well 2-Pack | Separating colors for beginners | 2 x 10×13 in, 20 wells | Wells slow drying and prevent mixing | $ |
| Sweaty Pony 20-Well 13×10 | Budget well palette | 13×10 in, 8 squares, 4 large and 8 small circles | Mixed well shapes | $ |
| Vertexly 4Pcs Clear Acrylic | Small and travel setups | Two 9.8×5.9 and two 11.8×7.9 in, thumb holes | Four sizes for different sessions | $ |
Best Palettes for an Organized Acrylic Layout
1. ELFULLY 2-Pack Neutral Grey Tempered Glass Palettes, 12×16 — Best for Accurate Value Judgment

A 12×16 glass palette gives you a full spectrum row across the top and sides with a wide-open mixing field, and ELFULLY’s neutral grey backing lets you judge the value of every mix against a mid tone instead of blinding white. The pack includes two palettes and ten non-slip pads.
Dried acrylic peels or scrapes off tempered glass cleanly with a razor, so the layout can be reset to spotless between sessions. The rounded edges are safe to handle, and having two palettes means one can hold a value string while the other carries tube colors.
Best suited for: Painters committed to a disciplined layout who want the most honest color read.
Key features:
- 2 x 12 x 16 x 0.12 inch tempered glass
- Neutral grey tone
- 10 non-slip adhesive pads
- Smooth rounded edges
- Scratch resistant; razor cleanable
Pros:
- Grey backing for value accuracy
- Two palettes for one mid-tier price
- Resets to clean every session
Cons and limitations:
- No wells; relies on your discipline
- Glass offers no drying protection
- Heavier than plastic
Buying consideration: Fit the pads first, then mark your color positions along the edge with a dot of permanent marker on the underside so the layout is always the same.
2. Geetery Large Paint Palette 24×17 Inch Clear Acrylic — Best for Large Layouts and Many Colors

At 24×17 inches, Geetery’s palette has roughly twice the area of a standard 12×16, which makes room for a full spectrum of fifteen or more colors plus a value ladder and still leaves a clear mixing field. The 3 mm acrylic sheet is described as thickened and impact resistant with polished rounded edges.
Being clear, it reads whatever is beneath it; slide a sheet of mid-grey card underneath for value accuracy. The non-stick surface wipes clean with water or mild detergent, and a thumb hole is cut in for the rare occasions you want to hold something this size.
Best suited for: Studio painters with a dedicated table who use many colors or paint large.
Key features:
- 24 x 17 inch clear acrylic, 3 mm thick
- Polished rounded edges, thumb hole
- Non-stick, wipe-clean surface
- Suitable for acrylic, watercolor, oil and gouache
Pros:
- Largest mixing area here
- Room for a value string
- Durable thick sheet
Cons and limitations:
- Needs a big table
- Clear surface requires a backing sheet
- Upper price tier
Buying consideration: Tape grey paper to the underside and the palette becomes a giant neutral mixing surface.
3. DUGATO 20-Well Plastic Paint Palette, 2-Pack, 10×13 — Best for Separating Colors for Beginners

For painters still building the habit of a fixed layout, wells enforce it. DUGATO’s 10×13 tray has 20 wells on sturdy white plastic, enough for a full spectrum around the rim and several mixing wells inside, and the pack includes two so one can be soaking while the other is in use.
The listing describes a smooth non-stick surface that rinses clean under water for most paints; dried acrylic may need soaking or peeling. The depth of the wells also slows skinning compared with a flat sheet.
Best suited for: Beginners and classroom painters who want colors kept apart by design.
Key features:
- 2 x 10 x 13 inch palettes, 20 wells each
- Sturdy, lightweight non-toxic white plastic
- Non-stick surface, rinse clean
- Suitable for acrylic, oil, watercolor, gouache and tempera
Pros:
- Wells prevent accidental mixing
- Two palettes
- Low price tier
Cons and limitations:
- White plastic skews value judgment
- Limited open mixing area
- Plastic eventually stains
Buying consideration: Assign each well a permanent color and label the rim with a marker; the point of wells is never having to think about where a color lives.
4. Sweaty Pony 20 Well Paint Tray Palette, 13×10 — Best for A Budget Well Palette

Sweaty Pony’s single 13×10 tray offers eight square wells, four large circles and eight small circles, a mix that maps nicely onto a layout: tube colors in the small circles around the edge, mixes in the squares, and large washes or value strings in the big circles. It weighs about a third of a pound.
The white plastic is described as sturdy, reusable and quick to wash. Like all white palettes it makes mixes look darker than they will on a mid-tone canvas, so judge values against your painting rather than the tray.
Best suited for: Painters who want one inexpensive well palette with varied well sizes.
Key features:
- 13 x 10 inch white plastic
- 20 wells: 8 squares, 4 large circles, 8 small circles
- About 0.35 lb
- Reusable and washable
Pros:
- Well variety supports a structured layout
- Very light
- Lowest price tier
Cons and limitations:
- Single palette
- White background
- Thin plastic flexes when carried loaded
Buying consideration: Use the four large circles for pre-mixed value steps and keep the small circles strictly for tube colors.
5. Vertexly 4Pcs Clear Acrylic Paint Palettes — Best for Small and Travel Setups

Vertexly’s set gives you four clear 2 mm acrylic palettes: rectangular and oval in 9.8×5.9 inches and in 11.8×7.9 inches, each with a thumb hole and protective film to peel off before use. For a limited palette of five or six colors, the small ones are ideal, and the larger pair handles a fuller spectrum.
The non-stick surface is described as easy to clean of dried paint. Being clear, they take their value reading from whatever is beneath, so carry a grey card with them. Their size also makes them good as a dedicated white-only palette beside a larger main one.
Best suited for: Plein-air and sketchbook painters, and anyone who wants a separate palette for white.
Key features:
- 4 palettes: 9.8×5.9 and 11.8×7.9 inch, rectangular and oval
- 2 mm clear acrylic with thumb holes
- Non-stick, easy-clean surface
- Protective film on both sides to remove
Pros:
- Four sizes for different sessions
- Lightweight and portable
- Lowest price tier
Cons and limitations:
- Thin 2 mm sheets flex
- Clear surface needs a backing
- Small mixing area
Buying consideration: Dedicate one of the small palettes to white alone to eliminate contamination of your darks.
Buying Guide: Choosing a Palette That Supports Good Layout
Size
Count your tube colors, allow about two inches of edge per color, and add a mixing field at least as large as the color row. For 10 to 12 colors that means 12×16; for 15 or more, go larger.
Surface color
Neutral grey gives the most accurate value reading. White makes everything look dark and tempts you to mix too light; clear takes on whatever is beneath it, which can be an advantage if you slide a grey card under.
Flat vs. wells
Flat surfaces offer freedom and easy cleaning; wells enforce separation and slow drying. Beginners often start with wells and graduate to glass.
Material
Tempered glass resets to clean indefinitely. Acrylic and plastic are light and cheap but stain over time and can scratch if scraped with metal.
Drying control
If acrylics dry too fast for you, consider a stay-wet palette or a sealed box that fits a 12×16 glass sheet; the layout principles are the same.
Portability
Travel palettes should hold a limited palette and nothing more. A second tiny palette for white is worth its weight.
Keep the Palette Working
Layout is only half of palette discipline. Our guide to how to clean a painting palette covers glass, plastic and wells. If a session runs long, read how to rehydrate dried acrylic on a palette to learn what can be rescued. And if drying is your constant frustration, what a wet palette is explains the one tool that changes the clock entirely.
Common Mistakes to Avoid
- Changing the color order every session, which means you never build muscle memory.
- Putting white next to black or dark blue, guaranteeing chalky shadows.
- Squeezing out a full tube’s worth in flat smears that skin over in ten minutes.
- Mixing inside the color piles instead of pulling paint into the open field.
- Judging values on a white palette without checking against the canvas.
- Scraping acrylic plastic palettes with a metal blade and scratching them permanently.
FAQs
What is the best way to arrange acrylic paint on a palette?
Lay colors in spectrum order around the edge, white at one corner and black or your darkest color at the opposite corner, with a clear mixing field in the middle. Use the same order every time.
Where should white go on an acrylic palette?
In a corner by itself, as far from your darks as possible, with extra space around it. Some painters keep white on a separate small palette entirely to avoid contamination.
How do I stop acrylics drying on the palette while I paint?
Squeeze out small tall piles, mist lightly every 15 to 20 minutes, put out only what you will use in half an hour, and consider a stay-wet palette or sealed box for long sessions.
Is a glass or a well palette better for acrylics?
Glass offers the largest mixing area and cleans to new with a razor, and grey glass gives accurate values. Well palettes keep colors separated and slow drying, which suits beginners. Many painters use both.
How many colors should I put on my palette?
Six to twelve. A warm and cool of each primary plus white covers most subjects; add two or three earth colors and a convenience green if you use them often. More colors mean more drying and more confusion.
Should I mix on a white or grey surface?
Grey, if possible. Acrylics dry darker than they look wet, and a white surface exaggerates the surprise by making wet mixes appear darker still, so you tend to mix too light.
Final Recommendation
Adopt the spectrum layout, white in one corner and darks in the other, and keep it identical for every painting. For the surface, the ELFULLY neutral grey glass pair is the best long-term choice for value accuracy and easy resetting, with the Geetery 24×17 for painters who need room for a value string and many colors.
If you are new to acrylics, start on the DUGATO or Sweaty Pony well palettes to let the wells enforce separation, and keep a Vertexly small palette for white alone. The habit matters more than the hardware; once the layout is automatic, you will mix faster and waste far less paint.




