
Are you looking to add a personal touch to your space without spending a fortune? Creating your own painted canvas wall art is easier than you think, and it’s a fun way to express your creativity.
Whether you’re a beginner or just want simple ideas that make a big impact, this guide will show you step-by-step how to make stunning DIY canvas art. Get ready to transform your walls with colors and designs that reflect your style—no expensive gallery trips needed.
Let’s dive in and make your home truly yours!
Materials Needed
Creating your own painted canvas wall art starts with gathering the right materials. Having the proper supplies makes the painting process easier and more enjoyable. This section explains the essentials needed for a successful DIY art project.
Choosing The Right Canvas
Select a canvas size that fits your space and style. Cotton canvases are affordable and work well for beginners. Linen canvases offer a smoother surface and last longer. Consider the canvas thickness; thicker edges allow painting on the sides. Pre-stretched canvases save time and provide a firm surface to paint on.
Selecting Paint Types
Acrylic paints dry quickly and are easy to clean up with water. They come in many colors and work well on canvas. Oil paints offer rich colors but take longer to dry. Watercolor paints are less common on canvas but can create unique effects. Choose paint based on your comfort level and the finish you want.
Additional Tools And Supplies
Brushes in various sizes help you create different details and textures. Palette knives are useful for mixing paint and adding texture. A palette keeps your paint organized and accessible. Use painter’s tape for clean edges and stencils for patterns. Don’t forget a cup of water for cleaning brushes and paper towels for quick spills.
Credit: www.reddit.com
Preparing Your Canvas
Preparing your canvas is a key step in creating beautiful DIY painted wall art. A well-prepared canvas ensures your paint sticks well and your artwork lasts longer. Taking time to get your canvas ready can make your painting process smoother and more enjoyable.
Priming Techniques
Start by choosing the right primer for your canvas. Gesso is the most common primer used for canvas painting. Apply a thin, even layer of gesso using a wide brush or roller. Let it dry completely before applying a second coat. Two to three coats of gesso provide a smooth, white surface that helps paint colors stand out. Sand lightly between coats if you want a very smooth finish. Avoid thick layers to prevent cracking. Proper priming protects the canvas fibers and improves paint adhesion.
Setting Up Your Workspace
Select a well-lit, clean area to work on your canvas. Cover your workspace with newspaper or a plastic sheet to catch any paint spills. Keep all your painting tools within easy reach to stay organized. Use an easel or flat surface to hold your canvas steady. Make sure you have good ventilation if you use strong-smelling paints or primers. A tidy, comfortable workspace helps you focus and create better art.
Basic Painting Techniques
Basic painting techniques form the foundation of any DIY painted canvas wall art project. These techniques help you create interesting designs that catch the eye. Learning simple methods lets you express your creativity clearly and confidently.
Each technique adds a unique touch to your art. Mixing them can lead to beautiful and personal pieces. Start with these easy steps to build your painting skills.
Brush Strokes And Patterns
Brush strokes give life to your painting. Use different strokes like dabbing, sweeping, or stippling. These create varied effects and textures on the canvas. Try making simple patterns such as stripes or dots for fun designs. Changing your brush angle changes the stroke style. Practice small strokes to gain control and precision.
Using Texture For Depth
Texture makes your canvas art look more real and rich. You can add texture by pressing thick paint or using tools like sponges and palette knives. Rough or smooth areas create interesting contrasts. Textured paint catches light differently, adding depth. Use texture to highlight parts of your painting or add background interest.
Layering Colors
Layering colors builds richness in your artwork. Start with light colors as a base. Let each layer dry before adding another. This prevents colors from mixing too much. Darker colors on top add shadows and detail. Layering creates a sense of space and dimension. Experiment with transparent layers for soft effects.

Credit: www.blog.birdsparty.com
Creative Design Ideas
Creative design ideas bring your DIY painted canvas wall art to life. They offer many ways to express your style and brighten your space. Choose a style that matches your mood and skill level. Experiment with colors and shapes. Each idea can turn simple canvas into stunning art.
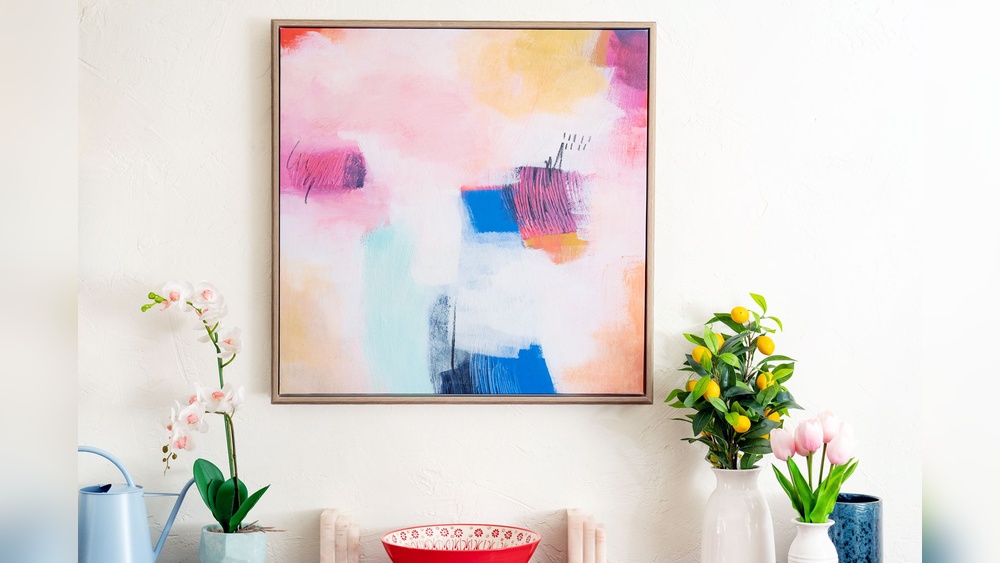
Abstract Art Styles
Abstract art uses shapes, colors, and lines without clear form. It lets you play freely with paint and brush strokes. Blend colors or splash paint for a unique look. Use bold or soft colors to fit your room. Abstract art fits any space and mood.
Geometric Patterns
Geometric patterns use straight lines and shapes like triangles, circles, and squares. They create clean, modern designs. Use painter’s tape for sharp edges. Choose contrasting colors for a strong effect. Repeat shapes for rhythm and balance. Geometric art adds order and style.
Nature-inspired Themes
Nature themes bring outdoor beauty inside. Paint leaves, flowers, trees, or animals. Use soft greens, blues, and earth tones. Try simple silhouettes or detailed images. Nature art feels calm and fresh. It works well in living rooms and bedrooms.
Textured Plaster Effects
Textured plaster adds a 3D feel to your canvas. Use joint compound or modeling paste to build texture. Apply with a palette knife for ridges or waves. Paint over the texture once dry. This style adds depth and interest. It creates a bold, tactile piece for any wall.
Step-by-step Project Examples
Creating your own painted canvas wall art can be fun and rewarding. Follow these step-by-step project examples to try different styles. Each example uses simple materials and techniques. You can complete them in a few hours. These projects fit well in any room, adding personality and color.
Simple Gradient Canvas
Choose two or three colors that blend well together. Start by painting the top of the canvas with the darkest color. Slowly add the lighter colors as you move down. Use a clean brush or sponge to blend the colors in the middle. Let the paint dry completely before hanging.
Bold Color Blocking
Pick two to four bright colors for this project. Use painter’s tape to create geometric shapes on the canvas. Paint each section with a different color. Remove the tape carefully before the paint dries. This design looks modern and eye-catching on any wall.
Diy Textured Wall Art
Mix joint compound or thick acrylic paint for texture. Apply the mixture on the canvas using a palette knife. Create patterns or random strokes for an interesting surface. After drying, paint over the texture with your chosen colors. This adds depth and a unique feel to your art.
Vintage Style Painted Canvas
Start with a light base color and let it dry. Use a sponge or rag to dab on darker shades for an aged look. Add stencils or hand-paint vintage patterns or words. Seal the canvas with a clear matte finish. This style brings charm and warmth to any space.
Tips For Beginners
Starting a DIY painted canvas wall art project can feel exciting and a bit tricky. Simple tips help beginners avoid common problems. These tips also make the process smooth and enjoyable. Follow these easy steps to create art you will love.
Mistake Prevention
Plan your design before you start painting. Use light pencil marks for guidance. Avoid thick paint layers; they take too long to dry and may crack. Test colors on a scrap canvas to see how they look. Keep your brushes clean to prevent muddy colors. Work in a well-lit space to see true colors clearly.
Time Management
Set small goals for each painting session. Take breaks to rest your eyes and hands. Allow paint layers to dry fully before adding more. Rushing causes smudges and mistakes. Keep your workspace organized to save time. Paint in a calm environment to stay focused and relaxed.
Using Affordable Materials
Choose basic acrylic paints for easy use and quick drying. Look for canvas packs that offer good quality at low prices. Use household items like sponges or old brushes for creative effects. Buy supplies in small amounts to avoid waste. Reuse materials when possible to save money. Affordable tools still give great results.
Displaying Your Artwork
Displaying your DIY painted canvas wall art is a key step to showcase your creativity. The way you present your artwork impacts the room’s atmosphere and draws attention to your piece. Proper display methods protect your canvas and help it blend with your space.
Choose the right frame or hanging style to suit your decor. Lighting also plays a big role in making your art stand out. Careful planning will make your painted canvas the centerpiece of any room.
Framing Options
Frames give your canvas a polished look. Simple wooden frames add warmth and suit most art styles. Floating frames create a modern, clean edge around your canvas. Unframed canvases offer a casual, artistic feel and keep focus on the painting itself. Pick a frame that matches your room’s style and your artwork’s colors.
Wall Hanging Techniques
Use sturdy hooks or nails to hang your canvas safely. For heavy canvases, picture wire or D-rings work well. Command strips provide damage-free hanging for lighter pieces. Align your artwork at eye level for best viewing. Group several canvases for a gallery wall effect. Keep spacing even and balanced to create harmony on your wall.
Lighting To Enhance Art
Good lighting highlights your canvas colors and textures. Use spotlights or track lights aimed at the art. Natural light is great but avoid direct sunlight to prevent fading. Soft, warm bulbs enhance the painting’s tones. Experiment with angles to reduce glare and shadows. Proper lighting makes your DIY canvas wall art pop beautifully.
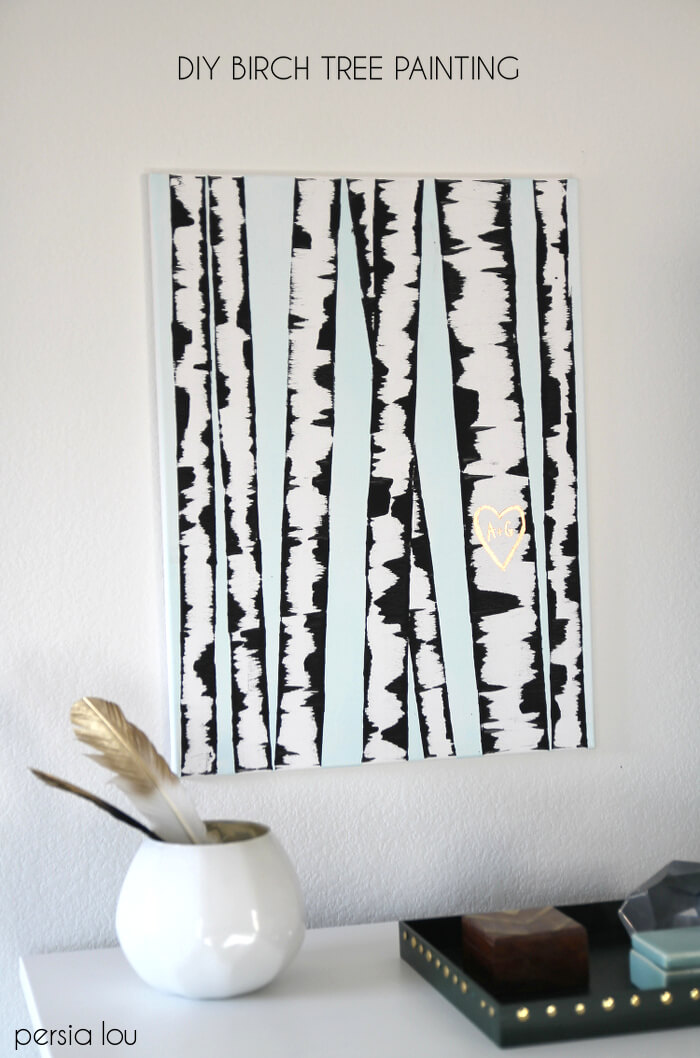
Credit: persialou.com
Maintaining Painted Canvas Art
Maintaining your DIY painted canvas art is key to keeping it beautiful for years. Proper care prevents colors from fading and protects the texture. Simple steps can extend the life of your artwork. Follow these easy tips to keep your canvas looking fresh and vibrant.
Cleaning Tips
Dust your canvas gently with a soft brush or dry cloth. Avoid using water or cleaning products on the paint surface. If dirt sticks, use a slightly damp cloth only on the frame, not on the paint. Always handle your artwork with clean hands to avoid stains.
Protective Coatings
Apply a clear varnish to seal your painted canvas. Choose a matte or glossy finish based on your style. Use a spray varnish for even coverage and less risk of brush marks. Let the coating dry completely before hanging your art on the wall.
Storage Advice
Store your canvas in a dry, cool place away from direct sunlight. Keep it upright and avoid stacking heavy items on top. Use acid-free paper to cover the paint surface if you need to wrap it. Proper storage stops warping and paint cracking over time.
Frequently Asked Questions
What Materials Do I Need For Diy Painted Canvas Art?
You need a blank canvas, acrylic paints, brushes, palette, and water. Optional items include painter’s tape and stencils for design precision. Choose materials based on your project style and complexity.
How Do I Prepare The Canvas For Painting?
Start with a clean, dry canvas. Apply a coat of gesso primer to seal and smooth the surface. Let it dry completely before painting to ensure better paint adhesion.
What Painting Techniques Work Best For Beginners?
Try simple techniques like color blocking, sponging, or dry brushing. These methods are easy to master and create interesting textures and effects on canvas.
How Can I Add Texture To My Painted Canvas?
Use modeling paste, joint compound, or thick acrylic paint to add texture. Apply with a palette knife or brush for raised, tactile effects that enhance visual interest.
Conclusion
Creating your own painted canvas wall art brings joy and style to any space. Use simple steps to express your creativity with colors and shapes. Experiment with textures and designs to make art truly yours. This DIY project suits all skill levels and budgets.
Enjoy the process and proudly display your unique artwork. Keep practicing to improve and find your personal style. Handmade canvas art adds warmth and character to your home. Start today and transform blank walls into beautiful galleries.


