
Have you ever wanted to add a personal touch to your home decor or create unique gifts that stand out? Painting your own DIY candles at home is an easy and fun way to do just that.
Imagine turning plain candles into colorful, eye-catching pieces that reflect your style and creativity. In this guide, you’ll discover simple tips and tricks that make candle painting safe, enjoyable, and rewarding—even if you’re new to crafting. Keep reading, and you’ll learn how to transform ordinary candles into beautiful works of art right in your own kitchen.
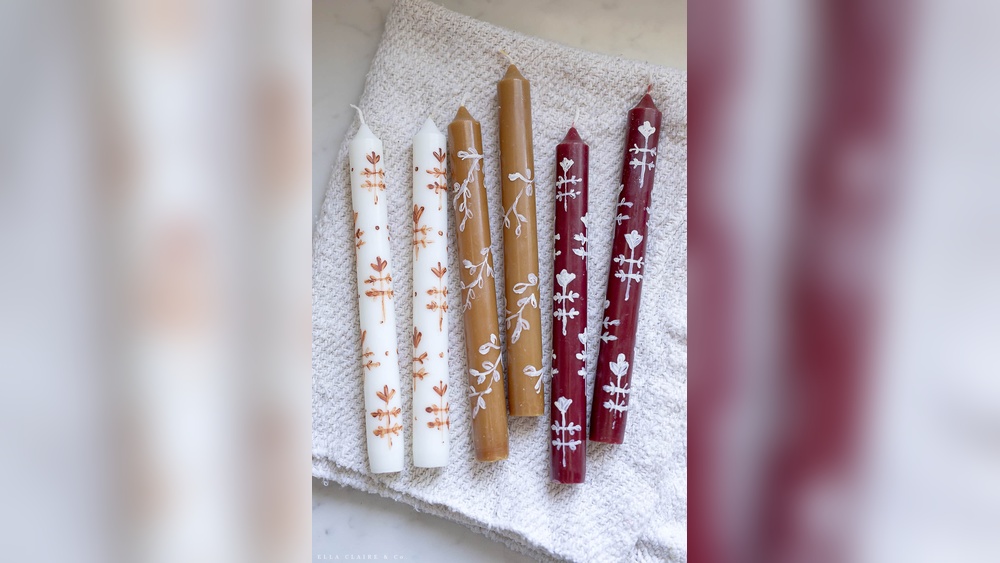
Credit: prettylifegirls.com
Choosing Candle Types
Selecting the right paint materials is key to creating beautiful DIY candles at home. The paint must stick well to the wax surface without cracking or peeling. It should also be safe and easy to work with. Choosing the correct type of paint and tools ensures your candle designs last long and look vibrant.
Some paints work better on candles than others. Knowing the differences helps you pick what fits your style and needs. Here, we will explore the best paint types and essential brushes for candle painting projects.
Non-toxic Acrylic Paints
Non-toxic acrylic paints are popular for painting candles. They dry quickly and have bright colors. These paints stick well to wax surfaces and resist fading. Acrylic paints are safe to use indoors and around kids. Use thin layers to avoid uneven textures. Let each layer dry fully before adding another. This paint type is easy to clean with water while wet.
Using Wax-based Colors
Wax-based colors melt into the candle surface for smooth coverage. They blend well and give a natural look. These colors come in blocks or sticks and can be applied with heat. Wax paints are ideal for creating soft gradients or intricate patterns. They also maintain the candle’s burn quality. Use a heat source like a hair dryer or heat gun to melt wax colors gently. This method needs more skill but offers unique effects.
Tools And Brushes Needed
Good brushes help you paint clean lines and fine details. Choose soft-bristled brushes in various sizes for flexibility. Flat brushes cover large areas smoothly. Fine-tip brushes work well for small designs. A palette or mixing tray keeps your paints organized. Use a damp cloth to wipe brushes between colors. Avoid metal brushes that can scratch the candle surface. Quality tools make painting easier and more enjoyable.
Selecting Paint Materials
Preparing your candles before painting is key to a smooth and lasting finish. Proper prep helps the paint stick well and keeps your design neat. Take time to ready each candle carefully. This step ensures your artwork looks professional and lasts longer.
Cleaning The Surface
Start by wiping the candle surface with a soft cloth. Remove any dust, dirt, or oils from handling. Use rubbing alcohol on a cotton pad for a deeper clean. Let the candle dry fully before painting. A clean surface prevents paint from peeling or smudging.
Protecting The Wick
Cover the wick with a small piece of tape or a clip. This stops paint from getting on it. A clean wick is important for safe candle burning. Avoid painting too close to the wick area to keep it clear.
Setting Up Your Workspace
Choose a flat, stable surface for your painting project. Lay down newspaper or a plastic sheet to catch spills. Gather all your painting supplies nearby for easy reach. Good lighting helps you see details clearly. Keep the area well-ventilated for comfort and safety.
Preparing Candles
Basic painting techniques form the foundation for creating beautiful DIY painted candles. These simple methods help you add color, depth, and texture easily. Start with clean, dry candles and a steady hand. Use the right paints made for wax surfaces. Follow these steps to bring your candle designs to life with confidence.
Applying Base Coats
Begin by applying a smooth base coat to your candle. This layer sets the tone for all other colors. Use a soft brush or sponge to cover the entire surface evenly. Let the paint dry completely before adding more layers. A solid base coat helps colors appear brighter and last longer.
Layering Colors
Build your design by layering different colors on top of the base coat. Apply thin, even coats and allow each to dry fully. This technique creates depth and richness in your candle art. Experiment with blending colors gently for smooth transitions. Layering also prevents paint from cracking or peeling.
Creating Texture Effects
Add interest to your candles by creating texture effects. Use tools like sponges, brushes, or even fingers for unique patterns. Dab or swipe paint to mimic natural textures such as stone or fabric. Textured paint brings a tactile element to your candle design. Keep layers light to avoid heavy buildup.

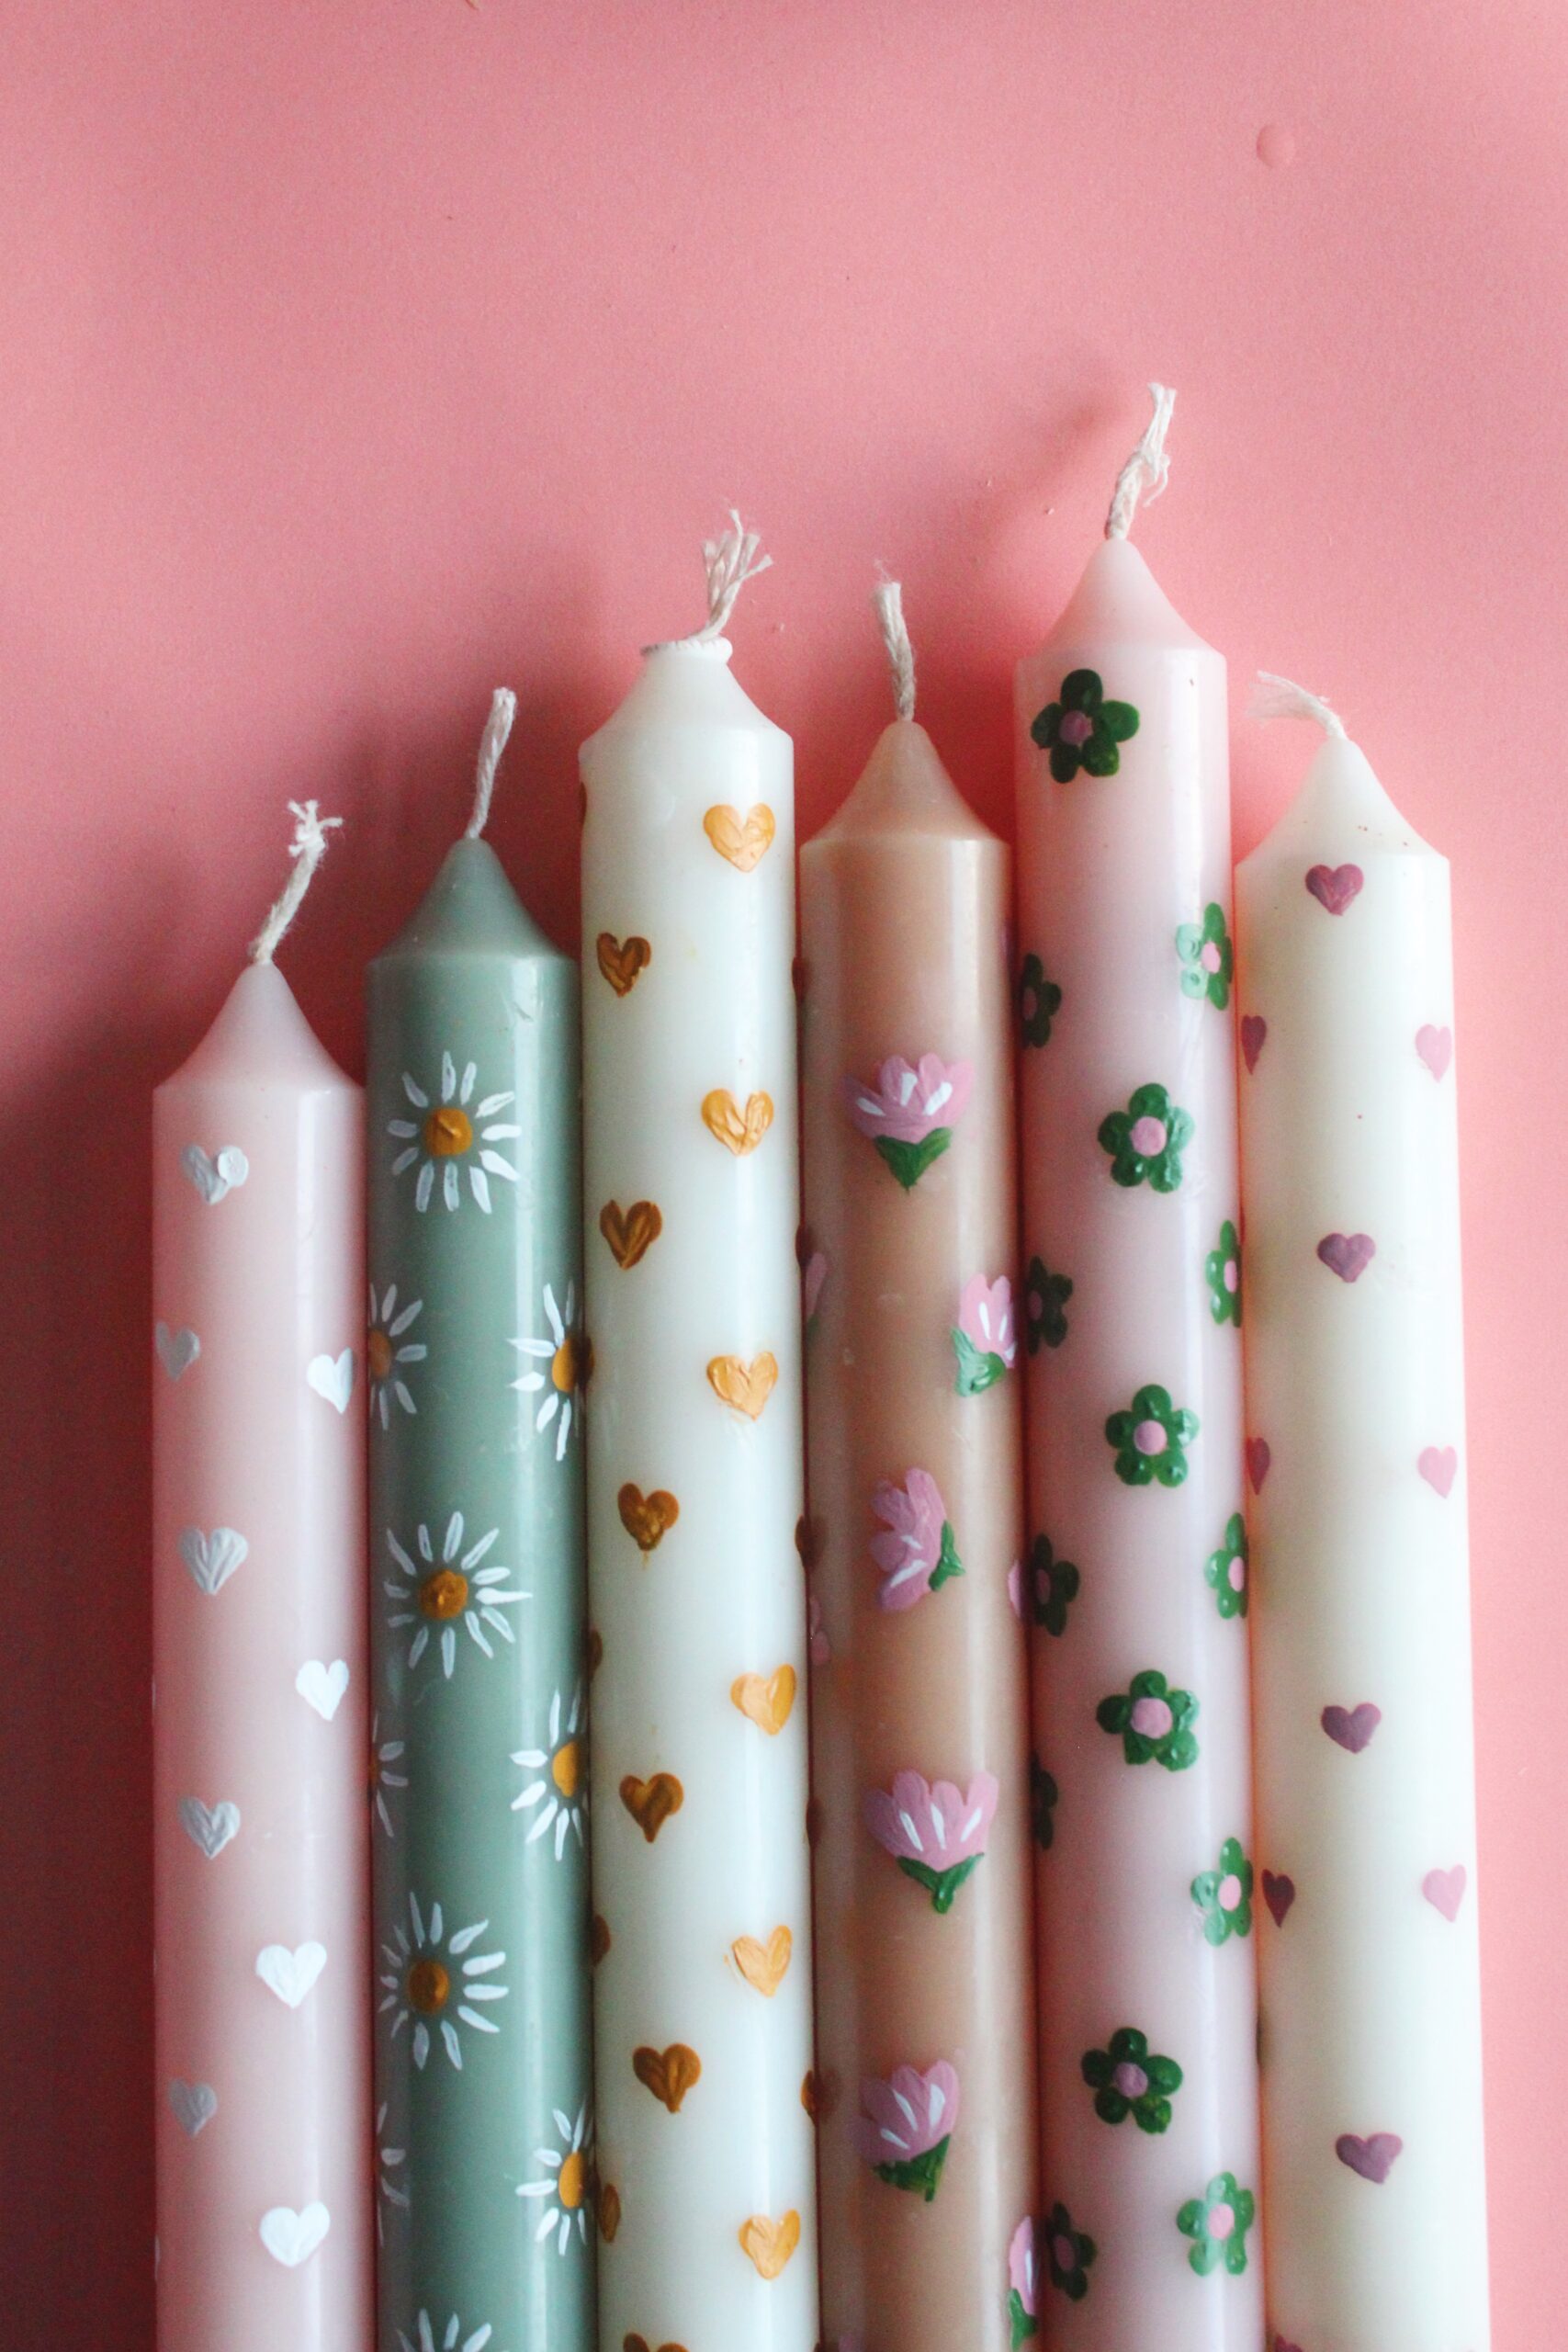
Credit: www.amazon.com
Basic Painting Techniques
Advanced design ideas take your DIY candle painting to a new level. These techniques create unique and eye-catching candles. They help you express creativity beyond simple colors. Experimenting with these ideas can make your candles stand out as beautiful decor or gifts.
Using Stencils And Patterns
Stencils add neat and consistent shapes to candles. Choose simple or intricate patterns. Place the stencil on the candle surface. Use a small brush or sponge to apply paint inside the stencil. Remove the stencil carefully to reveal the design. Repeat with different stencils for layered effects.
This method works well for geometric shapes, florals, or festive themes. It also helps if you want clean lines without freehand painting. Try using painter’s tape to block off areas for sharp edges.
Blending Multiple Colors
Blending colors creates smooth transitions and depth. Start with two or more paint colors. Apply them side by side on the candle. Use a dry brush or sponge to gently blend where the colors meet. Work quickly before the paint dries.
This technique gives a soft, gradient look. You can blend warm shades like red and orange or cool blues and greens. Practice on paper first to see how colors merge. Blended candles feel artistic and add a professional touch.
Adding Metallic Or Glitter Details
Metallic paints add shine and luxury to candles. Use gold, silver, or bronze acrylics for small accents. Apply with a fine brush to highlight edges or patterns. Glitter adds sparkle and texture.
Sprinkle glitter over wet paint or use glitter glue for precise placement. Seal glitter with clear varnish to prevent shedding. These details catch light beautifully and make candles festive. Perfect for holidays or special occasions.
Advanced Design Ideas
Painting DIY candles at home can be a fun and creative activity. Safety is very important during the process. Taking proper precautions helps avoid accidents and keeps your workspace safe. Follow these safety tips for a smooth candle painting experience.
Working Around Flames
Always be careful with open flames near candles. Keep flammable materials away from lit candles. Never leave burning candles unattended. Use a stable surface to avoid tipping candles. Extinguish flames before painting to prevent burns or fires.
Using Non-toxic Supplies
Choose non-toxic paints designed for candle surfaces. These paints are safer for indoor use. Avoid harsh chemicals that release harmful fumes. Check labels to confirm the paint is safe and non-toxic. Use brushes and tools that are clean and free of harmful residues.
Proper Ventilation
Work in a well-ventilated area to reduce fumes. Open windows or use fans to circulate air. This prevents inhaling any paint or candle smoke. Good airflow helps keep the room fresh and safe. Avoid painting in small, enclosed spaces without ventilation.
Painting With Melted Wax
Creative gift ideas make DIY painted candles special and thoughtful. They show care and effort. Handmade gifts always have a personal touch. Painted candles are perfect for birthdays, holidays, or just because. You can customize each candle to fit the receiver’s style and preferences. This section explores ways to make your candle gifts even more unique and charming.
Personalizing Candles
Start by adding names or initials on the candle surface. Use stencils or freehand painting for a neat look. Choose colors that match the recipient’s favorite shades. Add small drawings or symbols that mean something to them. You can also use scented paints or add a light fragrance for extra appeal. Personal touches make the gift feel one-of-a-kind and thoughtful.
Packaging Tips
Good packaging enhances the gift’s presentation. Wrap the candle in tissue paper or fabric for a soft touch. Use small boxes or glass jars to protect the candle during transport. Tie ribbons or twine around the package to add charm. Include a handwritten note or tag with a warm message. Proper packaging shows extra care and makes the gift exciting to open.
Themed Candle Sets
Create sets of candles with a common theme. For example, a holiday set with red, green, and gold colors. Or a spa set with calming blue and lavender tones. Group candles by scent, color, or style to suit different moods. Themed sets give more options and feel more luxurious. They are great for friends or family who love variety and style in their home decor.
Drying And Finishing
Troubleshooting is key to successful DIY candle painting. Small problems can ruin your design. Fix issues early for a smooth painting process.
Common problems include paint peeling, uneven color, and smudging. Each has simple solutions that improve your final look.
Paint Peeling Off
Peeling paint happens when the candle surface is oily or dirty. Clean the candle with rubbing alcohol before painting. Let it dry fully to remove any residue.
Use acrylic paint made for candles. Some paints do not stick well to wax. Apply thin layers and let each dry before adding more.
Uneven Color Coverage
Uneven color looks patchy and dull. Apply multiple thin coats of paint instead of one thick layer. Thin coats dry better and look smoother.
Use a small, soft brush for detailed work. Avoid overloading the brush with paint. Keep your strokes even and gentle on the candle surface.
Smudging And Streaks
Smudging occurs if paint is not dry before touching. Let the paint dry completely between coats. Use a fan or open window to speed drying.
Streaks appear from using a dry brush or uneven pressure. Wet your brush lightly with water or paint medium. Paint in one direction for a smooth finish.
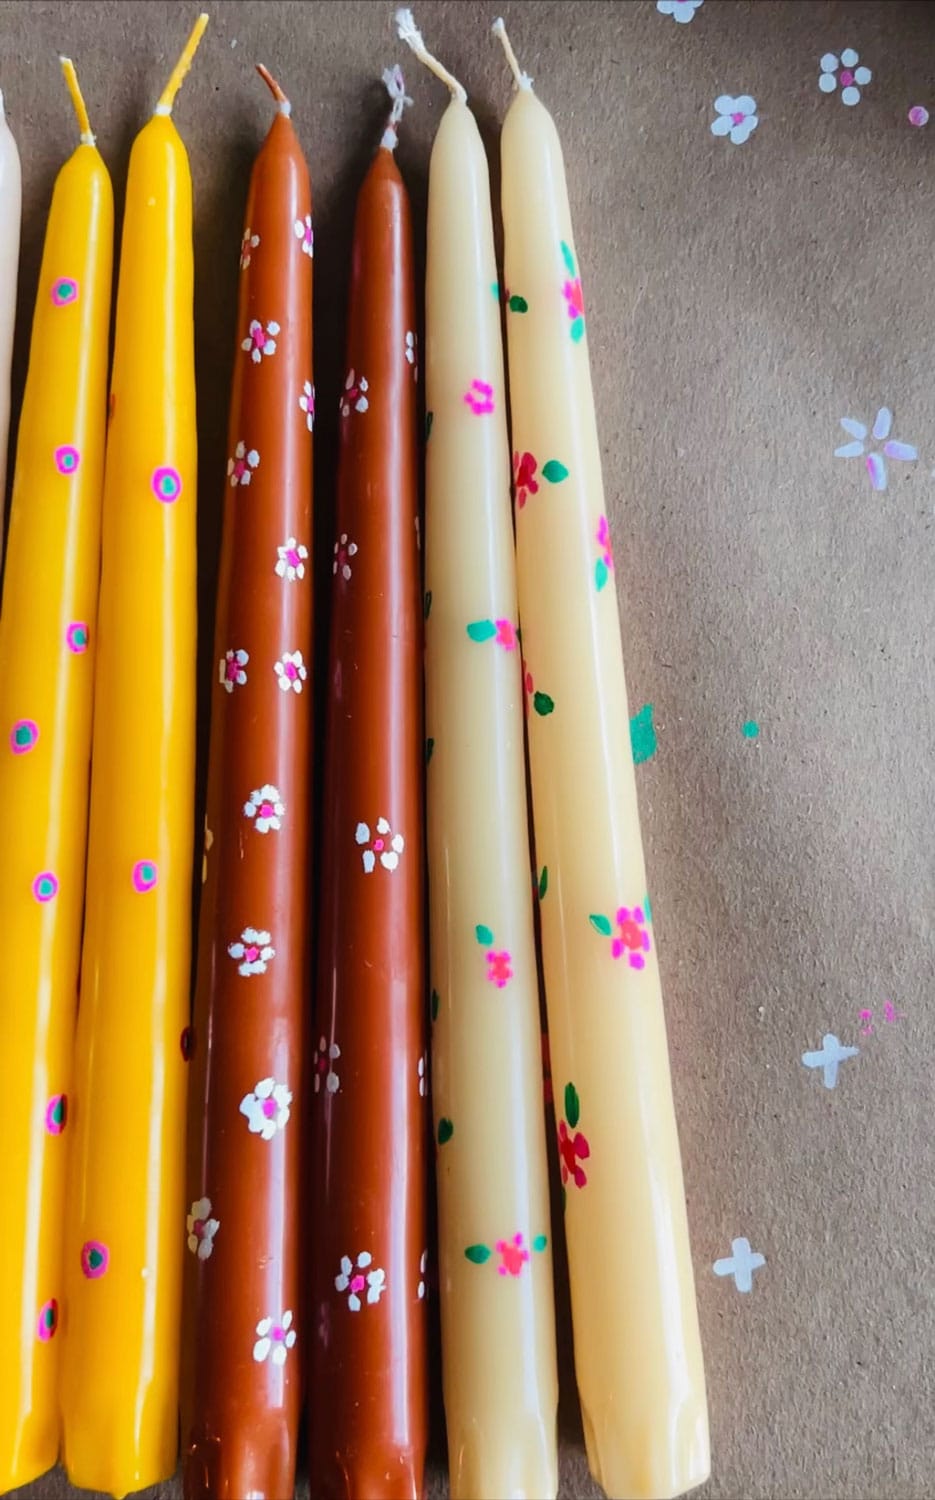
Credit: mostlovelythings.com
Frequently Asked Questions
What Paint Will Stick To Candles?
Use non-toxic acrylic paint for candles; it adheres well and is safe. Avoid painting near the wick to prevent fire hazards.
What Is The 84 Rule For Candles?
The 84 rule for candles means burning a candle for 84 minutes to test its quality and wick performance.
What Is The Best Way To Paint Candles?
Use non-toxic acrylic paint to decorate candles, avoiding the wick area. Apply thin layers and let each dry fully before adding more. This ensures vibrant, long-lasting designs without affecting candle burn quality.
What Is The 3 Hour Rule For Candles?
The 3 hour rule for candles means never burn a candle for more than three hours at a time. This prevents uneven melting and extends candle life. Always trim the wick before lighting and never leave burning candles unattended.
Conclusion
Painting DIY candles at home is simple and fun. Use non-toxic acrylic paints for safety. Always paint away from the wick to avoid fire risks. Take your time to create neat designs. Experiment with colors and patterns to make each candle unique.
Clean brushes after use to keep them ready. Enjoy your personalized candles for decoration or gifts. Try these tips to bring creativity to your candle projects. Keep practicing, and your skills will improve quickly. Happy painting!


