If you enjoy painting and want to make your brushwork stand out, learning how to use an Egbert brush can change your art. The Egbert is not as famous as the round or flat brush, but it has a unique shape and flexibility that make it a secret weapon for both oil and acrylic painters. Some of the world’s best-known artists, like John Singer Sargent, used Egberts to create beautiful, expressive strokes. If you want to add more life, movement, and detail to your paintings, mastering the Egbert brush is a smart step.
Many beginners overlook the Egbert because it looks odd—long, thin bristles with a filbert (oval) tip. But this brush is not just for professionals. With the right techniques, anyone can use an Egbert to paint soft edges, fine lines, and lively textures.
This guide will show you how to get the best results from your Egbert brush, explain common mistakes, and share tips that can help your painting skills grow, even if you are just starting out.
What Is An Egbert Brush?
An Egbert brush is a long-bristled brush with an oval-shaped tip. The bristles are much longer than a regular filbert brush, usually about three to four times longer than the width of the ferrule (the metal part that holds the bristles). You can find Egberts in natural hog bristle and synthetic fibers.
The long bristles give the Egbert a special spring and flexibility. This makes it perfect for creating loose strokes, blending, and painting delicate details like grass or hair. Egberts are popular in oil painting but can also be used for acrylics, especially if you want expressive, painterly effects.
Egbert Vs. Other Brushes
To understand what makes the Egbert unique, see how it compares to other common brushes:
| Brush Type | Bristle Shape | Bristle Length | Main Uses |
|---|---|---|---|
| Egbert | Oval (filbert) | Extra long | Expressive strokes, blending, detail work |
| Filbert | Oval | Medium | Soft edges, blending, general use |
| Flat | Square | Short to medium | Blocking in, sharp edges, bold strokes |
| Round | Round | Short to long | Detail, lines, sketching |
The Egbert’s length lets it hold more paint and create longer, flowing lines. It also “dances” on the canvas, making it easier to paint lively details.
Choosing The Right Egbert Brush
Not every Egbert is the same. Here are some tips to help you choose the best one for your art:
- Bristle Material: Natural hog bristle Egberts are best for oil paint and heavy textures. They keep their shape and give a lively stroke. Synthetic bristles work well for acrylics or if you want a softer touch.
- Size: Egberts come in many sizes, from tiny (size 2 or 4) to large (size 18 or 20). Small brushes are good for detail, while larger sizes help with bold, sweeping strokes.
- Ferrule Shape: The ferrule should hold the bristles tightly. Good brands use double-crimped ferrules so the bristles do not fall out.
- Handle Length: Long handles give better control for painting at an easel. Short handles are best for detail work or painting on a table.
- Brand Quality: Some well-known brands for Egbert brushes include Winsor & Newton, Rosemary & Co., Princeton, and Da Vinci.
Comparison: Natural Vs. Synthetic Egbert
Here’s a quick look at the main differences:
| Feature | Natural Bristle | Synthetic Bristle |
|---|---|---|
| Paint Type | Oil, heavy acrylic | Acrylic, water-based, lighter oils |
| Stroke Feel | Firm, springy, textured | Smoother, softer, less texture |
| Price | Usually higher | Usually lower |
| Durability | Wears with strong solvents | Long-lasting, easy to clean |
Insight: Many beginners choose synthetic brushes because they are cheaper, but natural Egberts give more control for textured effects, especially in oils.
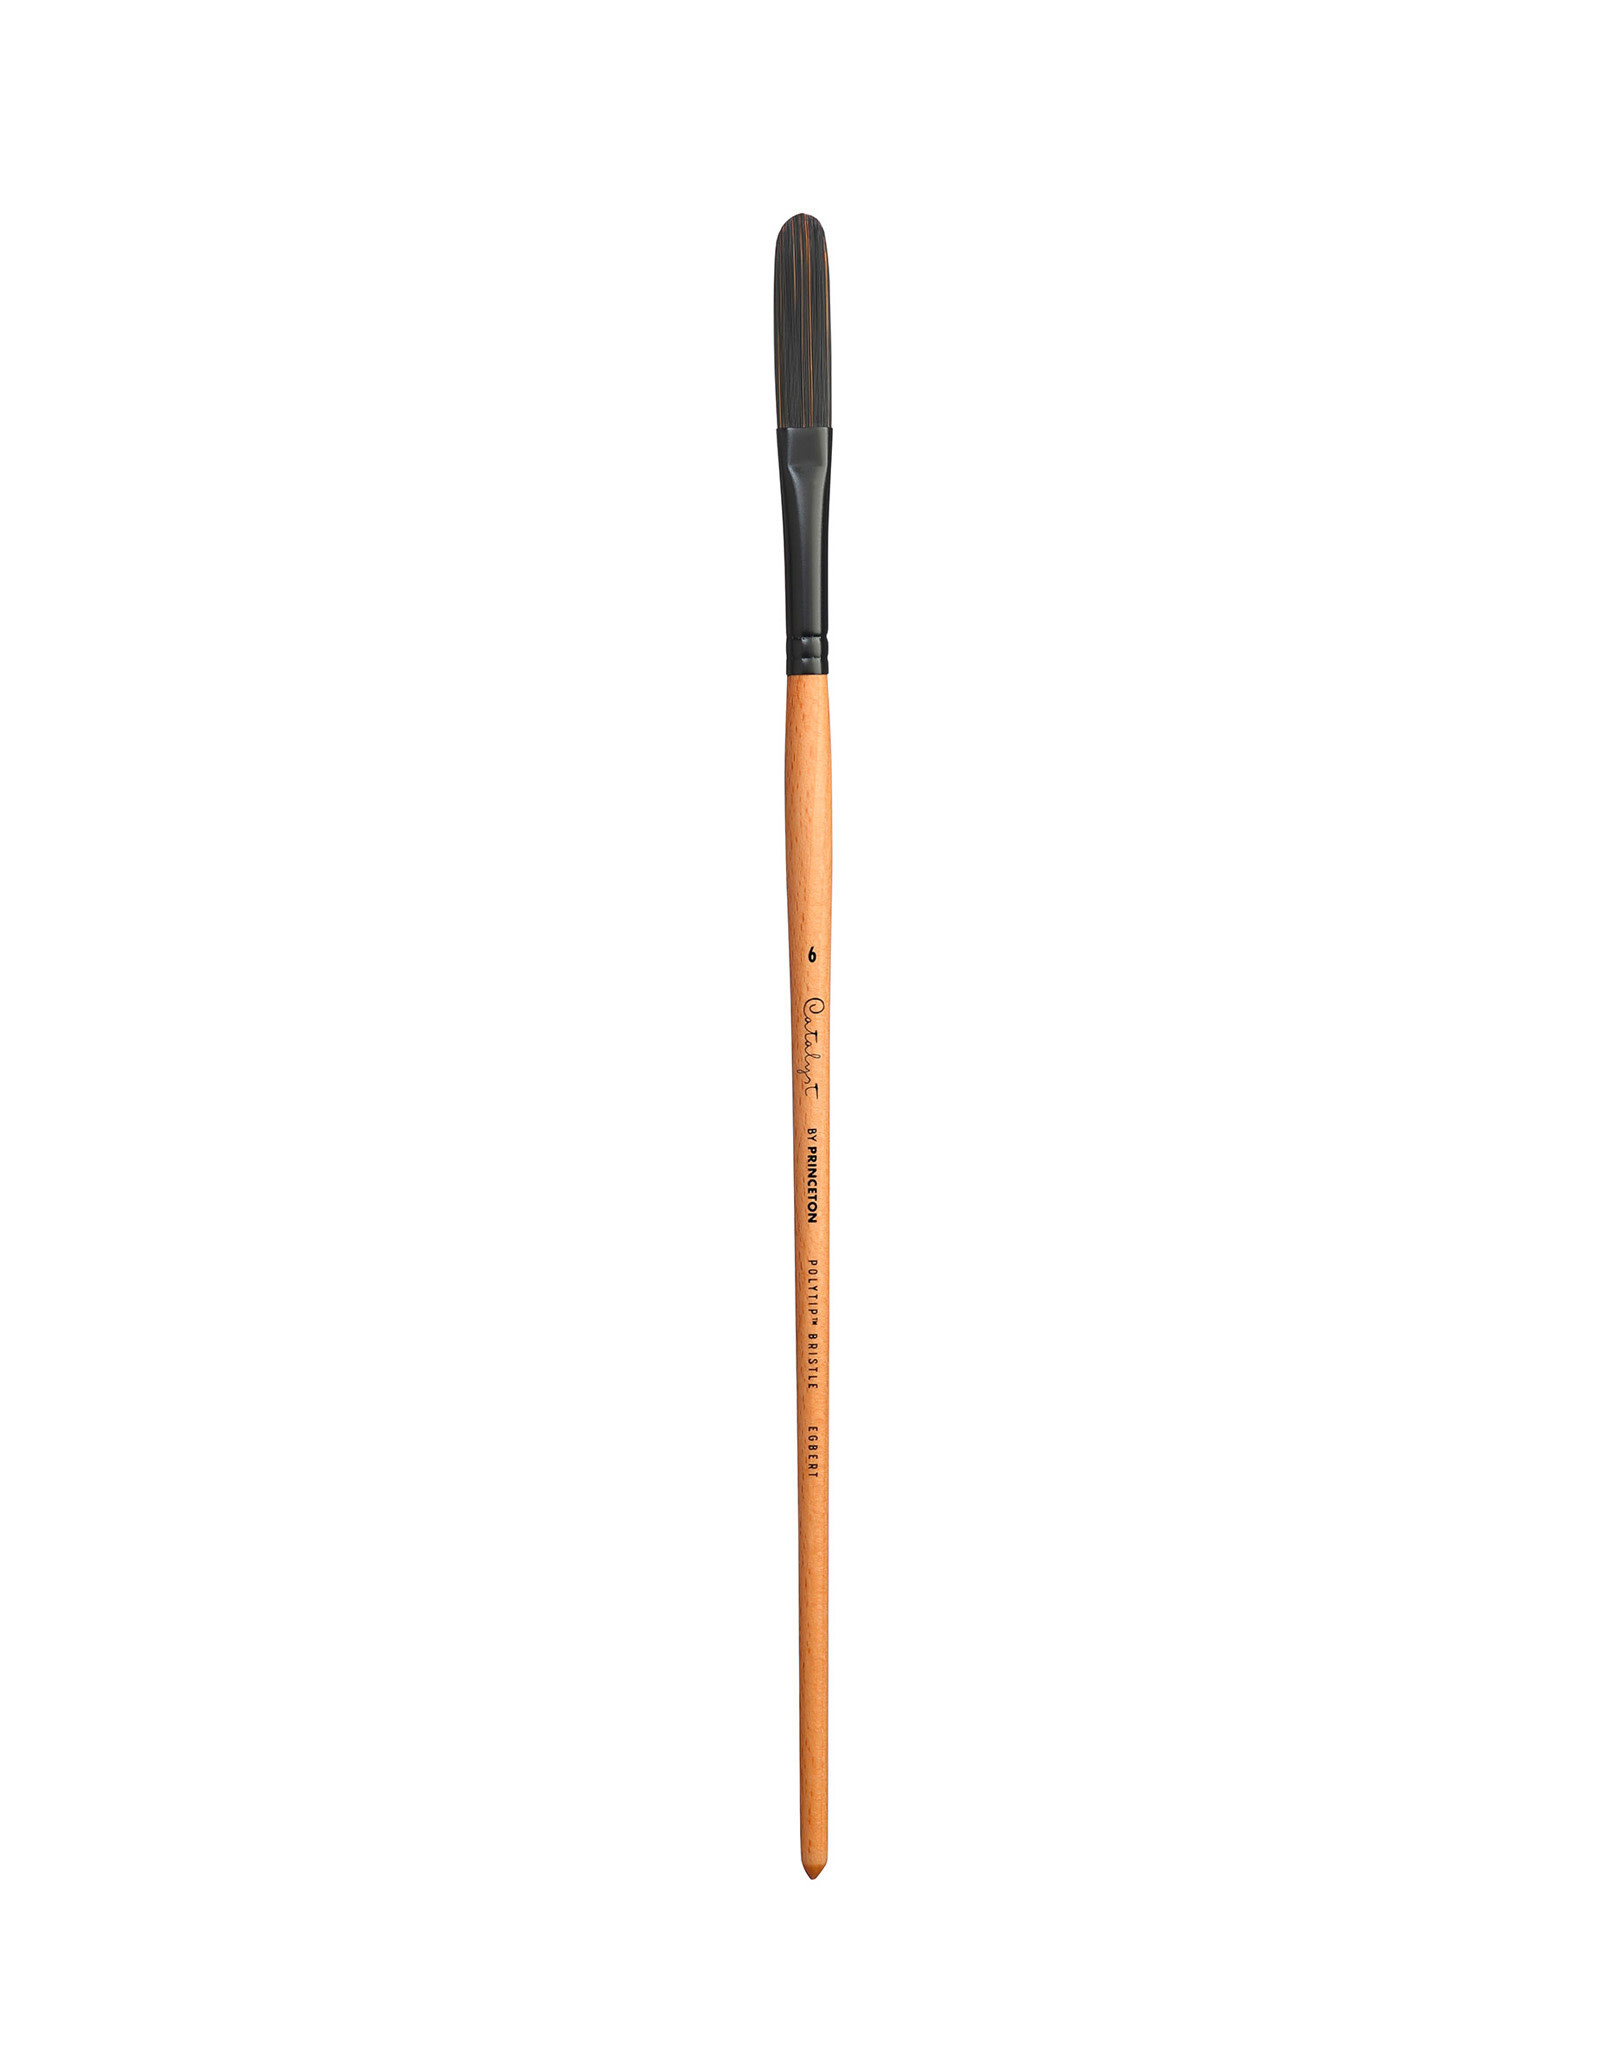
Credit: www.theartstorecny.com
Preparing Your Egbert Brush
Before you start painting, it’s important to prepare your Egbert brush. This step is often skipped, but it makes a big difference:
- Remove Factory Starch: New brushes often have glue in the bristles. Wash them gently with mild soap and lukewarm water to remove this.
- Shape the Bristles: After washing, shape the bristles to a clean oval while still damp. Let the brush dry flat.
- Check for Loose Bristles: Run your fingers through the bristles to remove any loose hairs.
- Oil Brushes (for oil painting): For natural bristle Egberts, dip them lightly in linseed oil before first use. This conditions the bristles and helps them last longer.
Tip: Never soak the brush with the ferrule down in water or solvent. This can loosen the glue and ruin the brush.
Basic Egbert Brush Techniques
Once your brush is ready, you can start exploring what makes the Egbert special. Here are some basic techniques:
1. Expressive Strokes
The extra-long bristles allow you to make flowing, expressive strokes. Load the brush with paint, hold it at the end of the handle, and move your arm (not just your wrist) for long, lively lines. This is great for painting grass, hair, or fabric folds.
2. Soft Blending
The Egbert’s oval tip blends paint smoothly. Lightly drag the tip over two colors to blend them together without harsh lines. Use a gentle, sweeping motion.
3. Dry Brush Texture
Wipe most of the paint from the brush, then scrub lightly over a dry canvas. This creates broken, textured strokes that look like weathered wood or rough stone.
4. Edge Control
With slight pressure, you can use the side of the Egbert for thin lines, or press it flat for wide, soft edges. This helps when painting clouds, waves, or transitions between light and shadow.
5. Scumbling
Load the brush with little paint and use a circular motion to apply a thin, broken layer over dried paint. This adds depth and atmosphere, perfect for mist or fog.
Non-Obvious Insight: Many beginners press too hard, which makes the Egbert lose its lively “snap.” Keep your touch light and let the brush’s length do the work.
Advanced Egbert Brush Techniques
After you’re comfortable with the basics, try these advanced moves:
Impasto Painting
If you like thick, textured paint, use the Egbert to build up impasto effects. Scoop thick paint onto the brush and lay it down with a rolling motion. The brush can hold a surprising amount of paint.
Controlled Flicks
The long bristles can flick out paint for special effects, like sparks, leaves, or highlights on water. Practice flicking the tip with your wrist for different results.
Negative Painting
Use the edge of the Egbert to carve out shapes by painting the background around them. This helps create soft outlines for objects like flower petals or clouds.
Double Loading
Try loading two colors on opposite sides of the brush. When you drag the brush, it creates a two-tone effect, perfect for painting leaves or feathers with a single stroke.
Common Mistakes When Using An Egbert Brush
Many artists, especially beginners, make these mistakes with Egberts:
- Overloading with Paint: Too much paint makes the brush hard to control. Start with a small amount and add more as needed.
- Pressing Too Hard: The Egbert works best with a light touch. Hard pressure flattens the bristles and ruins the stroke.
- Ignoring Brush Maintenance: Not cleaning the brush after use shortens its life. Always clean with the right solvent or soap.
- Using for Everything: Egberts are great, but not for all tasks. Use them for expressive work, not for flat, sharp lines.
- Not Practicing Control: The brush’s length means it takes practice to control. Spend time making different marks before starting a finished painting.
When To Use An Egbert Brush In Your Painting
The Egbert shines in specific situations. Here are the best uses:
- Landscapes: Perfect for grass, trees, clouds, and water because of its ability to make soft, varied marks.
- Portraits: Use for hair, fabric, and skin blending. The long bristles blend without smudging.
- Still Life: Ideal for petals, leaves, or glass reflections.
- Abstracts: Great for expressive, sweeping gestures and textured layers.
Practical Example: In a landscape, use a large Egbert for the sky and background, then switch to a smaller size for grass and flower details.
Cleaning And Caring For Your Egbert Brush
Proper care keeps your Egbert working well for years:
- For Oil Paint: Wipe off extra paint, then rinse in a small amount of solvent. Wash with brush soap and lukewarm water. Reshape the bristles and let dry flat.
- For Acrylic Paint: Rinse in water right away (acrylic dries fast). Wash with soap, reshape, and dry flat.
- Occasional Conditioning: For natural bristles, use a drop of linseed oil or brush restorer to keep bristles soft.
Never leave your Egbert standing in solvent or water. This bends the bristles and ruins the brush.
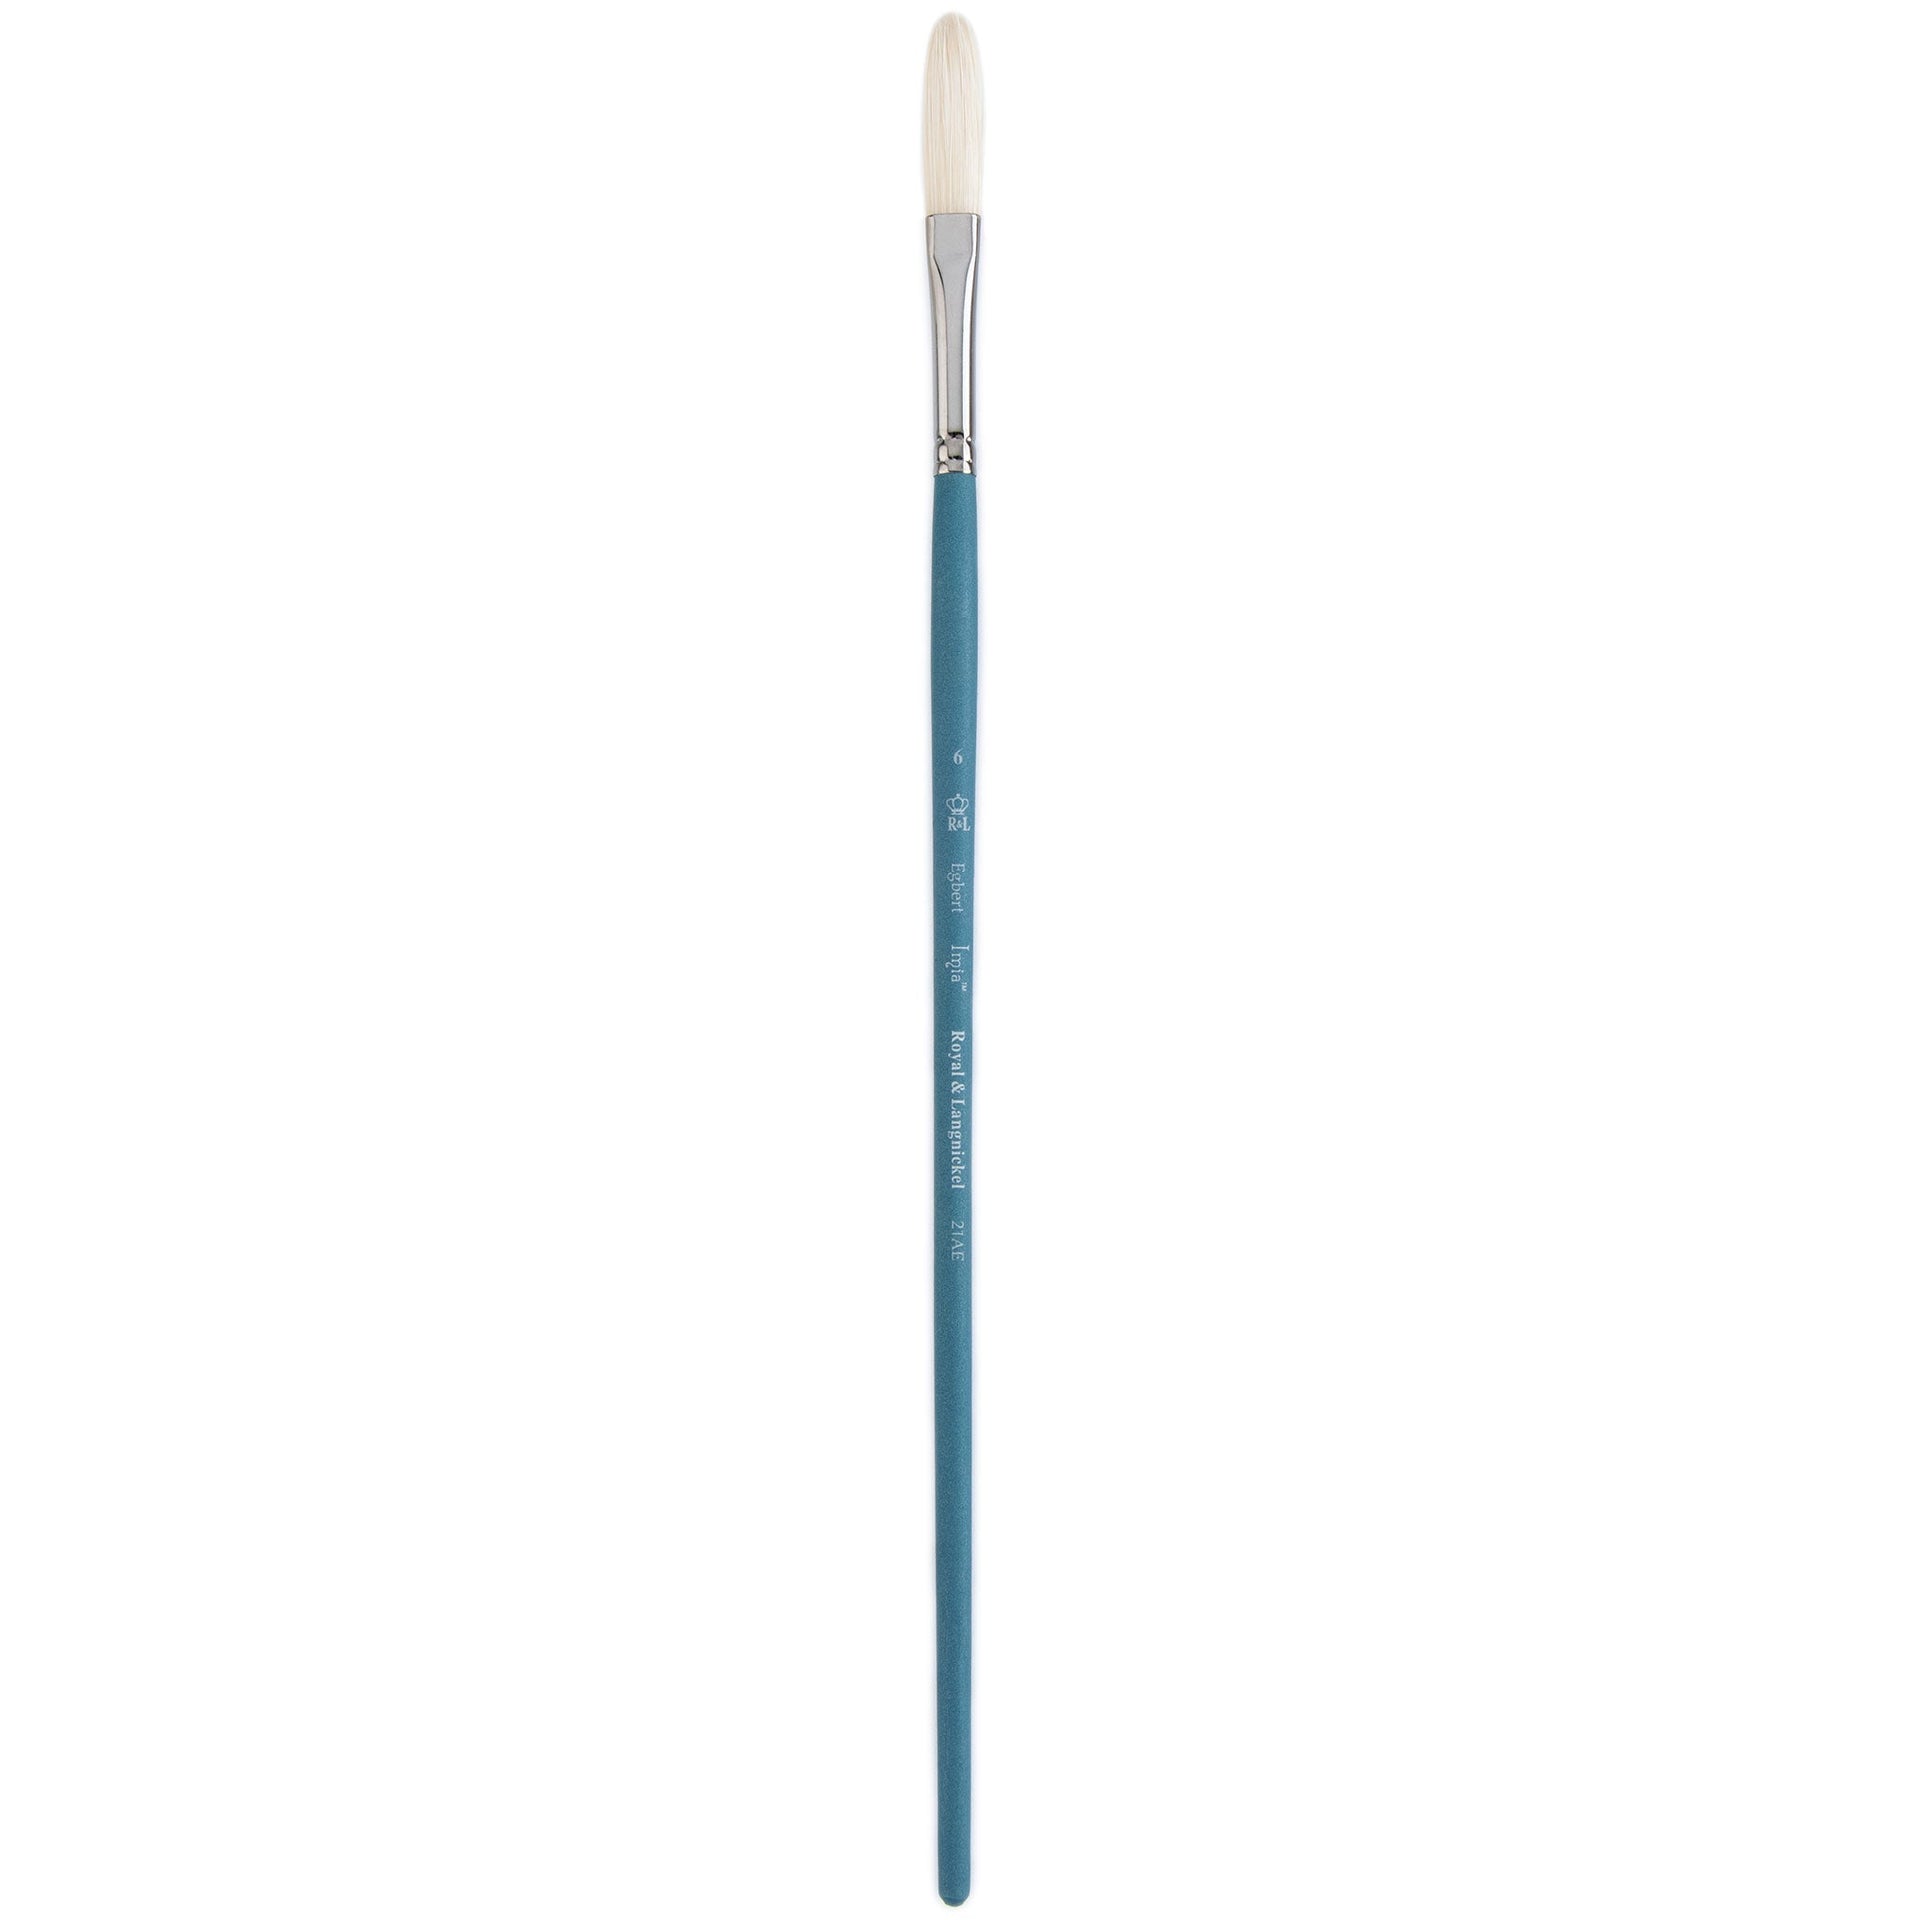
Credit: art.royalbrush.com
Comparing Egbert To Filbert And Flat Brushes
Artists often want to know when to use an Egbert instead of other brushes. Here’s a quick comparison:
| Brush | Best For | Strengths | Weaknesses |
|---|---|---|---|
| Egbert | Expressive, flowing strokes | Soft blends, lively lines, texture | Hard to control for sharp edges |
| Filbert | General blending, soft shapes | Versatile, easy to handle | Less expressive than Egbert |
| Flat | Bold lines, blocking in | Sharp edges, covers large areas fast | Poor for soft edges |
Non-Obvious Insight: For best results, use all three in one painting. Start with flat for blocking shapes, filbert for soft blending, and Egbert for final textures and lively details.
Helpful Painting Tips For Egbert Brushes
- Practice on Scrap Canvas: Before starting a painting, test the Egbert on scrap canvas to see how it behaves with different pressures and directions.
- Use Quality Paint: Cheap paint can clump in the long bristles. Use artist-grade paint for smoother results.
- Vary Your Grip: Hold the brush at the end for loose strokes, closer to the ferrule for detail.
- Rotate the Brush: Twist the handle as you paint to get different marks from the tip and side.
- Try Mediums: Use painting mediums (like linseed oil or acrylic gel) to change the flow and texture of the paint. This makes the most of the Egbert’s flexibility.

Credit: www.jerrysartarama.com
Where To Learn More
If you want to watch master artists use the Egbert, look up works by John Singer Sargent or see tutorials on YouTube. For more technical details about brush types, the Wikipedia page on paintbrushes is a good resource.
Frequently Asked Questions
What Makes The Egbert Brush Different From A Normal Filbert?
The Egbert has much longer bristles than a standard filbert. This length allows for more flexible, expressive strokes and smoother blending. The filbert is easier to control for beginners, but the Egbert gives more life and movement to your brushwork.
Can I Use An Egbert Brush With Acrylic Paint?
Yes, you can use an Egbert with acrylics, especially if you choose a synthetic bristle version. However, work quickly because acrylic paint dries fast in the long bristles. Clean the brush right after use to prevent paint from hardening.
How Do I Stop My Egbert From Losing Its Shape?
Always clean your brush well after painting. Reshape the bristles with your fingers and let the brush dry flat. Do not store the brush standing bristle-side down, and avoid soaking the ferrule in water or solvent.
What Size Egbert Should I Start With?
A medium size (like 8 or 10) is a good starting point. It’s large enough for expressive work but not too hard to control. As you gain confidence, try both smaller and larger sizes for different effects.
Is The Egbert Brush Only For Professional Artists?
No. While many professionals love the Egbert, beginners can use it too. It may take some practice to control, but it opens up many creative possibilities. Start with basic exercises and experiment with different marks to learn its strengths.
Using an Egbert brush can lift your painting to a new level. With practice, you’ll discover how much energy and beauty this special brush can bring to your art. Whether you paint landscapes, portraits, or abstracts, the Egbert offers unique possibilities for creativity and expression.