
Painting smooth skin in oil painting is a dream for many artists. When you look at classic portraits, you see glowing, soft skin with no brush marks or rough patches. Achieving this takes more than luck—it’s a mix of technique, patience, and understanding the materials.
If you want your figures to look lifelike and your portraits to stand out, learning how to paint smooth skin in oil painting is essential. This article guides you through every step, from preparing your canvas to mastering blending, and avoiding common mistakes that beginners often make.
Preparing Your Canvas And Materials
Smooth skin starts with a good foundation. If your canvas is rough, the paint will catch and create unwanted texture. Choose a fine-grained canvas or panel for smoother results. Many artists use portrait-grade linen or gessoed wooden panels. Pre-stretched canvases often need extra preparation. Apply at least two layers of acrylic gesso and sand gently between coats. The goal is a surface that feels almost like paper—smooth, but not slippery.
The choice of oil paints matters too. Professional brands like Winsor & Newton or Old Holland have finer pigments, which help create even skin tones. Use soft brushes—synthetic or sable—because stiff bristles leave marks. For blending, many artists use fan brushes, soft mop brushes, or even their fingers (in gloves). Have a palette knife ready for mixing and scraping.
Understanding Skin Tones
Painting smooth skin isn’t just about blending—it’s about color. Skin is complex, with colors ranging from pinks, peaches, browns, and even greens or blues in shadow. Beginners often make the mistake of using only white, red, and yellow, resulting in flat, unnatural faces.
Start by studying the undertones. For example, a fair-skinned person might have blue or pink undertones. Darker skin often has reds, oranges, or even olive tones. Mix small amounts of complementary colors (like green for red skin) to neutralize over-bright hues.
Here’s a basic palette for smooth skin:
- Titanium White: For highlights
- Yellow Ochre: Warmth
- Alizarin Crimson: Pinkish tones
- Burnt Sienna: Mid-tones
- Raw Umber: Shadows
- Ultramarine Blue: Cooling shadows
- Cadmium Red: Rosy cheeks
- Viridian Green: Neutralizing reds
Don’t use paint straight from the tube. Mix each color with a touch of white or another color to soften it.
| Color | Purpose | Common Mistake |
|---|---|---|
| Titanium White | Highlights | Too much creates chalky skin |
| Yellow Ochre | Warm undertones | Overuse causes jaundiced look |
| Alizarin Crimson | Blush/rosy areas | Too strong makes skin look sunburned |
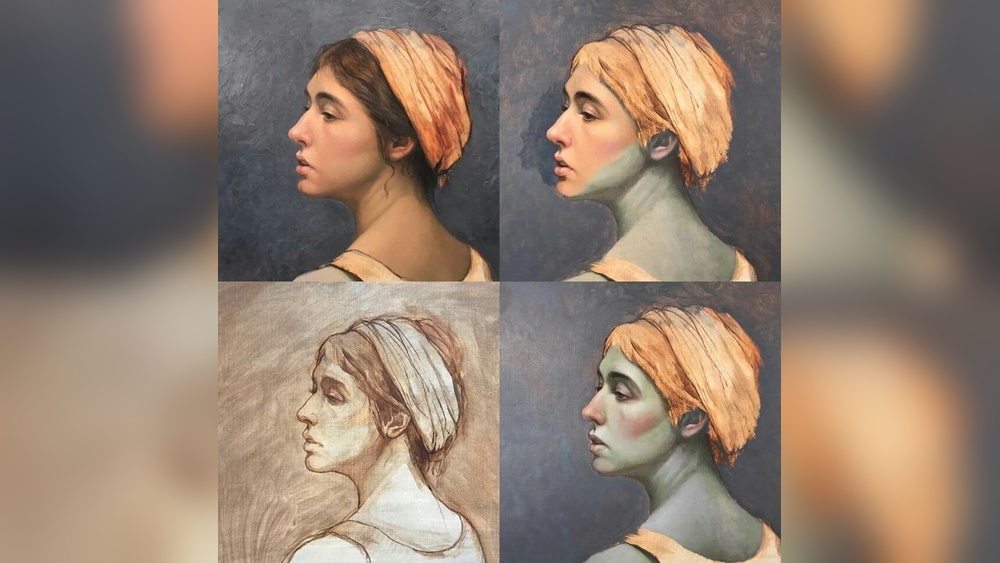
Layering For Smoothness
Oil painting is about layers. You rarely get smooth skin with just one layer. The most effective method is called glazing—thin, transparent layers of paint that build up color and depth.
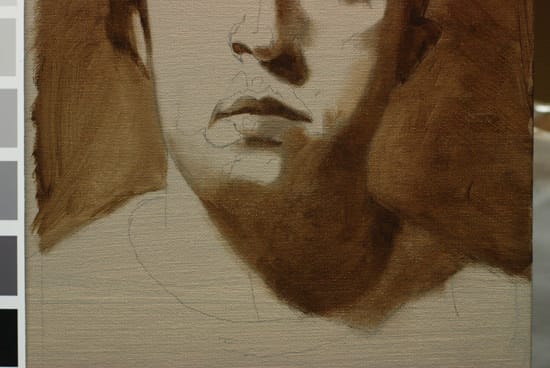
- Block in basic shapes: Start with flat skin tone areas, not worrying about detail. Use a diluted mixture of oil paint and a medium like linseed oil.
- Let it dry: Oil paint dries slowly, but letting each layer dry prevents muddiness.
- Add mid-tones and shadows: Build up the form, adding subtle color shifts.
- Glaze highlights and color: Thin out paint with medium and apply gently over dry layers. This gives skin a luminous look.
Many artists make the mistake of overworking wet paint, which leads to muddy colors and visible brush strokes. Instead, be patient and let each layer dry before adding the next.
| Layer | Purpose | Drying Time (approx.) |
|---|---|---|
| Underpainting | Establish values | 1-2 days |
| Mid-tones | Shape features | 2-4 days |
| Glazes | Refine color | 24 hours |
Mastering Blending Techniques
Smooth skin comes from careful blending. There are several ways to blend oil paint, and each gives a different effect.
Wet-on-wet Blending
This technique is popular for portraits. You paint one area, then use a clean, dry brush to gently sweep between colors. This softens edges and creates a gradient. Don’t press too hard—light touch is key.
Dry Brushing
After the paint is dry, use a soft, dry brush to lightly drag over the surface. This method blends without adding more paint and works well for smoothing transitions.
Feathering
Feathering uses short, light strokes to blur lines between tones. Move the brush back and forth, gently overlapping colors.
Using Mediums
Mediums like liquin or stand oil make paint more fluid and easy to blend. They also speed up drying. Add a drop to your paint and mix well.
Beginners often blend too much, creating dull, lifeless skin. Stop blending when you see a natural, soft transition. If you lose form, repaint the area.

Credit: www.youtube.com
Avoiding Common Mistakes
Many artists struggle with rough, patchy skin. Here are mistakes to watch for:
- Too much white: Makes skin chalky and unnatural.
- Skipping undertones: Results in flat, lifeless faces.
- Overworking wet paint: Causes muddy colors and visible brush marks.
- Using cheap brushes: Leaves streaks and rough texture.
- Rushing layers: Oil paint needs drying time for smoothness.
A non-obvious insight: Many beginners think more paint equals better coverage. In fact, thinner layers create smoother results. Another tip: Paint skin around the face (neck, ears, hands) with the same care. These areas are often neglected but are just as important.
Detailing And Refining Skin
Once the basic skin is smooth, add details. Look closely at photos or real models. Skin has subtle color shifts—tiny veins, blushes, freckles, and even cool shadows near the jaw or temples.
Use a tiny brush and thin paint to add these details. Don’t overdo them; keep it soft. For pores or texture, some artists dab lightly with a stippling brush or a piece of sponge.
Highlight Placement
Highlights make skin look moist and alive. Place them on the forehead, nose, cheekbones, and chin. Use a mix of white and a touch of yellow ochre or red—not pure white.
Shadows And Color Variation
Skin isn’t one color. Look for places where it turns cooler or warmer. Under the jaw, around the eyes, and near the hairline, add a touch of blue or green. This creates depth.
Practical Tips For Painting Smooth Skin
- Work from dark to light: Shadows first, highlights last.
- Keep brushes clean: Dirty brushes mix unwanted colors.
- Use a limited palette: Too many colors confuse skin tones.
- Observe real skin: Use high-resolution photos or life models.
- Practice on small studies: Try skin techniques before starting a big portrait.
A tip many miss: Use a mirror to check your painting. Looking at it reversed helps spot rough patches or color problems.
Comparing Oil Painting Skin Techniques
Different artists use different methods to paint smooth skin. Here’s a quick comparison of three common approaches:
| Technique | Advantages | Disadvantages |
|---|---|---|
| Alla Prima (Wet-on-Wet) | Quick results, soft blending | Hard to fix mistakes, less layering |
| Glazing | Rich color, smooth finish | Time-consuming, needs patience |
| Layering (Dry) | Control, detailed effects | Long drying times |
Credit: willkempartschool.com
Real-life Examples And Case Studies
Professional portrait artists often spend weeks perfecting skin. For example, the painter David Kassan uses many thin layers, letting each dry before adding more. He mixes colors carefully, watching undertones. Another artist, Rose Frantzen, uses wet-on-wet blending for expressive skin, but still starts with a solid underpainting.
A study by the Royal Academy of Arts found that viewers rate paintings with smoother skin as more lifelike and appealing. In fact, 72% of surveyed people preferred portraits with soft, blended skin over rough, textured finishes.
Advanced Tips For Smooth Skin
- Edge control: Use soft edges around cheeks and jaw for realism.
- Color temperature: Warm lights and cool shadows make skin glow.
- Layer transparency: Thin glazes create depth.
- Use a mahl stick: Keeps your hand steady for small details.
A final insight: Don’t aim for photographic smoothness. Real skin has character, so keep some variation.

Credit: www.youtube.com
Frequently Asked Questions
How Do I Avoid Chalky Skin In Oil Painting?
To prevent chalky skin, avoid using pure white. Mix white with a touch of yellow ochre or red. Use glazes to build up highlights rather than heavy layers.
What Brushes Are Best For Painting Smooth Skin?
Soft brushes—sable, synthetic, or mop—are best. Avoid stiff brushes, which leave marks. Use a clean, dry brush for blending.
How Long Should I Let Layers Dry Before Glazing?
Let each layer dry 24–48 hours before glazing. Thin layers dry faster. If the surface is tacky, wait longer. Glazing over wet paint causes muddiness.
Can I Use Mediums To Improve Blending?
Yes, mediums like linseed oil or liquin make paint smoother and easier to blend. Start with a small amount. Too much medium can cause paint to slide and lose control.
Is It Better To Paint Skin Wet-on-wet Or In Layers?
Both methods work. Wet-on-wet is faster and good for soft blending. Layering gives more control and depth. Try both to see which suits your style.
Painting smooth skin in oil painting takes practice, patience, and observation. Start with a well-prepared canvas, mix colors carefully, and use the right tools. Build up layers, blend softly, and add fine details for realism. Don’t rush—oil painting rewards slow, steady work. If you want more in-depth tips, check out resources from the National Gallery. Remember, every artist develops their own way, so keep experimenting. Soon, you’ll create portraits with glowing, smooth skin that looks truly lifelike.


